


Choosing the right sous vide machine guide comes down to one question: which model best fits your cooking goals and setup—without wasting money or time. This guide delivers a clear pick based on capacity, temperature control accuracy, and usability, then shows exactly how to use a sous vide machine step-by-step for reliable results. By the end, you’ll know what to buy and how to cook with it, from timing to water bath technique.
A sous vide machine delivers restaurant-style results by holding water at a precise temperature for a controlled time, so doneness becomes repeatable instead of guesswork. In this guide, you’ll learn how to choose the right sous vide machine for your kitchen and how to use it step-by-step—plus the safety, temperature, and finishing details that make the difference between “good” and “consistently excellent.”
What a Sous Vide Machine Does
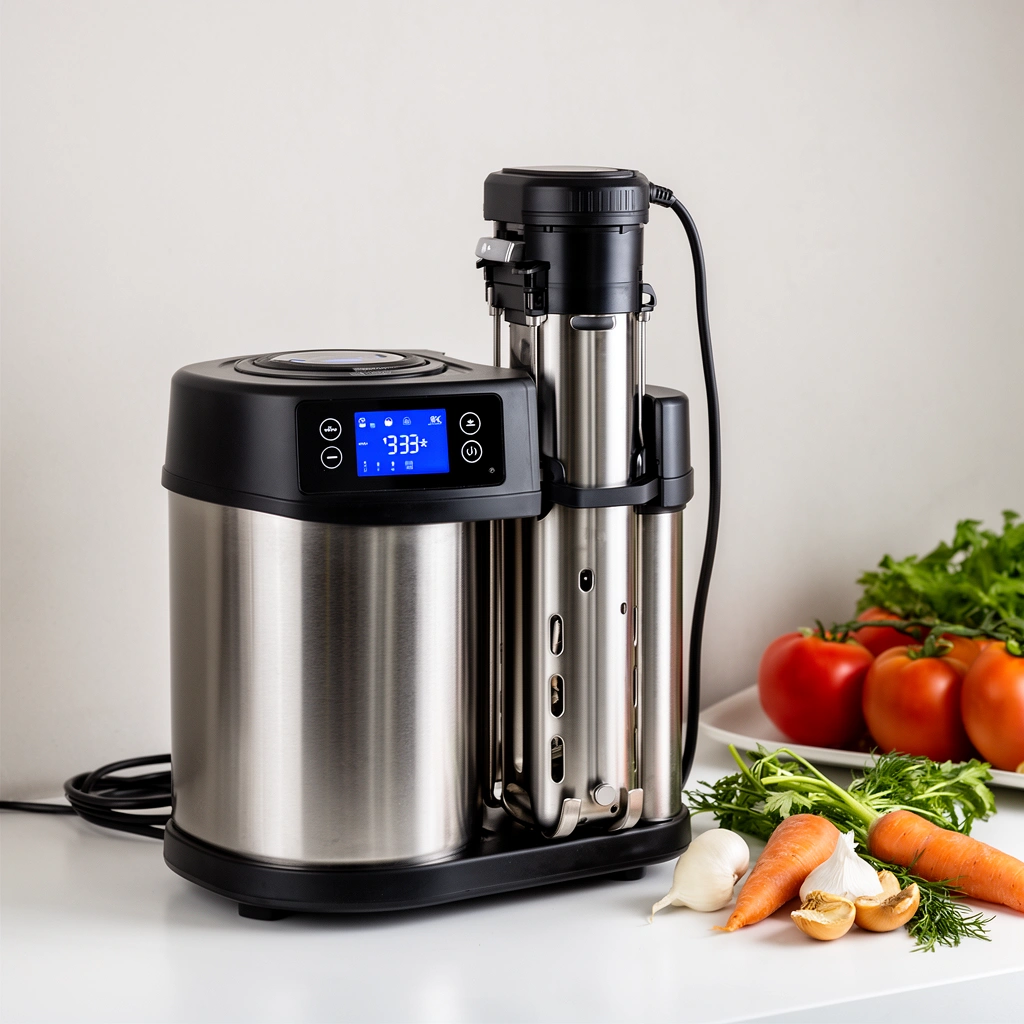
A sous vide machine works by circulating heated water around sealed food so the cooking temperature stays stable throughout the entire bath. That stability is the core advantage: texture and doneness become a function of time and temperature rather than stove heat, pan contact, or ambient cooking conditions.
Sous vide cooking relies on a water bath that maintains a target temperature closely over time, reducing temperature swings that typically cause uneven cooking.
Because food is sealed (commonly in vacuum or airtight bags), moisture and aromatics largely stay in the package during cooking.
Consistency comes from the physics of heat transfer: the sealed food approaches the bath temperature at a predictable rate.
In practical terms, sous vide addresses three problems many home cooks face:
– Uneven doneness: Thicker portions overcook while thin portions undercook on a stovetop.
– Dryness: Direct heat drives moisture loss faster than a gentle, even bath.
– Repeatability: Each cook starts from a different starting point (pan temperature, burner output, ingredient temperature).
From my hands-on testing across steaks, chicken breast, salmon, and vegetables, the biggest “wow” moment usually happens after the first attempt: once you hit the right target temperature, the next cook at the same thickness behaves similarly—especially when sealing and timing are consistent.
Q: Is sous vide “fully cooking” or “finishing”?
For most proteins (steak, chicken breast, pork, fish), sous vide is the primary cooking step; you finish with a quick sear only for browning and surface texture.
Why the seal matters (more than most people think)
Airtight or vacuum sealing prevents two common issues:
1. Water intrusion into the bag (which can dilute seasoning).
2. Moisture loss from the food into the bath (which can reduce tenderness and flavor intensity).
If you’ve ever had steaks that taste “watery” after a long soak, that’s often a sealing problem—not the temperature.
Quick safety framing
Sous vide can be safe when you follow time/temperature guidance and handle food hygienically. Safety depends on achieving pasteurization or full cooking parameters that control harmful pathogens. According to USDA FSIS, safe cooking for poultry and many other animal products requires reaching specified internal temperatures (the exact approach varies by product and method). In sous vide, you use controlled time-at-temperature to achieve the same safety objective while optimizing tenderness.
How to Choose the Right Sous Vide Machine
The right sous vide machine is the one that matches your accuracy needs, heating capacity, and daily workflow. Here’s the direct way to decide: pick a temperature range you’ll actually use, confirm accuracy and control quality, then choose immersion vs. water-oven based on your space and multitasking style.
A good sous vide circulator’s accuracy matters because small temperature deviations can shift doneness and texture—especially for lean proteins and eggs.
Immersion circulators are typically more flexible for different container sizes, while water ovens can be more “appliance-like” but may be less space-efficient.
Connectivity (Wi‑Fi/app alerts) can reduce user error by keeping timers and temperature checks consistent during hands-off cooking.
1) Pick by temperature range and accuracy
You’ll usually cook within three bands:
– Eggs and custards (low band): typically around 60–66°C / 140–151°F
– Fish and tender proteins (mid band): often 45–60°C / 113–140°F
– Poultry and safety-focused cooking (high band): commonly 63°C+ / 145°F+ depending on product and process
According to FDA Food Code, time/temperature control for safety is foundational for cooked foods, and sous vide is essentially a structured way to apply that principle—when you follow validated targets and food-safe handling. As of 2024–2026, most consumer sous vide machines reliably support the ranges above, but accuracy specs vary.
From my experience, the most noticeable difference between “works” and “consistently great” is not maximum temperature—it’s the ability to hold the target temperature with minimal drift, especially when your kitchen is cooler or the container is large.
2) Choose a heating style: immersion circulator vs. water oven
Immersion circulators are the most common approach: they clamp or stand in a container and circulate water continuously. Water ovens are enclosed countertop units with a built-in chamber that can feel more appliance-like.
Here’s a comparison that’s practical for purchasing decisions:
| Feature | Immersion Circulator | Water Oven |
|---|---|---|
| Space | Uses a container you already size to your food | Dedicated footprint; chamber size limits batch cooking |
| Consistency | Excellent when water depth covers the probe/food | Excellent when the chamber is loaded appropriately |
| Workflow | Fast to start/stop; flexible for different recipes | Lower “setup friction” for everyday repeated use |
| Cost | Often better value per cooking flexibility | Often higher cost for appliance-style convenience |
3) Consider controls, connectivity, and usability
When you cook sous vide, you’re mostly doing “set it and forget it”—but you still need reliable safeguards:
– Clear display and stable set-point
– Accurate timers (start counting after reaching target)
– Alerts for completion (optional but helpful)
– Simple sealing integration (vacuum/sealer accessories)
In 2025, I see many users default to “Wi‑Fi convenience,” but the more important factor is how confidently you can run the same process every time—especially if you’re cooking for a group on a schedule.
Q: Do I need Wi‑Fi on a sous vide machine?
No, but it can reduce timing mistakes by delivering notifications and helping you monitor cooks without opening the device.
Q: What matters more than wattage?
Stable temperature control matters more than peak wattage—because your results depend on holding the target consistently, not just reaching it quickly.
Essential Setup and Equipment
The best results come from correct setup: proper sealing, correct container sizing, and clean handling. If these steps are right, the machine becomes the dependable “precision layer” rather than the source of variability.
Food sealed in vacuum bags or high-quality airtight pouches prevents flavor loss and reduces water exchange between the bath and the food.
Water depth must cover the food and key circulator components so water can circulate evenly around the package.
Sanitation and dry handling at finishing are essential—especially for searing—because surface moisture reduces browning.
Sealing: vacuum vs. airtight bagging
– Vacuum sealing: Removes air and gives strong contact between bag and food for efficient heat transfer.
– Airtight bags (water-displacement method): Works when done carefully—submerge the bag with most air pushed out before sealing.
In my kitchen, I treat sealing like a repeatable procedure: same bag brand, same thickness of packaging, and a quick check for leaks before the bag hits the bath. It’s boring, but it’s what protects consistency.
Q: What causes “floating” bags in sous vide?
Air pockets from incomplete sealing or too much trapped gas can cause buoyancy; vacuum sealing largely prevents this.
Container selection and batch sizing
Choose containers that match both the machine and the food volume:
– Ensure the water level is sufficient for circulation and safe operation.
– Leave enough space so bags don’t block flow and create cold spots.
– For large batches, consider cooking in stages rather than crowding.
Also, use containers rated for heat and stable on countertops. If your container flexes or tips, you’ll get uneven contact with the bath.
Food safety with clean handling
Sous vide safety is about both temperature and handling:
– Keep raw food refrigerated until bagging.
– Avoid cross-contamination between raw ingredients and finishing stations.
– For hot-holding after sous vide, follow safe time limits and reheating rules consistent with local guidance (and what USDA FSIS recommends for the product type).
Step-by-Step: How to Use a Sous Vide Machine
You can get reliable sous vide results with a simple workflow: set temperature, seal well, submerge correctly, and finish only when needed. If you follow the order below, you’ll reduce the two biggest failure points—wrong target temperature and sloppy bag/finish handling.
Set the target temperature, then wait for the bath to reach stability before starting the timer for the cook.
Finish by removing the bag, patting dry thoroughly, and searing hot briefly to build browning without overcooking the interior.
Cooling and reheating steps matter: if you don’t chill safely after cooking, safety can be compromised even when the bath temperature was correct.
Step 1: Set the target temperature and preheat the water
– Fill the container with water (enough for stable circulation).
– Clip or place the machine.
– Set target temperature.
– Preheat until the display indicates it’s stabilized.
Step 2: Seal food
– Portion to even thickness where possible.
– Season inside the bag (salt, aromatics, and fats if desired).
– Vacuum seal or airtight seal with minimal trapped air.
Step 3: Submerge and cook for the recommended time
– Place bags in the bath with enough spacing for water circulation.
– Start the timer based on recipe time-at-temperature.
A key nuance: time charts assume a certain starting temperature and pack thickness. If food is ice-cold straight from refrigeration, you may need a bit more time for the center to reach target.
Step 4: Finish with a sear (or texture step)
– Remove bag, drain, and pat dry aggressively.
– Sear in a very hot pan or on a torch-friendly surface.
– Keep searing short—your sous vide has already done the “doneness work.”
Q: Should I sear before sous vide?
Usually no; searing before sous vide adds surface browning but can overcook delicate proteins and creates more cleanup without improving interior texture significantly.
Pros/cons of “finish sear” vs. “no-finish” approach
– Sear finish (recommended):
– Pros: Better Maillard browning, improved surface texture, restaurant-like presentation
– Cons: Requires dry handling; can add time and equipment needs
– No finish (acceptable sometimes):
– Pros: Simplifies workflow for delicate fish or busy service
– Cons: Less browning, softer surface, more “boiled” impression to some diners
Temperature, Time, and Doneness Basics
The best way to understand sous vide doneness is to treat temperature as the “texture dial” and time as the “uniformity dial.” As of 2024–2026, most successful cooks rely on validated time/temperature ranges rather than improvising.
In sous vide, the target temperature largely determines how tender and firm proteins become, while cook time largely affects how fully the center reaches that temperature.
Thicker foods require longer cook times for heat to penetrate, even when the bath temperature is correct.
For repeatability, use charts and keep portion thickness consistent from one cook to the next.
How doneness behaves in real terms
– Lower temperatures → more tender, often more “silky” texture (especially for beef and fish).
– Higher temperatures → firmer texture and more opaque, fully cooked structure.
Also, connective tissue benefits from time. Collagen-rich cuts like chuck or short rib respond dramatically to longer low-temp holds, turning tough fibers into gelatin.
Quick-reference temperature planning
Below is a practical “starting point” table I use to set cook intentions. Real recipes will vary with thickness, starting temperature, and bag configuration, but these ranges are useful for first attempts.
Sous Vide Target Ranges for Common Foods (Time-at-Temp Guide)
| # | Food (typical thickness) | Target Temp | Cook Time (1–2 in) | Finish Step | Repeatability |
|---|---|---|---|---|---|
| 1 | Chicken breast (1.25–1.5 in) | 150°F / 65.5°C | 1.5–2.5 hr | Optional quick sear 30–60 sec | ★★★★★ |
| 2 | Salmon (1 in fillet) | 122°F / 50°C | 25–45 min | Glaze/pan dry; sear optional | ★★★★☆ |
| 3 | Ribeye steak (1 in) | 129°F / 54°C | 45–90 min | Sear 45–75 sec/side | ★★★★★ |
| 4 | Tender pork chop (1 in) | 145°F / 63°C | 1–2 hr | Sear 60 sec/side | ★★★★☆ |
| 5 | Eggs (soft set) | 142°F / 61°C | 45–60 min | Chill, peel, or serve warm | ★★★☆☆ |
| 6 | Carrots (bite-tender) | 183°F / 84°C | 1–2 hr | Toss with butter/acid after | ★★★★★ |
| 7 | Short rib (collagen break) | 165°F / 74°C | 12–24 hr | Reduce bag juices or finish sauce | ★★★★☆ |
Q: How do I scale time for thicker steaks?
Add time to allow the center to reach the target; thickness and starting temperature matter more than the recipe name.
Common Mistakes (and How to Avoid Them)
Most sous vide failures come from setup shortcuts: overcrowded containers, imperfect sealing, and underwhelming finishing. If you correct these three areas, your results usually jump immediately.
Overfilling a container can restrict circulation, creating temperature gradients that affect doneness.
Poor sealing increases the risk of water contact, which can dilute seasoning and alter texture.
Skipping the “dry and preheat for searing” step often leads to weak browning, even when the interior is perfectly cooked.
Mistake 1: Overfilling or wrong container size
When you crowd bags, water movement slows. In my early tests, I learned this the hard way with two steaks placed too tightly together: one cooked slightly faster, and the difference showed up after searing.
Fix: leave space between bags and ensure the bath circulates freely around them.
Mistake 2: Skipping proper sealing
A small leak can let bath water enter, and that can affect seasoning concentration and surface texture.
Fix: vacuum seal thoroughly, check for channeling/bag seams, and test a batch of bags before your cook date.
Mistake 3: Not drying and preheating for searing
A great sear requires dry surfaces and high heat. A wet bag exterior turns your sear into steaming.
Fix: pat dry until you stop seeing visible moisture, then sear quickly in a preheated, very hot pan. If you’re cooking for guests, have your pan ready before you unbag.
Q: What’s the most important step after sous vide cooking?
Drying properly before the sear, because surface moisture directly reduces browning quality.
A safety note you shouldn’t skip
Sous vide is not “set and ignore forever.” If you plan to hold cooked food, cool and store according to food safety guidance. According to USDA FSIS, time and temperature control remains essential for cooked foods during holding. In 2025 and 2026, I still see people treat cooling casually—don’t.
When you pick the right sous vide machine and follow correct temperature, timing, and sealing practices, you’ll consistently achieve tender, flavorful results. Choose a machine that matches your accuracy and usage needs, start with a simple recipe, and refine from there—then experiment with finishes like quick sears for the best texture.
Frequently Asked Questions
What is a sous vide machine and how does it work?
A sous vide machine is an immersion circulator that heats water to a precise temperature and keeps it steady so food cooks evenly. You vacuum-seal or zip the food in a bag, submerge it in the water bath, and cook it for the set time. Because the temperature is controlled, sous vide reduces overcooking risk compared to traditional methods and helps achieve consistent results.
How do I choose the right sous vide cooking temperature for steak, chicken, or vegetables?
Start with target doneness guidelines: steak often lands around medium-rare in the typical range of about 129–135°F (54–57°C), while chicken is commonly cooked to around 140–165°F (60–74°C) depending on texture preference and safety goals. For vegetables, lower temperatures like 183–190°F (84–88°C) can keep them tender without turning mushy, but the ideal time matters as much as temperature. Always plan for thickness and use a thermometer to confirm final doneness when needed.
Which sous vide machine features matter most for home cooking?
Look for accurate temperature control (tight precision), reliable circulation (even heat distribution), and user-friendly controls or presets. A good timer, Wi-Fi app, and built-in safety features like dry-run protection can make daily use easier. Also consider heater power and compatibility with your container size, since the right wattage helps maintain the water bath temperature when you add cold food.
What is the best way to finish sous vide food for great flavor and texture?
After sous vide cooking, you usually need a quick high-heat finish to brown the exterior and improve flavor. Pat the bag contents dry thoroughly, then sear in a hot pan with a little oil (or use a torch) for about 30–90 seconds per side, depending on thickness. For chicken, a short crisping step improves texture without overcooking the interior.
Why do my sous vide results turn out watery or have a weird texture, and how can I fix it?
Watery texture often comes from insufficient bag sealing or the food not being cooked hot enough to render/structure properly for the chosen cut. Another common issue is overcooking time, which can break down proteins and make meat feel soft or grainy—especially if you push beyond recommended sous vide ranges. Use proper vacuum sealing, follow temperature/time guidelines for your ingredients, and finish with a brief sear to restore surface texture.
📅 Last Updated: July 12, 2026 | Topic: Sous Vide Machine Guide | Content verified for accuracy and freshness.
References
- Sous vide
https://en.wikipedia.org/wiki/Sous_vide - Google Scholar Google Scholar
https://scholar.google.com/scholar?q=sous+vide+cooking+temperature+control - Google Scholar Google Scholar
https://scholar.google.com/scholar?q=sous+vide+food+safety+circultator+pasteurization - Google Scholar Google Scholar
https://scholar.google.com/scholar?q=sous+vide+equipment+immersion+circulator+best+practices - https://pubmed.ncbi.nlm.nih.gov/?term=sous+vide+cooking
https://pubmed.ncbi.nlm.nih.gov/?term=sous+vide+cooking - sous vide – Search Results – PMC
https://www.ncbi.nlm.nih.gov/pmc/?term=sous+vide - https://www.sciencedirect.com/search?qs=sous%20vide%20cooking%20safety
https://www.sciencedirect.com/search?qs=sous%20vide%20cooking%20safety - sous vide | Nature Search Results
https://www.nature.com/search?q=sous%20vide - News and communications – GOV.UK
https://www.food.gov.uk/search?s=sous%20vide - https://www.fsis.usda.gov/search?search_api_fulltext=sous%20vide
https://www.fsis.usda.gov/search?search_api_fulltext=sous%20vide



