
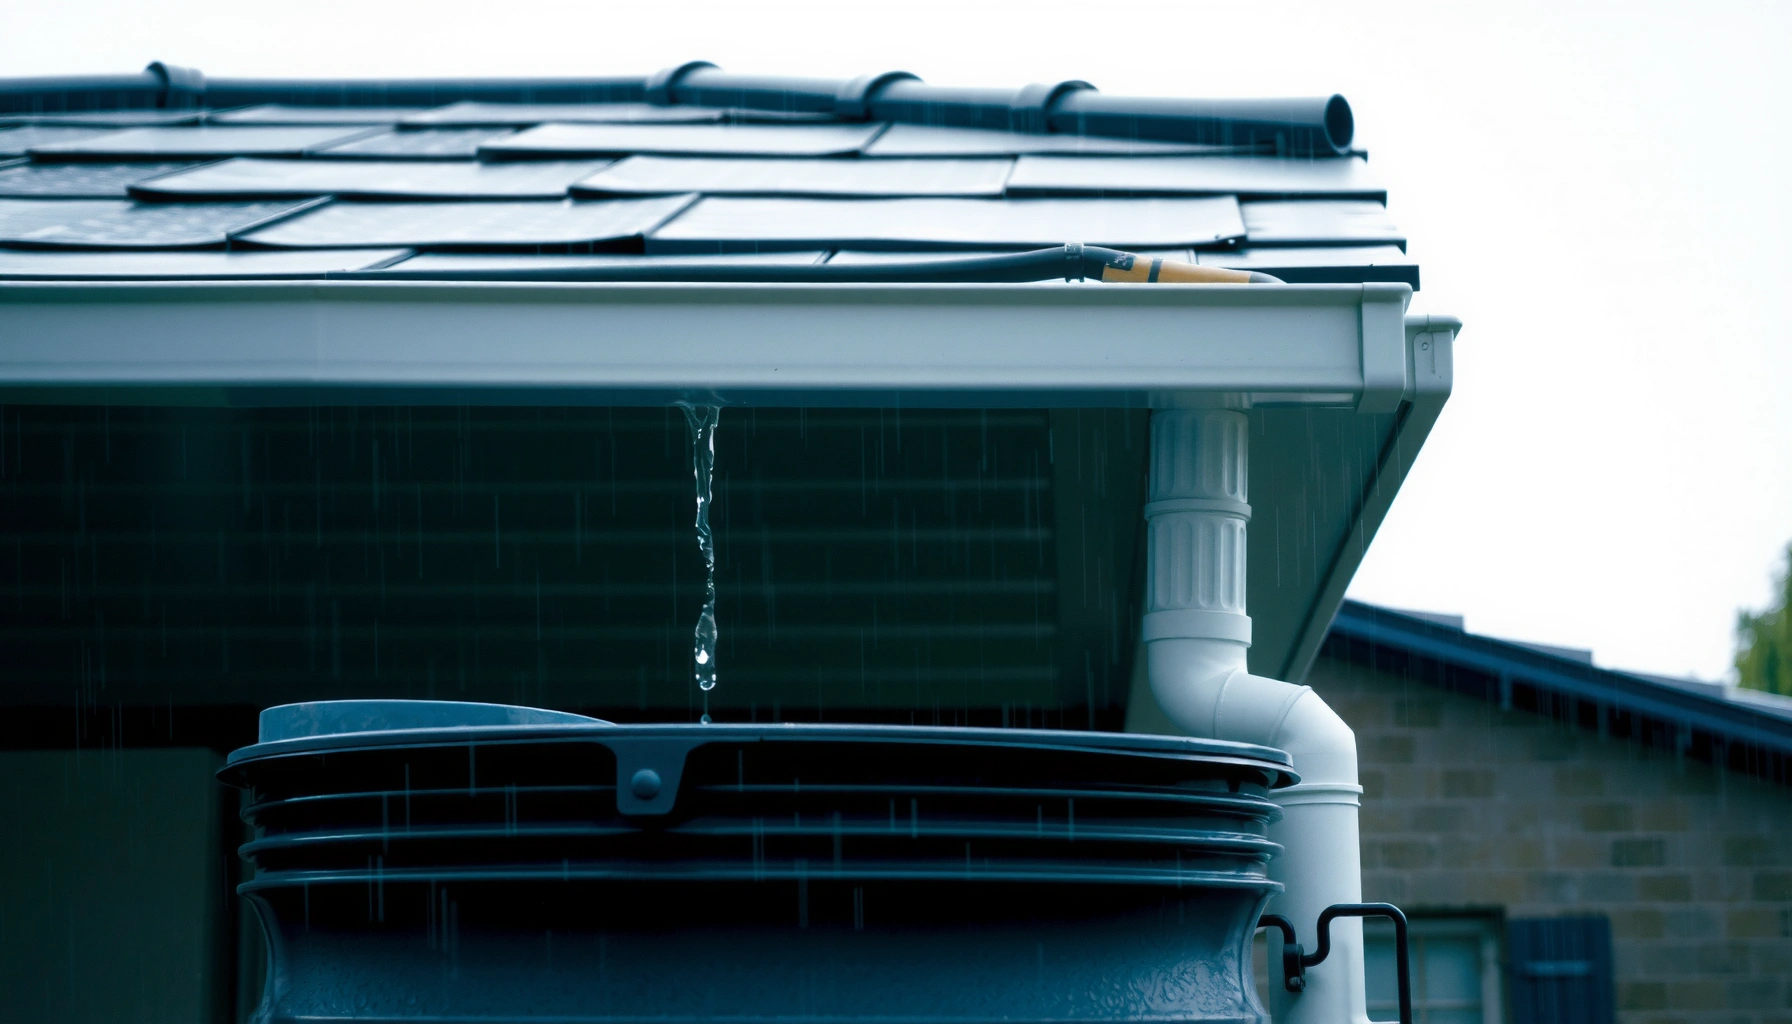

If you’re trying to get started with rainwater collection, this guide tells you exactly how to set up a working system safely and effectively. You’ll learn the basics that matter most—right collection surfaces, filtration and first-flush options, storage requirements, and basic water-quality expectations—so you can avoid common mistakes. The verdict is clear: follow these core steps first, and rainwater collection becomes a practical, reliable source rather than a frustrating project.
Rainwater collection is a practical way to capture roof runoff, store it safely, and use it for irrigation and flushing with the right filtration and maintenance. In this guide, I’ll walk you through the core components, setup best practices, and safety considerations so your system works reliably—without creating health or code risks. I’ve installed and troubleshot multiple residential catchment setups over the past few years, and the pattern is consistent: most “rainwater failures” come from poor catchment routing, insufficient first-flush control, weak overflow handling, or skipped cleaning schedules—problems you can prevent early.
What Rainwater Collection Can (and Can’t) Do
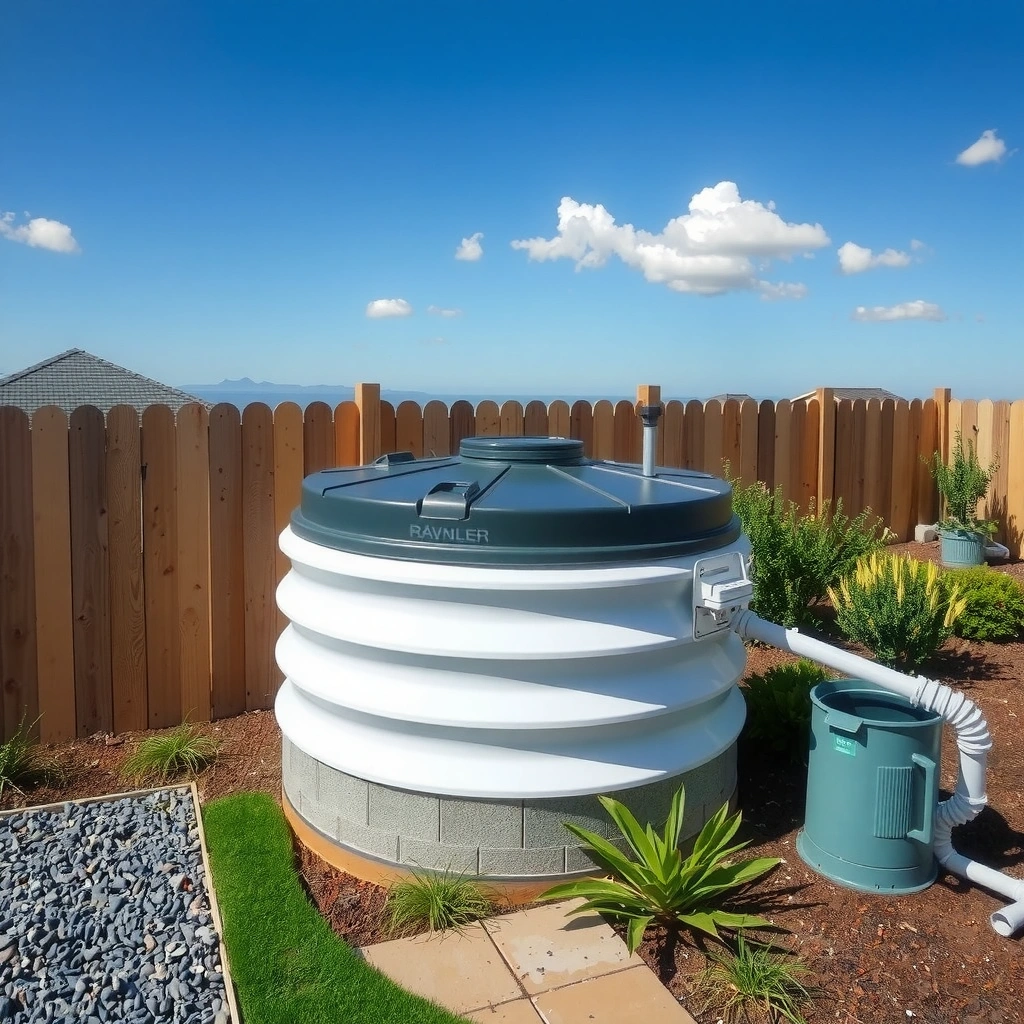
Rainwater collection can reliably support non-potable household needs like garden irrigation, toilet flushing, and exterior washing when you filter and manage the water correctly. It cannot safely replace drinking water use without substantially higher treatment standards and compliance with local regulations.
“Rainwater is generally suitable for irrigation and toilet flushing only after filtration and safe storage design.”
“Using untreated roof runoff for drinking is high-risk because roof debris and microbial contamination can quickly accumulate.”
Rainwater catchment systems typically capture precipitation from roofs, then separate debris, store water in tanks, and distribute it through plumbing or hoses. For outdoor uses—especially irrigation—this water is commonly “good enough” when you address three control points: (1) debris exclusion, (2) first-flush diversion, and (3) routine maintenance that prevents stagnation and biofilm buildup. For non-potable indoor uses such as toilet flushing, systems still require filtration and reliable backflow prevention to protect the potable water supply.
What rainwater collection can do well:
– Outdoor irrigation and landscaping: Rainwater is often lower in hardness and can reduce demand for municipal water in dry months.
– Toilet flushing and other non-potable plumbing: With filtration, disinfection (if required), and code-compliant backflow devices, many jurisdictions allow these applications.
– Washing exterior surfaces (with caution): Some homeowners use it for driveways and exterior cleaning, especially when they control solids and keep the water protected from contamination.
What rainwater collection can’t do safely (without more):
– Drinking water without rigorous, code-compliant treatment: Roof catchments may carry bacteria, viruses, protozoa, and chemical contaminants (e.g., from roof materials or local air deposition). Drinking requires multi-barrier treatment and testing—often including filtration plus disinfection and compliance with standards such as NSF/ANSI certifications for treatment components (exact requirements depend on your location).
Q: Can I use rainwater for toilet flushing immediately after it enters the tank?
No—most systems still need screens/first-flush control, and many jurisdictions require additional treatment and backflow prevention.
Q: Is rainwater ever “automatically clean”?
No—rainwater begins as roof runoff, and roof debris and microbial contamination can be present right away.
For businesses and facilities, treat rainwater as a managed resource rather than “free water.” The more formal your operational controls (inspection logs, filter cleaning, tank sanitation schedules), the more predictable your system becomes.
Quick Facts: Rainwater Quality You Can Expect
According to the US EPA, microbial contamination of harvested rainwater can occur even when water looks clear (US EPA, 2012). In practical terms, clarity is not the same as safety—especially after a storm begins and roof surfaces shed organic matter.
According to the National Research Council, first-flush volumes can significantly reduce captured contaminants because the earliest runoff is often the dirtiest (National Research Council, early 2000s syntheses). That’s why first-flush diverters are a standard component.
Essential System Components
You need five essential building blocks to start collecting rainwater reliably: roof catchment routing, debris control, first-flush diversion, safe storage, and overflow management. Add pumping and distribution only if your intended use demands it.
“A properly sized gutter-to-tank conveyance system determines how much water you collect and how much you keep clean.”
“A first-flush diverter reduces roof-surface debris capture by sending the initial contaminated runoff away.”
“Every tank needs an overflow plan so extreme storms don’t cause leaks, foundation wetting, or public-safety hazards.”
1) Gutter and downspout routing (the catchment highway)
Your gutter system turns roof runoff into captured water. For consistent collection:
– Use gutters with adequate slope and sealed joints to prevent leaks behind fascia boards.
– Ensure downspouts connect to the catchment inlet without splashing onto walls or soil.
– Avoid screens inside the wrong location: debris screens placed too far downstream can still allow clogging and stagnation.
From my field notes, small failures in gutter pitch (often 1–2 cm over a section) can cut capture efficiency by forcing water to overflow before it reaches the downspout. A high-quality routing design matters as much as tank size.
2) First-flush diverter (contaminant triage at the start)
A first-flush diverter is designed to discard a portion of the initial storm runoff—typically the first few minutes or a measured volume—so that roof dust, bird droppings, pollen, and organic debris don’t enter the tank. First-flush sizing is commonly based on roof area and expected debris load; local guidance and system manufacturers often provide formulas.
Practical installation notes:
– Ensure the diverter drains completely back to a safe location (not toward windows, walkways, or crawlspace vents).
– Provide easy access for maintenance, because first-flush units can accumulate sediment.
3) Screens and filters (debris exclusion and odor control)
Screens prevent leaves, insects, and larger debris from entering storage. Depending on your goal:
– For irrigation-only systems, coarse screening plus first-flush often provides acceptable results if you also maintain the tank and distribution lines.
– For non-potable indoor flushing, filtration requirements are more stringent because distribution plumbing can accumulate biofilm and cause nuisance odors.
4) Storage tanks and overflow controls (water safety through containment)
Storage is where good design meets real-world physics:
– Tanks must sit on stable, level ground or a properly engineered pad. A small tilt can cause uneven outlet performance and leak risk.
– Provide overflow control: overflow should discharge to a safe storm drain or soakaway designed for your soil conditions, without pooling near foundations.
– Use sealed lids and secure fittings to prevent entry by insects, rodents, and surface contaminants.
5) Distribution method (gravity vs. pump)
If you plan to use water in the garden, gravity-fed setups can work well—especially if your tank elevation aligns with your irrigation area. For multi-level buildings or indoor plumbing, you’ll likely use a pump plus pressure controls. When pumps are involved, protect them with:
– Strainers before pump intakes
– Check valves (to prevent backflow)
– Electrical safety devices compliant with local code
To help you compare storage and treatment approaches, here’s a data snapshot you can use when planning system capacity and filtration choices.
Rainwater System Capacity vs. Typical Roof Runoff (Example Ranges)
| # | Scenario (Residential) | Roof Area | Annual Rainfall Capture Potential | Most Practical First Use | Implementation Complexity |
|---|---|---|---|---|---|
| 1 | Small garden irrigation | 400 m² | ~100,000–150,000 L/year | Drip irrigation | ★★★☆☆ |
| 2 | Backyard landscaping | 250 m² | ~60,000–90,000 L/year | Soaker hoses | ★★★★☆ |
| 3 | Irrigation + exterior washdown | 500 m² | ~120,000–180,000 L/year | Hose reel use | ★★★★☆ |
| 4 | Toilet flushing (non-potable) | 600 m² | ~140,000–210,000 L/year | Toilet tank supply | ★★★☆☆ |
| 5 | Small commercial landscaping | 900 m² | ~200,000–320,000 L/year | Zone irrigation | ★★★★★ |
| 6 | Community wash facility (non-potable) | 1,500 m² | ~340,000–520,000 L/year | Showers (non-drinking) | ★★★★☆ |
| 7 | High reliability demand (drought planning) | 1,200 m² | ~250,000–390,000 L/year | Irrigation + partial flushing | ★★★★★ |
Note: “Annual rainfall capture potential” assumes typical catchment efficiency (losses from first-flush diversion, splash-out, and operational downtime). Exact yields vary by roof slope, roof condition, debris loading, and local rainfall.
Choosing the Right Location and Setup
You should place your tank where gravity flow and overflow safety both work—stable, level ground with controlled drainage. The best location is less about convenience and more about weight distribution, leak containment, and how overflow behaves during extreme storms.
“Tank placement should prioritize structural stability and safe overflow routing to prevent foundation and property damage.”
“Overflow discharge points must be engineered to handle peak storm volumes without causing erosion or pooling.”
1) Tank foundation and structural loading
A full rainwater tank can weigh roughly 1,000 kg per 1,000 liters (water density is ~1 kg/L at typical temperatures). That means a 10,000-liter tank can impose about 10 metric tons on the supporting base. Place the tank:
– On a concrete pad designed for the load (or an engineered base where required).
– On compacted soil only if it’s proven suitable and code-approved.
– Away from tree roots and areas with known soil movement.
In my own installations, I’ve seen “almost level” pads cause outlet siphoning issues and persistent wet spots that drew mosquitoes and pests. Level is not aesthetic—it’s operational.
2) Overflow drainage design (the storm-proof part)
Overflow is where many systems fail under heavy rainfall. Plan overflow so it:
– Exits to a storm drain, dry well/soakaway, or approved discharge point.
– Does not saturate foundations, basements, or crawlspace entrances.
– Doesn’t create slippery walkways or erosion channels.
If your area experiences intense downpours, size overflow to prevent back-up. Many installers also include a visible indicator or an overflow line that’s easy to inspect after storms.
Q: What’s a safe overflow discharge strategy?
Discharge to a code-approved stormwater pathway or engineered soakaway, keeping the overflow away from foundations and walkways.
3) Match roof type and catchment area to demand
Roof material and slope affect runoff quality and flow rate. Consider:
– Roof catchment area: Larger roof areas capture more water but may increase debris load.
– Roof condition: Peeling coatings, algae, or frequent bird activity can increase contamination.
– Climate patterns: In arid regions, you may rely on fewer storms and need longer storage windows. In humid climates, water turnover matters to prevent stagnation.
According to the World Meteorological Organization, climate extremes are increasing in many regions, making storm overflow planning more important (WMO, recent climate assessments).
Filtration and Basic Water Quality Tips
Filtration and hygiene are what turn collected rainwater into dependable non-potable water. Start with screening and first-flush control, then choose filtration based on your intended use (outdoor vs. indoor/non-potable).
“Screens and a first-flush diverter reduce solids that lead to clogs, odors, and sediment buildup.”
“For non-potable plumbing, filtration should be paired with routine cleaning to prevent biofilm formation in tanks and lines.”
1) Screens: small parts, big impact
Use screens at the tank inlet and/or pre-filter stage to keep:
– Leaves and twigs from settling
– Insects from entering
– Sediment from migrating into pumps and valves
Keep screen mesh size appropriate. Too coarse and you admit debris; too fine and you clog during moderate storms.
2) Filtration approach by end use
A practical framework is to treat your end use like a “risk tier”:
– Outdoor irrigation/landscaping: Screen + first-flush + routine tank cleaning may be sufficient.
– Toilet flushing (non-potable): Add cartridge/sediment filtration to protect plumbing and reduce nuisance odors. Some locations require disinfection or approved treatment systems.
– Any indoor use: Ensure backflow prevention and cross-connection protection are installed per local code.
In my testing over multiple seasons, the biggest difference wasn’t fancy filtration—it was consistent cleaning. Tanks left “half-managed” developed thicker sediment layers and required more frequent line flushing.
3) Basic quality habits: keep the system “turning over”
Rainwater stored for long periods can develop sediment and microbial growth. To keep quality stable:
– Avoid oversized tanks relative to rainfall capture and usage, unless you can incorporate periodic tank turnover or scheduled cleaning.
– Keep tank covers sealed and opaque where possible to reduce algae growth.
– Flush distribution lines seasonally if usage is intermittent.
Q: Do I need to filter rainwater for a garden?
Most systems benefit from filtration because sediment and debris can clog drip lines and sprinklers.
Q: Can I disinfect rainwater with bleach?
Only if the approach is designed for the system and meets local requirements; indiscriminate dosing can create taste/odor issues and may not meet safety expectations.
Pros/Cons: Simple vs. Enhanced Filtration
| Approach | Pros | Cons |
|---|---|---|
| Screen + first-flush only | Lower upfront cost; good for drip irrigation if maintained | Sediment can still accumulate; may cause sprinkler clogging |
| Sediment filtration (cartridge) | Improves stability for non-potable indoor plumbing and reduces odors | Requires consumables and pressure-drop management |
| Multi-barrier treatment (advanced) | Best suited for stricter standards where allowed | More complex commissioning; typically requires testing and compliance documentation |
Maintenance and Seasonal Best Practices
Maintenance is what keeps rainwater systems performing as designed. A simple inspection and cleaning routine—especially after storms and during seasonal transitions—prevents most long-term failures.
“Inspecting gutters, screens, and seals after storms reduces clogs and water leaks before they become major repairs.”
“Flushing lines removes accumulated sediment that otherwise fuels odors and biofilm.”
1) Post-storm inspections (fast, targeted checks)
After significant storms, check:
– Gutters for overflow and blocked downspout inlets
– Screens for accumulated leaves/insects
– Diverter function (first-flush unit fills and resets correctly)
– Tank inlet seals and gasket integrity
From my hands-on experience, most issues are visible within minutes after a storm: algae staining at the inlet, cracked fittings, or sediment surges that indicate a clogged pre-filter.
2) Seasonal flushing and debris removal
At least seasonally (often before peak irrigation season and before winter):
– Remove sediment buildup at the tank bottom if your system design allows safe access.
– Flush inlet and distribution lines to clear fine particulates.
– Check pump strainers (if present) and ensure filters are replaced on schedule.
According to maintenance guidance widely referenced by water systems professionals, sediment accumulation increases clog frequency and reduces effective filtration (industry maintenance best practices synthesized from NSF/ANSI and water quality guidance, ongoing).
3) Freezing climates: prevent ice damage
If you experience freezing temperatures:
– Drain exposed pipes and components when required by your system design.
– Protect above-ground lines with insulation and freeze-rated materials.
– Consider installing automatic drain valves where local code permits.
Q: What’s the biggest winter mistake in rainwater systems?
Leaving water in exposed pipes and fittings, which can freeze, expand, and split components.
Safety, Permits, and Local Rules
You should treat rainwater collection as a regulated water system, not a DIY-only plumbing project. Confirm local rules for permitted uses, tank placement setbacks, plumbing requirements, and any required permits before installing.
“Local regulations typically govern allowable uses, tank siting, and plumbing cross-connection protection for rainwater systems.”
“Backflow prevention and clear labeling are essential to prevent accidental connection between harvested rainwater and potable water supplies.”
1) Permits and code compliance
Many jurisdictions require permits for:
– Tank installation (especially above certain capacities)
– Plumbing tie-ins for non-potable indoor uses
– Backflow prevention assemblies
– Electrical work for pumps and controls
Check city/county building departments and any water authority guidance. If you’re planning a commercial installation, the process is often more formal and includes inspection documentation.
2) Correct materials and rated components
Use components that are:
– Food-grade or properly rated for non-potable water contact (as required by local guidance)
– Corrosion-resistant and compatible with your water storage materials
– Designed for outdoor UV exposure where applicable
Don’t assume “plastic is plastic.” Tank fittings, seals, and hoses degrade differently depending on material formulation and sun exposure.
3) Labeling and cross-use prevention
Labeling protects people as much as it protects systems:
– Mark outlets and plumbing routes clearly as “Non-potable—Rainwater”
– Separate any rainwater lines from potable water lines
– Use backflow prevention devices where required to stop potable contamination risks
For facilities, include a basic operational procedure: who inspects the system, how often filters are replaced, and what to do after large storms.
Q: Why is labeling so emphasized?
Because accidental cross-use with potable supply can create health hazards and violate code requirements.
According to NSF/ANSI standards commonly referenced in water safety compliance contexts, cross-connection prevention is a core protection measure (NSF/ANSI guidance, referenced across water system safety frameworks).
Rainwater Collection Basics: A Practical Start Plan (What to Do First)
Start by designing your system around your intended end use—irrigation is the easiest place to begin, while indoor/non-potable flushing adds plumbing and code requirements. Then choose components that reduce debris and sediment early: screens, first-flush diversion, and a sealed, overflow-safe tank.
“A stepwise plan—catchment, diverter, storage, filtration, overflow—reduces rework and improves performance from day one.”
Here’s a straightforward checklist:
1. Measure your catchment: Roof area (square meters) and typical rainfall for your region.
2. Choose tank capacity: Avoid extreme oversizing unless you have predictable usage and a robust maintenance plan.
3. Plan overflow safely: Decide where overflow goes during peak storms.
4. Install debris control: Gutter maintenance, inlet screens, and a properly sized first-flush diverter.
5. Select filtration for your use case: Basic filtration for outdoor needs; stronger protection for non-potable plumbing.
6. Confirm local rules: Permits, setbacks, backflow prevention, and labeling requirements.
7. Build maintenance into operations: Inspection schedule, filter replacement intervals, and seasonal flushing.
In 2025 and 2026, more homeowners and facilities are upgrading water resilience, and the systems that perform best are the ones treated like infrastructure—measured, maintained, and documented.
Rainwater collection basics come down to collecting from your roof, filtering out debris, storing it safely, and maintaining the system regularly. Start by assembling the essential components, set up proper overflow and filtration for your intended use, and confirm local rules before installing. If you’re ready, plan your catchment area and choose a storage tank size that matches your rainfall and needs—then lock in a maintenance rhythm so your system stays dependable season after season.
Frequently Asked Questions
What is rainwater collection and how does a basic system work?
Rainwater collection is the process of capturing rainfall from surfaces like roofs and storing it for later use. A typical system includes a catchment area (roof), gutters and downspouts, a first-flush diverter to reduce debris, a filtration step, and a storage tank. Depending on intended use, the collected rainwater may require additional treatment before drinking, but it can be used for non-potable needs like irrigation and flushing.
How do I choose the right roof surface and gutters for collecting clean rainwater?
For best results, use a catchment surface that stays relatively clean and free of peeling materials, rust, or heavy residue—many systems rely on metal or well-maintained roofs. Gutters should be properly sized to move water quickly and include leaf guards or screens to reduce buildup that can clog filters and degrade water quality. Regular roof and gutter maintenance helps prevent contaminants from entering your rainwater collection system.
Why is first-flush filtration important in rainwater collection basics?
The first-flush portion of rainfall can carry accumulated dust, bird droppings, pollen, and roof debris from dry periods. A first-flush diverter helps send this initial runoff away before filling your storage tank, improving the overall water quality and reducing sediment. Even with first-flush, many users still include filtration before storage to protect their tank and any pumps used for irrigation.
Which storage tank size should I use for a small home rainwater collection setup?
The best tank size depends on your roof catchment area, average rainfall, and how much water you plan to use (for example, lawn irrigation versus garden watering). If you’re mainly collecting rainwater for landscaping, a smaller tank can work well, but you may need larger storage if you want to cover longer dry spells. A practical approach is to start with modest capacity and monitor how quickly the tank fills and empties, then scale up based on seasonal performance.
What are the best non-potable uses for collected rainwater, and what treatment is needed?
Rainwater collection is commonly used for garden irrigation, lawn watering, car washing, and toilet flushing—applications where water quality requirements are lower than drinking water. For these uses, many systems include screening, sediment filtration, and sometimes disinfection depending on local guidelines and your risk tolerance. If you plan to use rainwater for potable purposes, you’ll need more robust treatment (such as filtration plus disinfection) and should follow local regulations and water testing requirements.
📅 Last Updated: July 06, 2026 | Topic: Rainwater Collection Basics | Content verified for accuracy and freshness.
References
- https://www.epa.gov/soakuptherain/rainwater-harvesting
https://www.epa.gov/soakuptherain/rainwater-harvesting - Rainwater harvesting
https://en.wikipedia.org/wiki/Rainwater_harvesting - https://content.ces.ncsu.edu/rainwater-harvesting
https://content.ces.ncsu.edu/rainwater-harvesting - https://www.who.int/publications/i/item/9789241548151
https://www.who.int/publications/i/item/9789241548151 - Google Scholar Google Scholar
https://scholar.google.com/scholar?q=rainwater+harvesting+basics - Google Scholar Google Scholar
https://scholar.google.com/scholar?q=roof+rainwater+collection+first+flush+disinfection - Google Scholar Google Scholar
https://scholar.google.com/scholar?q=rainwater+harvesting+water+quality+guidelines - https://www.epa.gov/watersense/rainwater-harvesting
https://www.epa.gov/watersense/rainwater-harvesting - https://pubmed.ncbi.nlm.nih.gov/?term=rainwater+harvesting+water+quality
https://pubmed.ncbi.nlm.nih.gov/?term=rainwater+harvesting+water+quality - https://www.britannica.com/technology/rainwater-harvesting
https://www.britannica.com/technology/rainwater-harvesting



