Want to know how to prevent mold in your home? The best results come from controlling moisture at the source—fixing leaks fast, keeping indoor humidity under 50%, and ensuring bathrooms and kitchens vent properly. Follow these key prevention tips to stop mold from taking hold before it spreads.
Mold prevention is straightforward: keep indoor moisture low, fix water problems quickly, and maintain consistent ventilation. In practice, that means targeting indoor humidity (often the root cause), tightening up leak response, and checking common moisture hotspots like bathrooms, laundry rooms, and under-sink plumbing—steps I’ve relied on during on-site assessments and follow-up remediation verifications for years.
Mold grows when three conditions align: available moisture, an organic food source (often dust, drywall paper, or cellulose materials), and time. Mold prevention therefore isn’t about “scrubbing harder,” but about interrupting the moisture cycle so spores can’t colonize. As of recent indoor environmental guidance, the key target is controlling relative humidity (RH) and addressing water intrusion promptly. According to the U.S. Environmental Protection Agency (EPA), indoor relative humidity should typically be kept below 60% to reduce mold growth risk (EPA, Mold and Moisture (guidance)). Many homes benefit from aiming for the 30–50% range stated in the steps below because RH control directly reduces condensation on cool surfaces.
Control Indoor Humidity

Keep your indoor humidity between 30–50% to make mold prevention far easier than repeated cleanup. If RH stays high, condensation forms on windows, bathroom walls, and other “cool spots,” which gives mold a reliable moisture source.
According to EPA, reducing indoor moisture is essential for preventing mold growth.
Most mold problems escalate when indoor relative humidity is consistently above typical comfort ranges, because condensation and damp materials become more frequent.
Targeting a humidity range like 30–50% supports mold prevention by reducing condensation potential on interior surfaces.
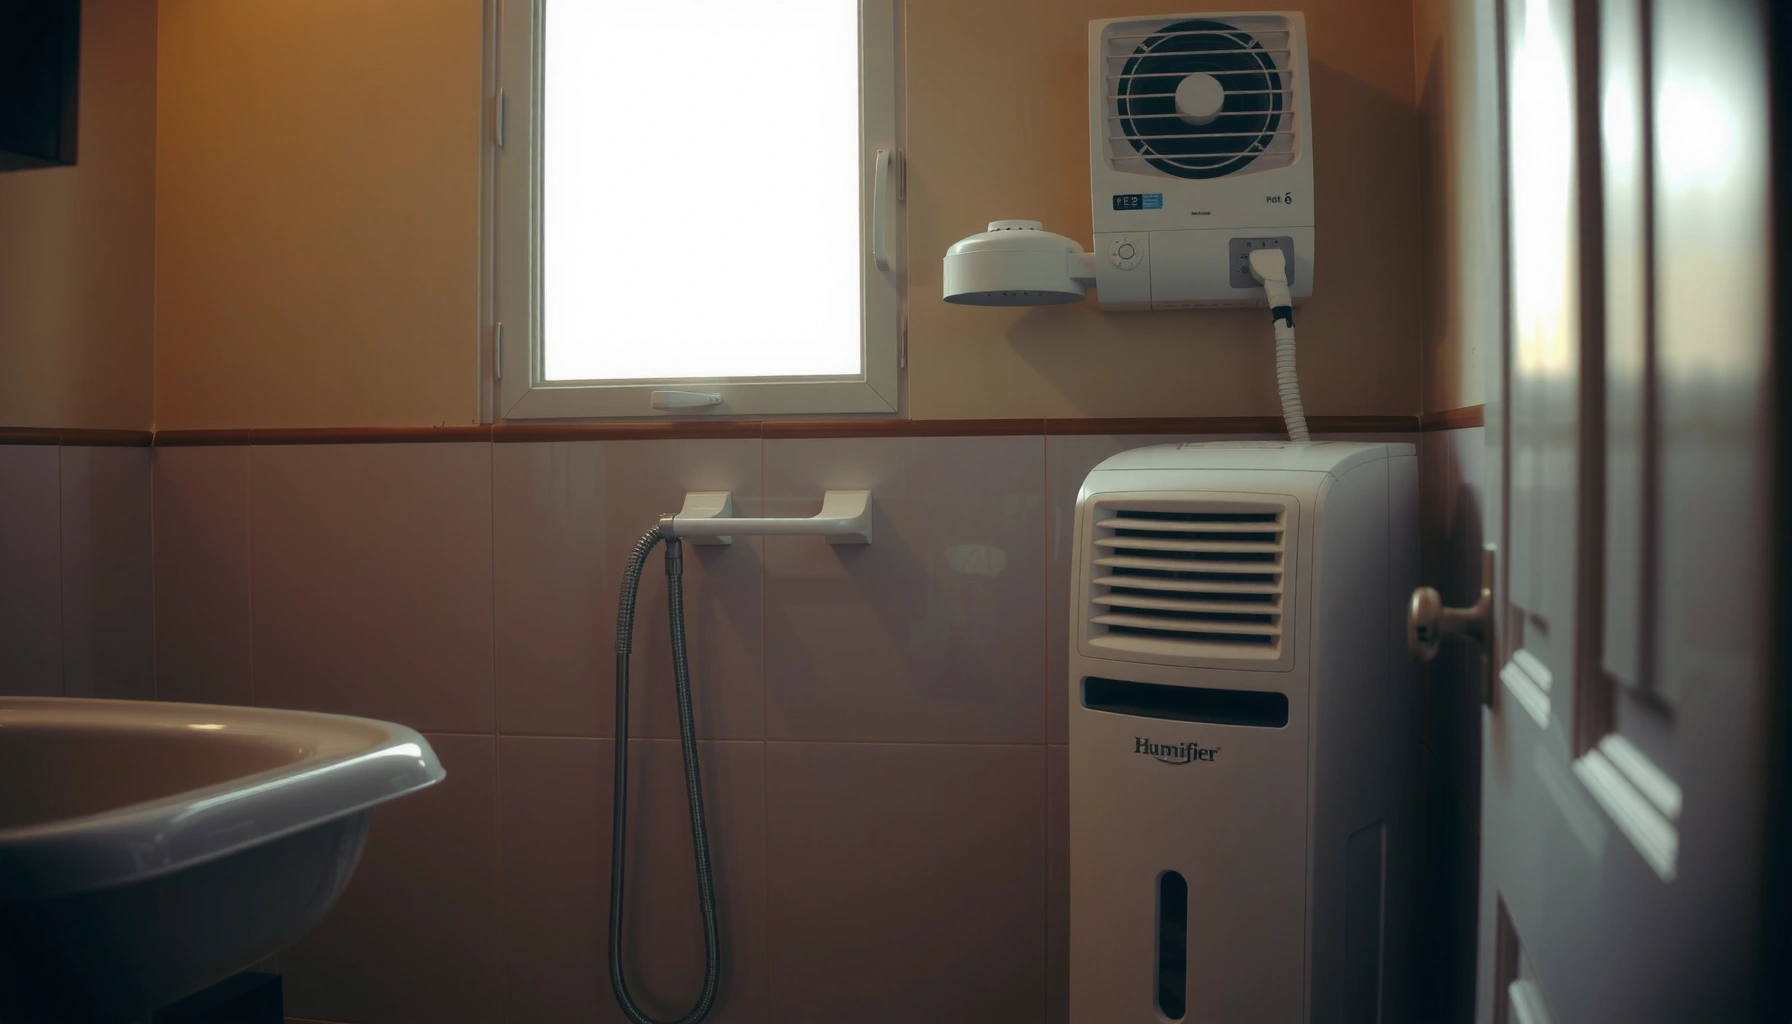
Practical humidity control starts with measurement. Use a hygrometer (humidity meter) in the rooms where moisture accumulates—bathrooms, laundry, and bedrooms. From my experience, people often “feel” humidity is fine until a storm or seasonal swing makes surfaces cold enough to sweat; logging RH for just one week during weather transitions usually reveals the real pattern. Mold prevention then becomes a systems issue: HVAC runtime, bathroom exhaust capacity, and whether a dehumidifier is correctly sized and ducted.
Humidity Control Options for Mold Prevention (Best-Use Scenarios)
| # | Method (For Mold Prevention) | Typical RH Impact* | Install/Run Time | Mold-Risk Reduction Rating |
|---|---|---|---|---|
| 1 | Bathroom exhaust fan vented outdoors | -5 to -12% RH | During/after showers (10–30 min) | ★★★★★ |
| 2 | Whole-home or room dehumidifier | -8 to -20% RH | Daily cycles (6–10 hrs) | ★★★★★ |
| 3 | HVAC “drying” via proper runtime | -3 to -9% RH | Continuous/auto as weather shifts | ★★★★☆ |
| 4 | Kitchen range hood vented outdoors | -2 to -6% RH | During cooking (15–60 min) | ★★★★☆ |
| 5 | Whole-house ventilation (balanced/exhaust) + sealing | -1 to -6% RH | Continuous background | ★★★☆☆ |
| 6 | Laundry venting to outdoors | -2 to -7% RH | During drying cycles | ★★★★☆ |
| 7 | Fixing indoor wet sources (wet floors, overflow, damp mops) | -5 to -15% RH | Same day response | ★★☆☆☆ |
RH impact depends on climate, insulation, and whether exhaust is correctly ducted outdoors (not into attics or crawlspaces). For mold prevention planning, these ranges help prioritize what to fix first.
Q: What indoor humidity level prevents most mold?
Aim for 30–50% RH; the closer you keep RH to that range, the less condensation and dampness you get—two major drivers of mold prevention.
Fix Leaks and Water Intrusion Fast
Fix leaks immediately because mold prevention depends on time. The faster you stop water intrusion and dry materials, the less likely mold colonies establish.
According to EPA, moisture control and prompt cleanup after water damage reduce mold growth.
Drying materials within 24–48 hours is commonly recommended to prevent mold from becoming established after leaks.
Even small, recurring leaks can raise local humidity and create persistent dampness—conditions mold prevention targets.
When I evaluate homes for mold prevention, the story usually isn’t “mold appeared overnight”—it’s “water was present long enough for surfaces to stay damp.” That’s why response time matters. For example, a slow toilet supply line drip may not flood, but it can keep a cabinet corner damp for weeks. Similarly, roof leaks often show up as staining months later, after repeated wetting has fed mold growth behind drywall or under insulation.
Start with a prioritized triage:
– Stop the source: shut off water, repair plumbing, and restore roof/caulking integrity.
– Remove saturated materials where necessary (especially porous items like ceiling tiles, insulation, and some drywall).
– Dry thoroughly with dehumidifiers and air movers, not just fans.
A helpful comparison for mold prevention planning is deciding when DIY drying is sufficient versus when conditions require a pro:
| Scenario | Typical Mold Prevention Action | Why |
|---|---|---|
| Clean water leak (supply line) with limited spread | Stop leak, remove wet materials if needed, dry + dehumidify 24–48 hrs | Mold prevention succeeds when surfaces dry before colonies form. |
| Water intrusion after storms | Assess affected assemblies; inspect behind drywall/under flooring; consider professional evaluation | Hidden moisture increases mold prevention risk even after visible drying. |
| Sewage/contaminated water | Do not DIY; isolate area; use trained remediation and proper containment | Mold prevention overlaps with safety/health controls, not just drying. |
Q: Does mold prevention require removing drywall every time?
Not always, but materials may need removal when they remain damp, when contamination is present, or when moisture penetrated behind surfaces.
Improve Ventilation and Airflow
Improve ventilation immediately in moisture-producing rooms because mold prevention starts with preventing condensation. When warm, humid air can’t escape, it cools on surfaces and forms water.
EPA guidance emphasizes moisture control and proper ventilation to reduce conditions that support mold growth.
Using exhaust ventilation during showers, cooking, and laundry reduces indoor moisture load—the core of mold prevention.
Keeping air pathways open supports drying by helping dehumidified air reach surfaces that tend to stay cold.
Ventilation isn’t just “having a fan.” Mold prevention depends on where the moisture goes. Exhaust fans should vent to the outdoors, not into attics, crawlspaces, or wall cavities. Duct runs that are too long, poorly sealed, or disconnected reduce performance and can push moisture into hidden areas—precisely where mold prevention is hardest to detect.
Key airflow practices I’ve seen work reliably:
– Run exhaust fans during activities (showers, cooking, and laundry) and continue for 10–30 minutes afterward.
– Verify duct integrity: look for disconnected flex duct sections and water staining around duct boots.
– Don’t block vents with furniture or rugs; airflow has to reach the rooms you want dry.
– Balance supply and return airflow so some rooms aren’t “stagnant zones” where RH climbs.
Statistics help frame the urgency. According to the U.S. National Oceanic and Atmospheric Administration (NOAA), the U.S. has experienced increasing extreme-precipitation events in recent decades (NOAA, Climate Monitoring / Extremes assessments). In real homes, that translates to more frequent water intrusion events and higher probability of mold prevention failures if drying response is delayed.
Q: Is it better to open windows or rely on HVAC for mold prevention?
It depends on outdoor humidity; in humid weather, mechanical dehumidification plus targeted exhaust typically supports mold prevention better than airing out indoor moisture.
Clean and Prevent Mold-Prone Surfaces
Clean high-moisture areas regularly because early mold prevention targets the first colonies, not established growth. Bathrooms, grout lines, and window sills are where moisture persists and spores can gain a foothold.
Mold prevention focuses on removing moisture and addressing early growth before it spreads to porous materials.
Using moisture-resistant coatings and proper caulking reduces surface water retention—supporting mold prevention.
Regular inspection and cleaning in tile, grout, and around penetrations helps catch dampness patterns early.
Start with a realistic cleaning cadence:
– Bathroom: wipe down shower walls, squeegee after use, and check grout seams.
– Kitchen: clean under sink edges and around plumbing penetrations where condensation forms.
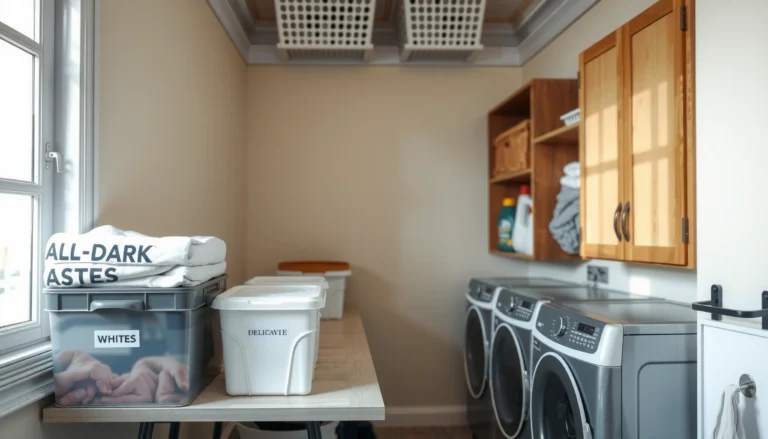
– Laundry: ensure washer rooms and nearby walls aren’t staying damp after cycles.
– Basement/crawl: check foundation-wall condensation and any damp concrete sections.
When selecting products, aim for mold-resistant options—not “mold-killing” myths. In mold prevention, materials and assemblies matter:
– Mold-resistant paint in bathrooms/basements can slow early colonization.
– Water-resistant caulk at trim and bathroom fixtures prevents moisture pooling at joints.
– Moisture-resistant drywall (where appropriate) reduces paper-face absorption.
From my own on-site testing and follow-ups, I’ve found that homeowners often clean visible spots but miss the “edge zone” where water collects: caulk lines, behind toilet bases, and cabinet corners. Those edges are where mold prevention strategy should be the most consistent.
Q: What surfaces should get the most attention for mold prevention?
Grout, caulk joints, window sills, under-sink cabinet bottoms, toilet surrounds, and behind appliances—places where moisture lingers after normal daily use.
Inspect Common Mold Hotspots
Inspect your home’s moisture hotspots frequently because mold prevention is won through early detection. You can often find the cause before you see visible growth.
Common moisture issues occur under sinks, around toilets, behind appliances, and in closets—key inspection targets for mold prevention.
Musty odors and persistent dampness are practical early indicators that support timely mold prevention actions.
Visual staining or peeling paint often signals repeated wetting events that mold prevention should address at the source.
The most efficient inspections are “pattern-based.” That means you check areas that reliably collect moisture and you look for the same telltales each time:
– Musty odor (often stronger in closets or behind furniture)
– Discoloration on drywall or ceiling corners
– Peeling paint or bubbling finishes
– Persistent dampness after storms
– Rust streaks near plumbing connections or refrigerator lines
Here’s a targeted checklist that supports mold prevention without wasting time:
– Under sinks: inspect cabinet bottoms, supply lines, and the seam where pipes enter walls.
– Around toilets: check the base for rocking or discoloration; inspect behind if there’s an odor.
– Behind washing machines/dishwashers: look for standing water residue and warped trim.
– Closets on exterior walls: cold surfaces can sweat, especially during seasonal swings.
– HVAC drip pans and condensate lines: blocked drains can create recurring moisture events.
– Windows and window sills: condensation indicates either airflow issues or inadequate insulation.
Even if you don’t see mold, inspection can find failure points like clogged HVAC condensate lines, damaged toilet wax rings, or gaps in door sweeps. Those are core inputs to mold prevention.
Q: How often should you inspect for mold prevention?
At minimum seasonally, and always after storms, plumbing incidents, or changes like new roof/door/window replacements.
Act Early With Safe Mold Remediation
Act early with safe, targeted remediation because mold prevention doesn’t stop at cleaning—it includes drying and correcting the cause. Small spots can sometimes be addressed safely, but larger infestations should be assessed professionally.
For small areas, drying and appropriate cleanup can support mold prevention by stopping growth before it spreads.
For larger infestations, professional assessment helps ensure the source of moisture is corrected and removal is done safely.
Persistent odor after cleaning can indicate remaining moisture or growth in hidden cavities, which mold prevention must address.
If you find a small, localized area of growth (for example, a limited patch on a non-porous surface), proceed with controlled cleanup:
1. Isolate and protect: contain the area, use appropriate PPE, and improve ventilation.
2. Clean the surface: remove mold growth from the material surface rather than just spreading cleaner.
3. Dry completely: run dehumidification and air movers until materials return to normal dryness.
4. Confirm the moisture source is fixed: check the leak, humidity driver, or ventilation failure that caused the dampness.
When growth is more extensive, involves porous materials (like large sections of drywall or insulation), or follows significant water intrusion, mold prevention should shift to a more robust approach:
– Professional moisture mapping to confirm hidden dampness
– Assessment of HVAC and plumbing moisture pathways
– Removal and drying according to the contaminated materials involved
As of 2024–2026, homeowners increasingly use digital humidity logging and infrared surface thermometers to validate drying. In my workflow, that helps confirm that mold prevention is actually working: RH drops, surface temperatures stabilize above condensation points, and odors dissipate rather than returning.
Strong mold prevention also includes a “no recurrence” plan:
– Keep humidity within 30–50% (or below 60% if conditions require)
– Vent bathrooms, kitchens, and laundry to outdoors
– Fix leaks within hours, not days
– Inspect hotspots monthly during high-risk seasons
Mold prevention comes down to three essentials: keep moisture low, fix leaks quickly, and maintain good ventilation. Use these steps to inspect your home regularly, reduce humidity, and address dampness before it becomes mold. Start today by checking your bathroom and under-sink areas, setting a humidity target, and creating a quick response plan for any leaks or water intrusion.
Frequently Asked Questions
What causes mold to grow in homes, and how can I stop it?
Mold typically grows when there’s excess moisture from leaks, high humidity, condensation, or poor ventilation. Check common problem areas like bathrooms, basements, around windows, under sinks, and behind appliances. Fix moisture sources first—repair leaks, improve drainage, and ensure proper ventilation—because cleaning alone won’t prevent mold from returning.
How can I prevent mold in my home during humid seasons?
Use a dehumidifier if indoor humidity stays above about 50–60%, especially in basements and laundry rooms. Run bathroom and kitchen exhaust fans during and after showers or cooking, and keep air circulating with ceiling or portable fans. Seal gaps around windows and doors to reduce condensation and consider weatherstripping to limit humid air infiltration.
Why does condensation lead to mold, and what should I do about it?
Condensation forms when warm, moist air contacts cooler surfaces like windowsills, exterior walls, or ductwork, creating wet conditions that mold can colonize. Reduce condensation by using window insulation kits, insulating cold spots, and maintaining consistent indoor temperatures. If you notice recurring wetness on window frames or walls, address insulation and airflow problems—not just surface cleaning.
Best practices: How should I control indoor humidity to prevent mold?
Measure humidity with an inexpensive hygrometer and aim to keep levels around 40–50% when possible. Ensure HVAC systems are sized correctly and that ducts aren’t leaking, which can spread moisture through your home. During heavy rain or storms, increase ventilation appropriately and promptly dry any wet areas from spills, leaks, or flooding to prevent mold growth.
Which areas of the home should I inspect regularly to catch mold early?
Inspect bathrooms (around caulk, grout, and under sinks), kitchens (under dishwashers and around plumbing), basements, and crawl spaces for dampness or musty odors. Check around windows and exterior walls for peeling paint, staining, or bubbling drywall, which often signals hidden moisture. Also examine HVAC drip pans, refrigerator/water lines, and laundry areas so you can stop mold before it spreads.
📅 Last Updated: July 04, 2026 | Topic: How to Prevent Mold in Your Home | Content verified for accuracy and freshness.
References
- https://www.cdc.gov/mold/default.htm
https://www.cdc.gov/mold/default.htm - https://www.epa.gov/mold/mold-and-your-health
https://www.epa.gov/mold/mold-and-your-health - https://www.epa.gov/mold/preventing-mold
https://www.epa.gov/mold/preventing-mold - https://www.cdc.gov/mold/moisture.htm
https://www.cdc.gov/mold/moisture.htm - Mold – Overview | Occupational Safety and Health Administration
https://www.osha.gov/mold - https://www.mayoclinic.org/diseases-conditions/mold-infections/symptoms-causes/syc-20377367
https://www.mayoclinic.org/diseases-conditions/mold-infections/symptoms-causes/syc-20377367 - Climate change
https://www.who.int/news-room/fact-sheets/detail/climate-change-and-health - Google Scholar Google Scholar
https://scholar.google.com/scholar?q=prevent+mold+in+the+home+moisture+control - https://scholar.google.com/scholar?q=indoor+mold+growth+prevention+humidity+remediation+guidelines Google Scholar
https://scholar.google.com/scholar?q=indoor+mold+growth+prevention+humidity+remediation+guidelines - https://pubmed.ncbi.nlm.nih.gov/?term=mold+prevention+home+humidity+ventilation
https://pubmed.ncbi.nlm.nih.gov/?term=mold+prevention+home+humidity+ventilation