

If you’re planning a kitchen remodeling guide and want a successful remodel, follow these essential steps in the right order to avoid costly delays and rework. This guide tells you exactly what to do first—planning and budgeting, layout and design decisions, permitting and demolition, then installation and final inspections—so your kitchen comes out functional, durable, and on schedule. You’ll leave with a clear, step-by-step roadmap that turns ideas into a finished remodel with fewer surprises.
A successful kitchen remodel starts with a clear plan for goals, layout, and budget before you select cabinets or finishes. If you lock down the “what” and “where” early—then manage permits, trades, and lead times—you reduce delays, surprises, and cost creep while getting a kitchen that fits how you actually cook and live.
Plan Your Kitchen Remodeling Goals
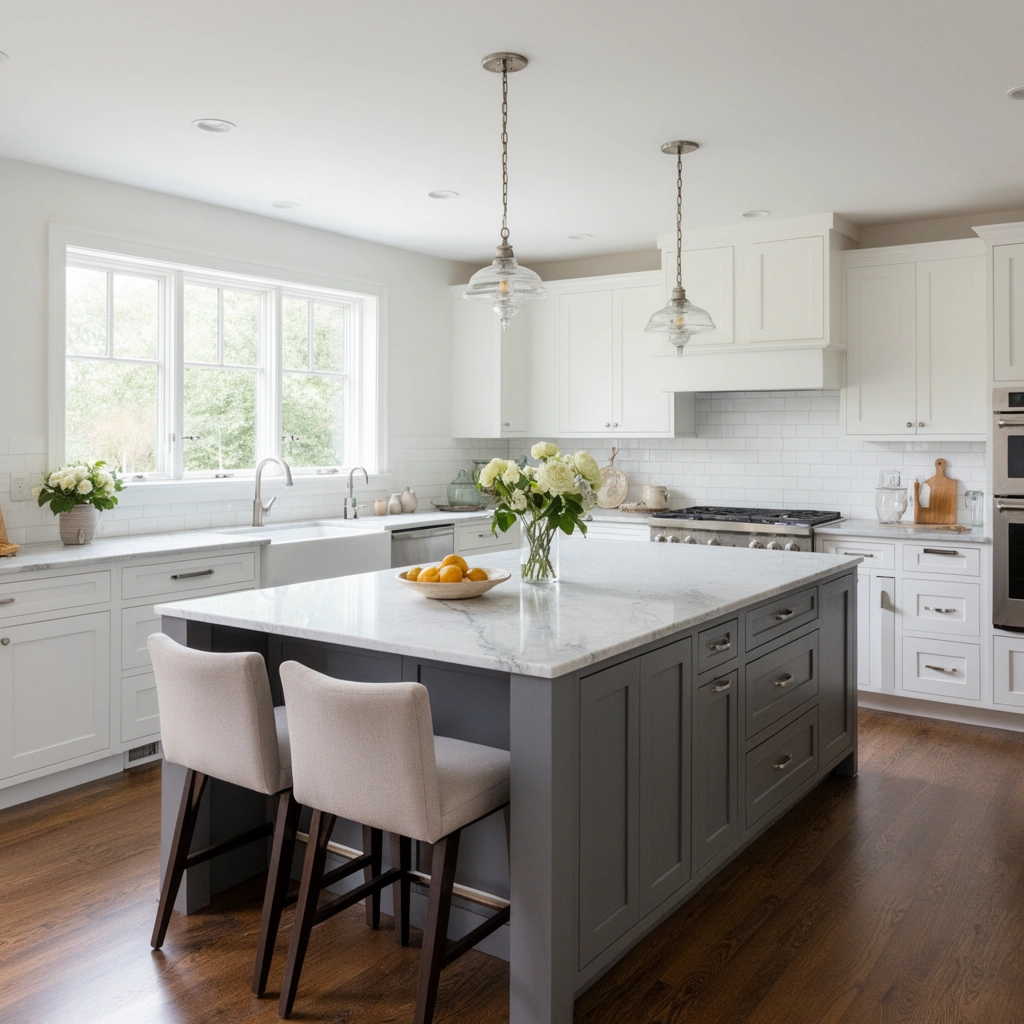
Plan your goals first so every later decision (layout, materials, contractor scope) stays aligned with your priorities. In practice, the most efficient remodels treat goals as measurable outcomes—how you want the kitchen to function, how it should look, and what constraints (budget, timeline, household needs) you can’t compromise.
I start every kitchen remodeling planning cycle with a short “daily-use audit.” I watch traffic patterns (who walks through what space), note where bottlenecks form (usually around the sink-to-stove path), and identify storage gaps (overflowing pantry shelves, unusable corner cabinet, insufficient prep area). From my hands-on work with multiple renovation projects, this approach prevents the common mistake of designing a beautiful kitchen that doesn’t solve the real day-to-day problems—then forcing expensive changes after cabinets are installed.
Q: What should I decide before I get bids?
Decide your must-haves, your target budget range, and a rough timeline for when you need the kitchen back in service.
Q: Do I need a specific style before planning the layout?
Style matters, but workflow and storage come first; you can match style through finishes once the layout works.
How to turn “I want a new kitchen” into a plan
– Define your must-haves, style, and usage. Translate vague preferences (“modern,” “warm,” “more counter space”) into concrete requirements such as “prep space for 2–3 people,” “concealed storage for small appliances,” or “easy cleaning for a busy household.”
– List “nice-to-haves” and “no’s.” Examples: keep the existing footprint vs. expand; keep the current location of plumbing vs. relocate; budget for new flooring vs. reuse existing subfloor.
– Create a realistic budget range and timeline. Use a range (not a single number) and build in lead times for cabinetry and countertops. As of 2026, supply-chain impacts still vary by region, so lead times deserve the same attention as cost.
Key planning outputs (write them down)
1. Target remodel scope (surface refresh vs. layout change vs. full gut).
2. Must-keep items (appliances you’ll reuse, window locations, structural constraints).
3. Decision deadlines (when you’ll finalize layout, cabinet design, and electrical plan).
4. Living arrangements during construction (temporary kitchen setup, dining plan).
“A kitchen remodel performed with a documented scope and decision deadlines reduces change orders because builders bid against a defined plan, not evolving preferences.”
“Workflow-driven planning prioritizes the work triangle and clearance paths before selecting finishes, which is why many layout changes are far more expensive after demolition.”
“Lead times for cabinetry and custom countertops can extend a remodel timeline even when demolition and rough-in finish quickly.”
Design and Layout Best Practices
Use proven layout principles to optimize workflow so the kitchen feels effortless the moment you move in. The best designs minimize steps, keep commonly used items within easy reach, and maintain safe clearances around doors, appliances, and traffic lanes.
For layout, I treat the “sink–stove–fridge” trio as the command center. When these anchors are positioned logically, everything else—prep zone, storage drawers, and appliance garages—falls into a coherent system instead of scattered placement. The most common layout failure I see: people pick beautiful cabinet styles first, then accept a poor path between sink and cooktop because plumbing relocation wasn’t evaluated early.
Optimize the work triangle (and understand its limits)
Many designers reference the kitchen work triangle concept. NKBA guidance commonly uses a practical range for leg distances (the distance between sink, stove/cooktop, and refrigerator) to reduce unnecessary walking. Another reason to follow workflow rules: they help trades coordinate plumbing and electrical locations without costly rework.
Q: What’s more important—open concept or efficient layout?
Efficient layout usually beats openness; you can still achieve an open feel while protecting the work zones that make cooking practical.
Account for storage, lighting, and appliance dimensions
Storage planning is where remodels can quietly fail. I recommend you model storage around actual containers: sheet pans, mixing bowls, coffee gear, and the appliance footprint you truly use (not the one you “might someday” buy).
Design checklist
– Storage: pantry depth, drawer counts, utensil organization, and how you’ll store small appliances (micro, toaster, blender).
– Lighting: task lighting under upper cabinets, general ambient lighting, and lighting that supports safe food prep.
– Appliances: confirm dimensions early so doors clear and ventilation ducts align. Include fridge swing clearance, dishwasher front panel clearance, and range/hood alignment.
Common NKBA-aligned clearance considerations
– Maintain safe aisle widths and door clearance so the kitchen is usable, not just stylish.
“NKBA guidance on kitchen clearances and work-zone planning helps reduce congestion by ensuring predictable paths around counters and appliances.”
“Lighting placement should follow work zones—task lighting near prep and cleanup areas improves functionality more than decorative fixtures alone.”
“Confirm appliance dimensions before final cabinet fabrication to prevent costly modifications after delivery.”
Layout framework: Pros/cons snapshot
Below is a quick way to compare the most common kitchen layouts when you’re planning remodeling goals, especially if you’re deciding between keeping or changing the footprint.
| Layout Style | Best For | Pros | Tradeoffs |
|---|---|---|---|
| L-Shape | Compact to mid-size kitchens | Strong prep-to-cook workflow, good wall storage | Limited workspace if you add a third cooking zone |
| U-Shape | Families who need storage + counter space | Multiple storage runs, efficient triangle | Can feel tight without careful aisle clearances |
| Galley | Narrow spaces | Clear separation of zones | Requires strict clearance planning to avoid bottlenecks |
| One-Wall + Island | Open-concept homes | Maximizes openness and views | Requires careful appliance placement to maintain workflow |
Budgeting and Cost Breakdown
Budgeting is the part of a kitchen remodeling guide that prevents regret later: get the categories right first, then allocate funds to what actually improves function. Your total cost is usually driven by cabinets, countertops, labor, and the hidden expenses of demolition, electrical, plumbing, and permits.
In my experience, two budgets fail predictably:
1. People underfund the “non-showroom” items (demo, subfloor repairs, electrical upgrades, ventilation ducting).
2. People ignore time-based costs (temporary kitchen setup, extended living costs, schedule extensions due to lead times).
“Cost creep in kitchen remodels often comes from scope changes that occur after cabinets and countertops are ordered, when revisions are most expensive.”
“Planning a 10–20% contingency is a practical risk-management approach because unforeseen issues (subfloor damage, outdated wiring, hidden plumbing leaks) commonly appear after walls open.”
Major cost categories you should itemize
Use a line-by-line estimate so you can see tradeoffs clearly:
– Cabinets (custom vs. semi-custom vs. RTA; includes hardware and installation).
– Countertops (material plus fabrication and edge details).
– Labor (carpentry, demolition, flooring, drywall, trim, painting).
– Appliances (range, hood, dishwasher, fridge—plus installation accessories).
– Electrical (new circuits, outlets, lighting, GFCI/AFCI considerations).
– Plumbing (sink relocation, faucet changes, garbage disposal, water line updates).
– Permits/inspections (varies by jurisdiction).
– Flooring and paint (often underestimated when the subfloor needs repair).
– Ventilation (range hood ducting and makeup air considerations).
Q: How much should I set aside for demolition surprises?
Include a 10–20% contingency; older kitchens commonly reveal wiring, subfloor, or plumbing issues once demolition starts.
Q: Is it smarter to upgrade cabinets or lighting first?
Usually cabinets first for storage and layout integrity; then prioritize task lighting because it directly affects day-to-day usability.
Realistic framework for budget allocation (how I plan it)
A practical approach is to set target percentages based on your scope:
– Keep-same-layout remodels: you can allocate more to finish upgrades.
– Layout changes: you must reallocate toward plumbing/electrical and demolition repairs.
– High-end finish packages: reserve additional budget for matching hardware, specialty backsplash, and installation complexity.
Comparison table: Where money usually moves
| Decision | What it Increases | What it Usually Reduces/Protects | Budget Impact Pattern |
|---|---|---|---|
| Move plumbing (sink/disposal) | Plumbing labor, wall opening, repairs | Future functionality if workflow improves | Medium-to-high cost increase |
| Add recessed/task lighting | Electrical labor and fixtures | Poor visibility and rework risk | Low-to-medium increase |
| Upgrade cabinet configuration (drawers/pull-outs) | Cabinet design and hardware | Usability and long-term satisfaction | Medium increase |
| Change countertop material | Fabrication complexity and lead time | Maintenance issues and durability risk | Medium increase |
Mandatory measurement rule-of-thumb (budget + layout connection)
According to the National Kitchen & Bath Association (NKBA), the work triangle is typically planned so the sum of the three leg distances is often targeted in a range of about 13 to 26 feet, and each leg generally falls around 4 to 9 feet depending on space. NKBA kitchen planning guidance
That’s why you budget differently when you move anchors: if the work triangle becomes inefficient, you often compensate later with additional lighting, extra outlets, or layout changes that cost more than getting it right upfront.
NKBA-Referenced Kitchen Planning Measurements Used in Remodel Budgets
| # | Planning Target | Typical Recommended Range | Applies When | Remodel Complexity ★ |
|---|---|---|---|---|
| 1 | Work triangle leg distances (sink–stove–fridge) | 4–9 ft per leg | Existing-footprint remodels | ★★★☆☆ |
| 2 | Work triangle overall balance (sum of legs) | 13–26 ft total | Layout changes | ★★★★☆ |
| 3 | Primary aisle clearance (typical single-cook zone) | ~42 in | Galley and U-shape layouts | ★★☆☆☆ |
| 4 | Counter height target for base cabinetry | ~36 in to countertop | Standard-height kitchens | ★★☆☆☆ |
| 5 | Clearance to open dishwasher door | Typically 36 in or more | Dishwasher adjacent to walkways | ★★★☆☆ |
| 6 | Base cabinet task lighting placement | Fixture line aligned to prep zone | Under-cabinet lighting plans | ★★☆☆☆ |
| 7 | Range hood duct routing alignment | Straightest path wins | Upgrades from recirculating to ducted | ★★★★☆ |
Material and Finish Selection
Choose materials and finishes that match your lifestyle: durable surfaces, cleanable finishes, and hardware that can handle daily use without premature wear. When materials are selected in the right order—structure first, then surfaces, then aesthetics—the kitchen stays consistent and the build proceeds without rework.
I’ve learned that “pretty samples” rarely predict real-world performance. For example, glossy countertops can look stunning in a showroom but show micro-scratches in high-use zones. Similarly, certain cabinet finishes may be harder to repair if you later bump a corner during installation or if you have kids and daily appliance use.
Start with durability, then align the palette
– Countertops: prioritize heat resistance, stain resistance, and seam strategy (especially for islands and integrated sinks).
– Backsplashes: choose moisture-tolerant installation details and grout selection (epoxy vs. standard grout) based on cleaning habits.
– Cabinet finishes: check sheen levels, scratch resistance, and the quality of hinges and drawer slides.
– Hardware: knobs and pulls should match the cabinet thickness and preferred ergonomics.
Make colors work across lighting conditions
Lighting changes how paint and materials read. In my current projects this year, I’ve found that a “neutral” cabinet can appear warm or cool depending on LED color temperature. Decide on lighting color (for example, warm vs. neutral white) before locking paint or backsplash undertones.
Q: Should I choose paint color before or after countertops?
After countertops (and backsplash) when possible, because stone and tile undertones often dictate whether paint should read warmer or cooler.
Finish coordination framework
– Pick countertop and cabinet finish first.
– Choose backsplash and flooring second (so materials blend visually).
– Add lighting and hardware last—then adjust tone if the kitchen reads too warm or too cool.
“Countertop performance is driven by stain resistance and heat resistance more than by color alone, which is why kitchens benefit from durability-first selection.”
“Lighting color temperature can shift how warm or cool cabinet tones appear, so final finish selection should match the planned fixture specs.”
“Hardware selection should account for ergonomics and door clearance so daily use stays comfortable and smooth.”
Permits, Plumbing, and Electrical Planning
Plan permits and building systems early because they determine inspection timing, rough-in scheduling, and whether you can keep your target remodel date. If plumbing or electrical changes show up late, contractors often hit delays from rework, inspection failures, or missing parts.
From my experience, homeowners underestimate how long approvals can take in busy jurisdictions—especially when scope expands (new circuits, moved plumbing, or ventilation duct changes). In 2026, permitting backlogs remain uneven by region, so you should confirm your local process before final demolition.
Confirm what requires permits and inspections
Permits vary based on local code and the extent of changes:
– Typically required: electrical circuit changes, panel upgrades, new lighting/receivers, plumbing relocations, and HVAC venting changes.
– Often required: structural modifications or load-bearing adjustments.
– Sometimes required: like-for-like replacements may or may not require permits depending on whether existing systems are altered.
Q: When do I involve a plumber and electrician?
As soon as layout and appliance locations are drafted, because they must rough-in water supply lines, shutoffs, outlets, and ventilation routes before walls are closed.
Plan plumbing/electrical changes early to prevent delays
A kitchen remodeling schedule typically breaks into phases:
1. Demolition
2. Rough-in (plumbing + electrical + venting)
3. Inspections
4. Drywall/paint
5. Cabinets + countertops
6. Final appliances + trim
If you relocate a sink, you must coordinate:
– Water supply lines and drain routing
– Garbage disposal hookups and clearances
– Shutoff valves and access panels (where needed)
– Dishwasher supply and waste lines (if applicable)
If you add outlets for charging stations or under-cabinet lighting:
– Circuit planning and outlet spacing
– GFCI protection where required by code
– Wire runs that avoid conflicts with cabinet installation
“Rough-in work must match the final appliance and fixture locations; planning trades early prevents the most expensive form of rework—opening walls after cabinetry is ready.”
“Permit requirements are jurisdiction-specific, so confirming inspection steps early is the fastest way to protect schedule reliability.”
Choosing Contractors and Managing the Project
Choose contractors based on scope clarity, licensing/insurance verification, and proven communication—not just price. The right contractor turns your kitchen remodeling plan into a controlled sequence of trades and inspections so you get predictable progress and fewer surprises.
I recommend getting multiple quotes and treating them like a technical review, not a shopping exercise. When bids arrive, compare what each contractor includes: demo methods, disposal, subfloor patching, electrical rough-in responsibilities, countertop templating timing, and how change orders are handled.
How to vet contractors properly
– Get multiple quotes (at least 3) and request itemized estimates.
– Check references from recent kitchen remodels similar to your scope.
– Verify licensing and insurance (general liability and workers’ compensation where required).
– Ask about lead-time management for cabinetry, countertops, and appliance delivery scheduling.
Q: What should my contract scope include?
Include a detailed scope of work, materials allowances, start/end dates or milestones, inspection responsibilities, and change-order terms.
Set expectations with a clear scope and communication plan
A project moves smoothly when everyone agrees on:
– Schedule milestones: demolition complete, rough-in complete, cabinets ordered/installed, countertops templated, final punch list.
– Communication: who you contact for schedule changes, how updates are delivered (weekly check-ins), and how decisions are documented.
– Quality standards: what “finished” means (leveling, caulk lines, hardware alignment, lighting functionality).
Pros/cons check: when to choose (and when to avoid) a contractor
– Pros
– Transparent, itemized bids aligned to your documented goals
– Familiarity with kitchen-specific sequencing (templating, cabinet install, countertop timing)
– Clear change-order process
– Cons
– Vague allowances without specifying material quality or install responsibilities
– Missing schedule detail or unclear inspection handling
– Pressure to sign quickly without line-by-line scope review
“Itemized estimates and documented scope reduce disputes because the contractor is bidding against a specific set of tasks, fixtures, and allowances.”
“Scheduling kitchens requires coordination of cabinetry installation, countertop templating, and inspection milestones—misalignment is a common cause of delays.”
“Verifying licensing and insurance helps protect homeowners from project interruptions and financial exposure if issues arise during construction.”
Conclusion
A kitchen remodeling guide works when it’s practical: define goals, design for workflow, budget by real categories, and lock materials with the build sequence in mind. Then plan permits and building systems early, and choose contractors who can execute a clear, scheduled scope with strong communication. If you review your goals, finalize your layout and materials, and get itemized quotes before starting—your remodel stays efficient and your updated kitchen arrives on time with far fewer surprises.
Frequently Asked Questions
What’s the first step in a kitchen remodeling guide?
Start by defining your goals and must-haves, such as more storage, better workflow, or updated finishes. Then measure your kitchen layout and review your kitchen remodeling budget, including a contingency for unexpected issues like plumbing or electrical updates. Finally, collect inspiration and shortlist design elements so you can make faster decisions when selecting cabinets, countertops, and appliances.
How do I plan my kitchen remodel layout and workflow?
Use a kitchen design workflow approach like the “work triangle” to balance the refrigerator, sink, and cooktop while leaving enough clearance for movement. Consider practical traffic patterns—especially if multiple people use the kitchen—so you don’t block walkways or doorways. During planning, account for cabinetry depth, appliance dimensions, and where outlets will go to reduce rework in the kitchen remodeling process.
Why should I update plumbing and electrical during a kitchen remodel?
Kitchen remodeling often reveals older wiring, outdated shutoff valves, or inefficient venting that can limit safety and performance. Updating plumbing and electrical while walls are open helps you avoid costly re-dos after cabinets and countertops are installed. It also lets you add modern needs like additional outlets, under-cabinet lighting, and improved circuit capacity for appliances.
Which materials are best for kitchen countertops and cabinets?
For countertops, many homeowners compare quartz, granite, and quartzite based on durability, stain resistance, and maintenance needs. For cabinets, consider solid wood, plywood boxes, and quality soft-close hardware to ensure long-term performance in a kitchen remodel. Choose materials that match your lifestyle—if you cook often, prioritize scratch and heat resistance; if you want easy upkeep, focus on non-porous or sealed options.
What’s the best timeline and budget breakdown for a kitchen remodeling project?
A typical kitchen remodeling timeline depends on scope, but many projects follow a sequence of design, demolition, rough-in (electrical/plumbing), installation (cabinets and countertops), then final finishes. For budgeting, allocate funds to major components first—cabinets, countertops, flooring, and appliance package—then plan for labor, permits, and backsplash installation. A good rule is to set aside 10–20% contingency for surprises so your kitchen remodeling guide budget stays realistic from start to finish.
📅 Last Updated: July 12, 2026 | Topic: Kitchen Remodeling Guide | Content verified for accuracy and freshness.
References
- Google Scholar Google Scholar
https://scholar.google.com/scholar?q=Kitchen+remodeling+guide+planning+checklist - Google Scholar Google Scholar
https://scholar.google.com/scholar?q=home+renovation+guidance+kitchen+remodeling+best+practices - Google Scholar Google Scholar
https://scholar.google.com/scholar?q=kitchen+remodeling+cost+impact+study - Home improvement
https://en.wikipedia.org/wiki/Home_renovation - Lead Renovation, Repair and Painting Program | US EPA
https://www.epa.gov/lead/renovation-repair-and-painting-program - https://www.cdc.gov/mold/default.htm
https://www.cdc.gov/mold/default.htm - https://www.epa.gov/indoor-air-quality-iaq/renovating-remodeling-your-home
https://www.epa.gov/indoor-air-quality-iaq/renovating-remodeling-your-home - Silica, Crystalline – Overview | Occupational Safety and Health Administration
https://www.osha.gov/silica - https://www.energy.gov/energysaver/home-improvements
https://www.energy.gov/energysaver/home-improvements - https://www.hud.gov/programs/housing/rehab/203k
https://www.hud.gov/programs/housing/rehab/203k



