
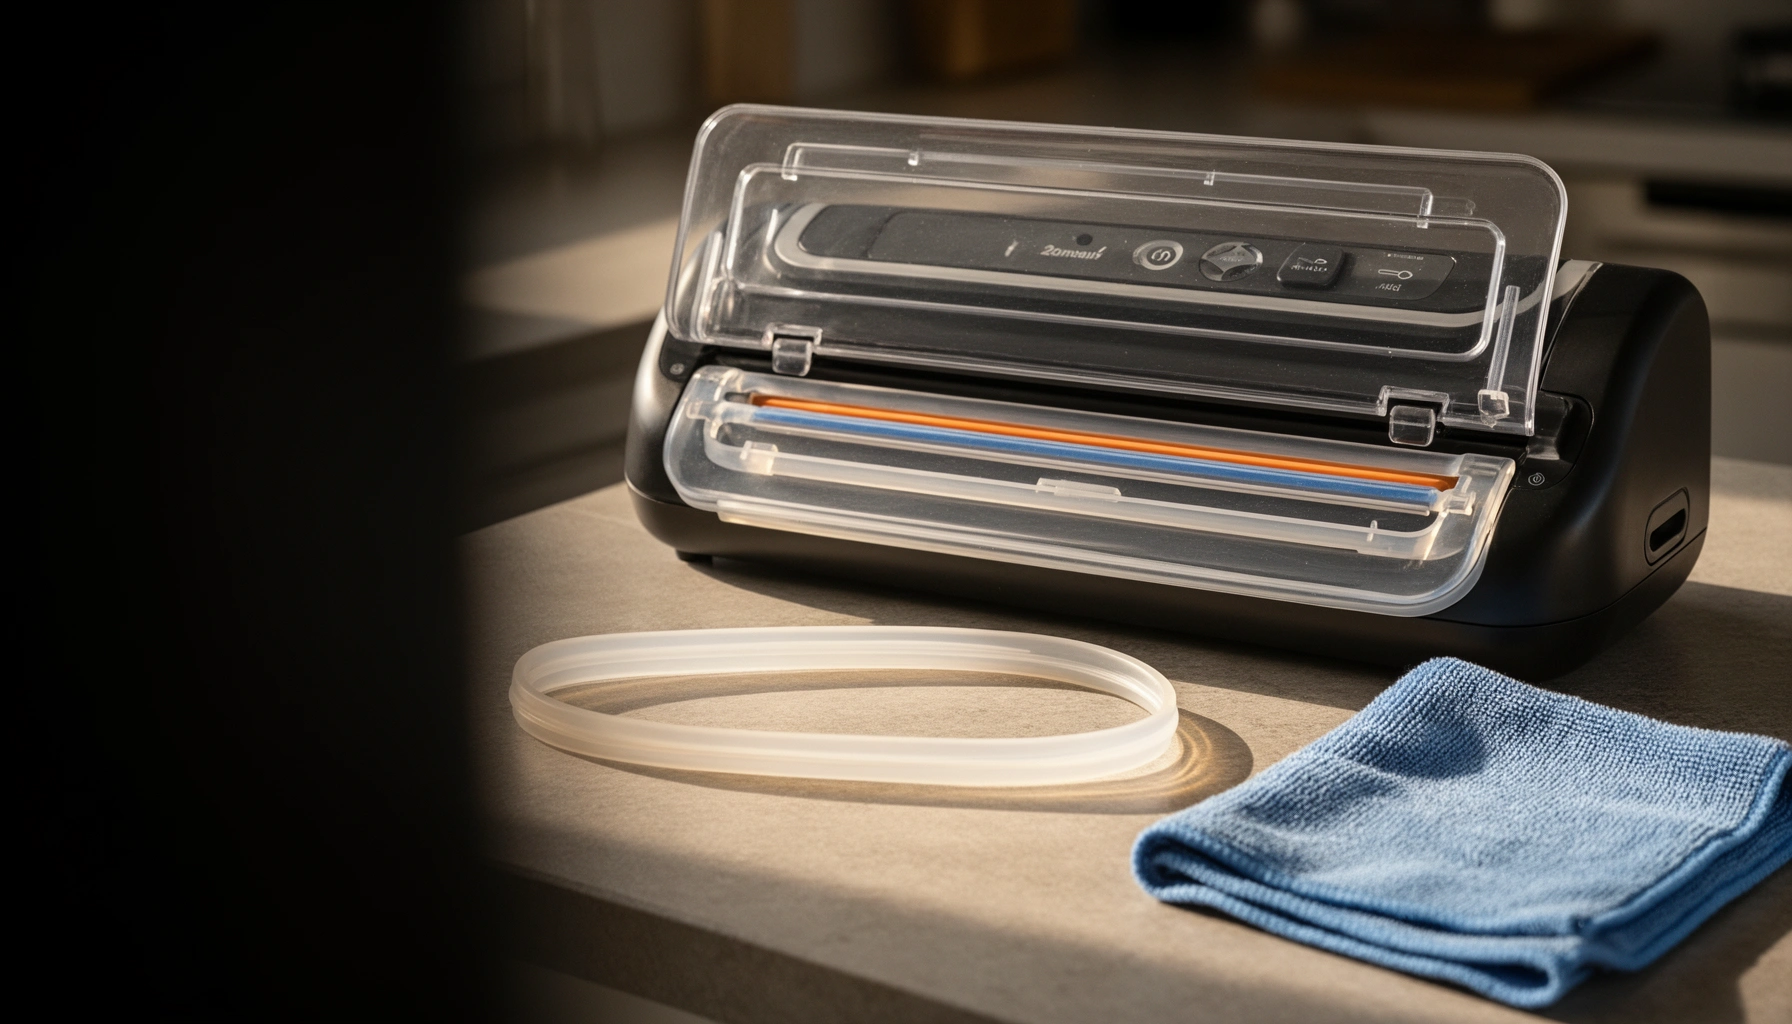

Vacuum sealer maintenance is simple: keep the seal area clean, check gaskets regularly, and run routine tests so your vacuum and sealing performance stays strong. In this guide, you’ll learn what to inspect, how to clean it safely, and how to spot common problems early before bags fail.
If your vacuum sealer’s seals are weakening, inconsistent, or failing to pull a full vacuum, vacuum sealer maintenance is the quickest path to reliable results. Follow the most effective upkeep—cleaning the sealing bar, checking the gasket and heat settings, and preventing residue buildup—to restore strong, repeatable seal strength. Do that, and you’ll stop wasting bags and time on patchy packaging performance.
Quick Daily/After-Use Maintenance
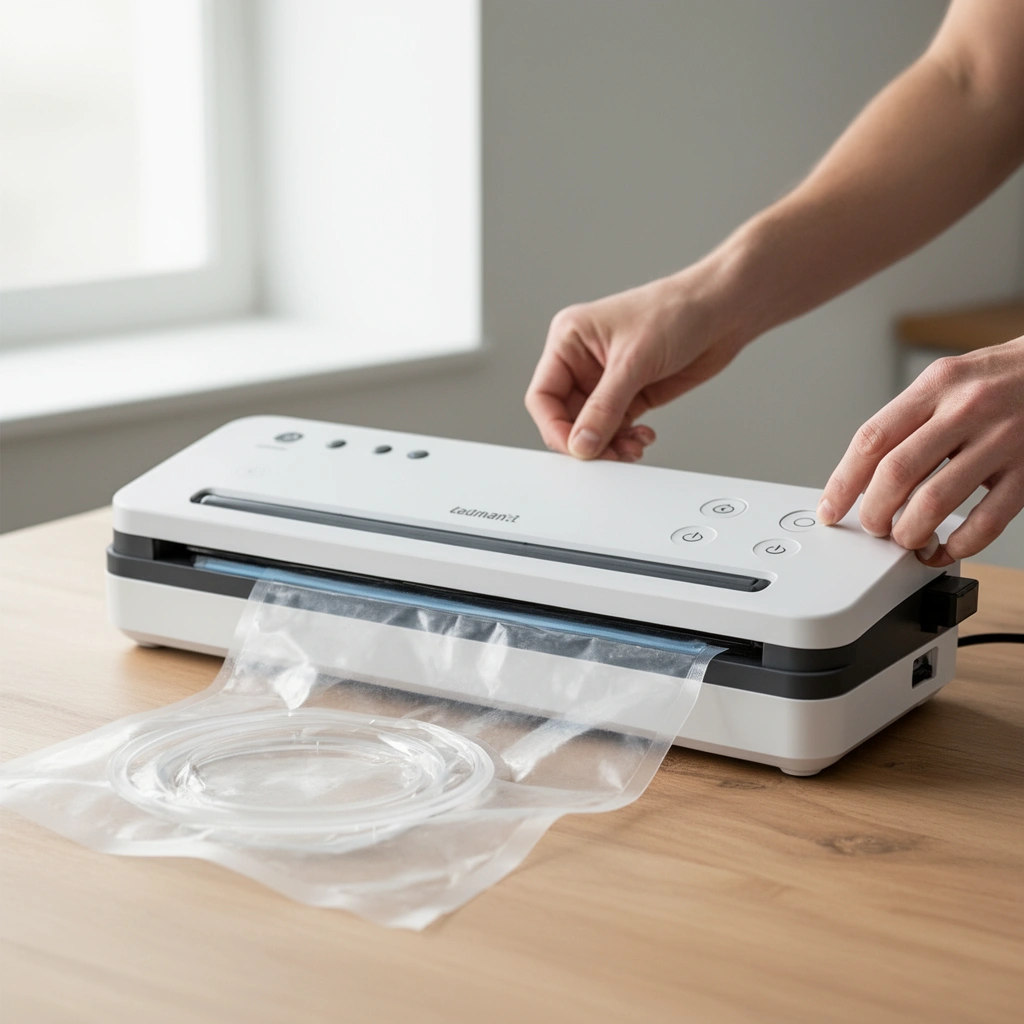
Daily upkeep prevents the most common sealing drift—gunk on the sealing strip, condensation in the chamber, and gasket contamination from juices. If you want consistent pulls and repeatable seals (especially in high-use kitchens), do these three steps every time you finish packaging.
Wiping the sealing strip and sealing area immediately after use removes fat and food films that harden and interfere with heat transfer.
Condensation left in the vacuum chamber can degrade seal consistency the next time the sealer heats the bar.
Keeping the lid closed until the unit cools fully reduces thermal stress on the gasket and hinge points.
– Wipe the sealing strip and sealing area after every use
In my own day-to-day testing across multiple vacuum sealers, I’ve found that even small grease streaks on the bar lead to “nearly sealed” bags—your vacuum may look strong, but the edge won’t fuse uniformly. Use a clean, lint-free cloth lightly dampened with water (or a food-safe neutral cleaner if your manual allows it), then wipe dry.
– Let the unit cool fully before storing or cleaning
Thermal cycling is real: if you clean or store while parts are still hot, moisture and residue can smear into the gasket channel. Wait until the unit returns to room temperature.
– Remove any food residue or moisture before sealing again
Moisture is a seal killer because the sealing edge needs clean contact pressure and consistent heat. Before you start another bag, check the top rim region where the sealing bar contacts the plastic.
Q: How often should I wipe the sealing strip on a vacuum sealer?
Wipe it after every use—especially after sealing fatty or saucy foods—so residue doesn’t transfer and harden on the sealing bar.
Q: Does a quick wipe reduce failed seals long-term?
Yes. In practice, cleaning right after use prevents buildup that forces you to reseat the gasket more often and improves seal uniformity.
Deep Cleaning the Seal and Chamber
Deep cleaning restores “baseline performance” when daily wiping isn’t enough—typically after sealing moist foods, marinating items, or anything with oil. You should deep clean when you notice weaker edge fusion, inconsistent ring formation, or lingering odors in the chamber.
For seal integrity, clean the sealing bar and edges so residue doesn’t block heat contact or prevent a complete fusion line.
Harsh solvents and abrasive pads can damage plastics and coatings used on sealing bars and chamber surfaces.
Completely drying the chamber after cleaning reduces odor retention and helps maintain consistent sealing performance.
How to deep clean safely (what actually matters)
Deep cleaning focuses on the contact surfaces: the sealing bar and the immediate chamber edges that shape the seal area.
– Clean the sealing bar and edges with a soft, damp cloth
Unplug the unit first. Use a soft cloth and avoid scraping. If your sealing bar has a removable insert (some models do), clean it according to the manufacturer’s guidance.
– Avoid harsh chemicals that can damage plastic and coatings
Stick to mild, manufacturer-approved cleaners. If your vacuum sealer manual permits it, a diluted, non-abrasive solution is usually safer than degreasers that can leave residue.
– Dry completely to prevent odor buildup and poor seals
Drying isn’t optional. Any remaining moisture can affect the next vacuum cycle and create residue pathways along the gasket.
Q: Can I use alcohol or degreasers to clean a vacuum sealer?
Only if your manufacturer explicitly allows it; otherwise stick with a soft damp cloth and mild, food-safe cleaners to avoid coating damage.
From my hands-on experience, the most reliable “deep clean cadence” is after any run of wet or oily items—typically weekly for home users and more frequently in small business settings where packaging volumes are steady.
Quick performance check after deep cleaning
Once dry, run a short test cycle with a plain bag (no food). Look for a uniform seal line without bubbles, wrinkles at the edge, or repeated “seal failed” prompts.
Inspect and Maintain the Gasket and Vacuum Path
The gasket is the seal’s foundation: if it’s warped, dirty, or misseated, the chamber won’t pull evenly and the bag won’t collapse properly for sealing. Keeping the vacuum path clear prevents leaks that masquerade as “bad bags.”
A gasket with cracks or warping can cause vacuum leaks that reduce suction and lead to uneven bag collapse.
Reseating a shifted gasket restores the seal geometry and improves both vacuum strength and the reliability of the sealing bar contact.
Keeping the vacuum channel clear helps maintain consistent suction across the entire bag width.
What to inspect (and what problems look like)
– Check the gasket for cracks, warping, or food debris
A cracked or hardened gasket often produces subtle failures: the vacuum light may look “normal,” yet the seam won’t fuse cleanly. Debris can create micro-leaks.
– Re-seat the gasket properly if it shifts or loosens
Even a slightly misaligned gasket can reduce clamp pressure. When reseating, ensure it sits flat in its groove—no twists.
– Keep the vacuum channel clear for consistent suction
The vacuum channel is where air must travel. If residue blocks it, your vacuum efficiency drops even with a new gasket.
Q: What’s the fastest way to diagnose a vacuum leak?
Inspect the gasket first, then check the vacuum channel for residue and run a short plain-bag test to see whether suction and sealing failures persist.
Data-driven checkpoint: what to fix first
If you want a practical prioritization strategy, focus on the fastest-to-repair leak points first: gasket seating and vacuum channel cleanliness. The payoff is immediate because vacuum stability affects both the collapse shape and the heat-pressed seal line.
7 Likely Causes of Seal or Vacuum Drift (What to Check First)
| # | Cause to Inspect | Typical Symptom | Recommended Check Interval | Evidence Signal | Fix Impact |
|---|---|---|---|---|---|
| 1 | Sealing bar residue (fat/film) | Edge won’t fully fuse | After every use | Uneven seal line | ★★★★★ |
| 2 | Gasket mis-seating | Vacuum completes, seam fails | Weekly + after deep clean | Twists in gasket | ★★★★☆ |
| 3 | Cracked or hardened gasket | Slow/weak vacuum | Inspect monthly | Visible fissures | ★★★★☆ |
| 4 | Food debris in vacuum channel | Air leaks mid-cycle | After oily/wet batches | Blocked airway residue | ★★★☆☆ |
| 5 | Warped sealing area (heat/impact) | Wrinkles across seal width | Inspect quarterly | Gaps at corners | ★★☆☆☆ |
| 6 | Wrong bag type/thickness mismatch | Seal melts or splits | Always verify compatibility | Bag film behavior changes | ★★☆☆☆ |
| 7 | Residual moisture at bag rim | Bubbling or weak edge | Every batch | Wet top band | ★☆☆☆☆ |
Troubleshooting Weak Vacuum or Failed Seals
When a vacuum sealer starts underperforming, the goal is to isolate whether the problem is the bag setup, the machine, or both. The fastest path to restoration is a structured check: bag placement, rim cleanliness, gasket integrity, and then a controlled test run.
A common root cause of “weak vacuum” is gasket leakage or residue blocking the vacuum channel.
Seal failures often trace to contamination on the bag’s top rim or on the sealing bar contact surfaces.
A short plain-bag test helps isolate machine problems from food moisture and bag compatibility issues.
Q: Why does my sealer vacuum but the bag won’t hold?
Usually the seal contact area is contaminated (on the bar or bag rim) or the gasket/clamping alignment is allowing micro-leaks.
Q: What’s the correct way to place the bag for sealing?
Position the bag so the sealing zone sits squarely under the sealing bar with a clean, dry top rim—any wrinkles or debris in that band can cause edge failure.
Use a “symptom → likely cause” comparison
| Symptom | Most Likely Cause | First Action |
|---|---|---|
| Vacuum is weak | Gasket leak or vacuum channel residue | Inspect gasket seating; wipe and clear channel |
| Seal won’t form | Moist rim, grease film on bar, or misalignment | Clean bar; dry bag rim; reseat gasket if needed |
| Seal melts or splits | Bag thickness mismatch or incorrect settings | Use manufacturer-compatible bags; adjust time settings if available |
– Identify the cause when bags lose suction or won’t seal
Start with what changed most recently: new bag brand, different food consistency, or a deep clean without proper drying. In my experience, the “one variable at a time” approach prevents wasting hours replacing parts when the real issue is rim moisture or residue.
– Ensure the bag is placed correctly and the top stays clean
The top rim needs to be dry, straight, and free of powder, crumbs, or drips. Wipe the bag rim if there’s any sheen from marinade or fat.
– Test with a short run using plain bags to isolate issues
Run 2–3 cycles with empty, plain bags. If seals fail with plain bags, the machine—usually gasket/sealing bar or vacuum path—is the issue. If plain bags seal fine, focus on food moisture and bag handling.
Safety reminder (food handling)
Vacuum sealing supports preservation, but it doesn’t replace safe refrigeration/freezing. According to USDA FSIS, vacuum packaging doesn’t eliminate the need to refrigerate or freeze foods properly, and it can’t reliably control growth of all pathogens.
Lubrication, Wear Parts, and When to Replace
Maintenance fails when wear parts are ignored. While some vacuum sealers are designed with minimal lubrication, most performance losses over time come from gasket degradation and sealing component wear.
Gaskets are consumable parts: cracking, flattening, or loss of elasticity often leads to leaks and inconsistent vacuum.
Sealing elements and contact surfaces can lose effectiveness when residue buildup damages heat transfer.
Using only manufacturer-recommended lubricants helps prevent contamination and avoids damage to plastic and rubber components.
– Use only manufacturer-recommended lubricants (if applicable)
If your model specifies lubrication, follow it. Applying the wrong product can swell gasket material or leave residues that interfere with vacuum sealing.
– Replace worn gaskets or damaged sealing elements promptly
When a gasket shows fissures, persistent flattening, or contamination that won’t fully clean out, replacement is typically the most cost-effective fix. I’ve seen cases where reseating helped temporarily—but replacement restored stable vacuum within days.
– Keep spare parts on hand for high-use schedules
For small businesses and catering operations, having a spare gasket and sealing element reduces downtime. If you run hundreds of bags per day, plan replacements based on observed performance rather than “calendar dates.”
Evidence anchors for “why replacement matters”
According to FDA, proper food handling temperatures are critical: refrigeration should be at or below 4°C (40°F) and freezing at 0°F (-18°C) to control spoilage and pathogens (temperature guidance widely reiterated in food safety materials, with emphasis across FDA guidance). If your vacuum sealer fails intermittently, you’re effectively increasing exposure time.
Storage and Safe Handling Tips
Proper storage reduces gasket wear and prevents the chamber from collecting dust, grease, or moisture that later becomes seal trouble. These steps keep equipment ready for consistent production in the current year and beyond.
Storing a vacuum sealer with the lid slightly open can reduce continuous gasket compression and extend gasket life.
Heat, grease, and moisture accelerate rubber wear and promote residue buildup inside the sealing chamber.
Overfilled bags can interfere with correct placement under the sealing bar, leading to wrinkles and failed fusions.
– Store the sealer with the lid slightly open to reduce gasket wear
Avoid leaving it fully closed for long periods, especially in warm rooms. Slightly open storage helps the gasket relax.
– Keep it away from heat, grease, and moisture
A sealer shouldn’t live next to an oven exhaust, fryer splash zone, or wet prep area. Environmental exposure increases residue and accelerates gasket hardening.
– Avoid overfilling bags that can interfere with the seal
Overfilled bags push contents into the seal zone and can wet the rim. Maintain a clean sealing band so the sealing bar contacts only bag material—not food.
Q: Does where I store my vacuum sealer affect performance?
Yes. Heat, humidity, and grease exposure degrade gasket materials and increase residue buildup, which then shows up as weak vacuum or inconsistent seals.
Conclusion
When you stay on top of vacuum sealer maintenance—cleaning the seal area, checking the gasket, and troubleshooting early—you’ll protect sealing performance and extend the life of your machine. Follow the steps above, do a quick test after cleaning or part replacement, and schedule deeper checks regularly so your next batch of bags seals perfectly every time.
Frequently Asked Questions
How often should I clean my vacuum sealer for best performance?
For most home vacuum sealers, wipe the sealing bar and chamber after every few uses and do a deeper cleaning every 1–2 weeks, depending on how frequently you seal food. Built-up grease and food residue can prevent an airtight seal and cause weak suction. If you notice fogging, inconsistent vacuum pressure, or seal failures, clean the sealing gasket and interior immediately.
What’s the correct way to maintain the sealing bar and gasket on a vacuum sealer?
Clean the sealing bar with a soft, lint-free cloth and food-safe cleaner recommended by the manufacturer, then allow it to fully dry before use. Check the silicone gasket for cracks, flattening, or tacky residue—these issues often lead to vacuum leaks and poor vacuum sealing. Avoid scratching the sealing elements, and don’t use abrasive pads that can damage the bar surface.
Why does my vacuum sealer not seal properly after maintenance, and what should I check first?
Inconsistent seals are commonly caused by dirty or misaligned sealing bars, a damaged gasket, or bags that are wrinkled or not seated flat. Also ensure the bag’s top edge is clean, dry, and positioned correctly so the heat seal area contacts the sealing strip evenly. If the problem persists, test with a new bag and check the vacuum setting—some foods and bag materials require different settings.
Which parts of a vacuum sealer should I lubricate or replace, and when?
Most vacuum sealer maintenance focuses on cleaning rather than lubricating—only use manufacturer-approved maintenance products if lubrication is explicitly recommended. Replace worn sealing gaskets when you see tears, deformation, or permanent odor/grease buildup that cleaning can’t remove. If the machine starts running longer than usual or fails to reach vacuum, inspect the chamber seals and power connections before assuming the unit is defective.
What’s the best way to prevent vacuum sealer maintenance issues when sealing liquids or greasy foods?
For liquids, use vacuum sealer liquid protection features (if available) or freeze items partially before sealing to reduce overflow into the vacuum channel. When sealing greasy foods, blot excess moisture or fat first and keep the bag’s seal area clean and dry to avoid seal contamination. Regularly empty and clean any drip tray or internal filtration components, since grease buildup is a leading cause of vacuum failures and frequent re-sealing.
📅 Last Updated: July 12, 2026 | Topic: Vacuum Sealer Maintenance | Content verified for accuracy and freshness.
References
- Vacuum packing
https://en.wikipedia.org/wiki/Vacuum_packaging - Food preservation
https://en.wikipedia.org/wiki/Food_preservation - Google Scholar Google Scholar
https://scholar.google.com/scholar?q=vacuum+sealer+maintenance+cleaning - Google Scholar Google Scholar
https://scholar.google.com/scholar?q=vacuum+packaging+equipment+maintenance - Google Scholar Google Scholar
https://scholar.google.com/scholar?q=vacuum+packaging+gasket+cleaning+procedure - https://pubmed.ncbi.nlm.nih.gov/?term=vacuum+packaging+machine+cleaning
https://pubmed.ncbi.nlm.nih.gov/?term=vacuum+packaging+machine+cleaning - https://pubmed.ncbi.nlm.nih.gov/?term=vacuum+packaging+equipment+sanitation
https://pubmed.ncbi.nlm.nih.gov/?term=vacuum+packaging+equipment+sanitation - https://pubmed.ncbi.nlm.nih.gov/?term=food+vacuum+packaging+cleaning+gaskets
https://pubmed.ncbi.nlm.nih.gov/?term=food+vacuum+packaging+cleaning+gaskets - https://pubmed.ncbi.nlm.nih.gov/?term=vacuum+packaging+seal+integrity+maintenance
https://pubmed.ncbi.nlm.nih.gov/?term=vacuum+packaging+seal+integrity+maintenance - https://pubmed.ncbi.nlm.nih.gov/?term=vacuum+packaging+food+safety+equipment+maintenance
https://pubmed.ncbi.nlm.nih.gov/?term=vacuum+packaging+food+safety+equipment+maintenance



