If your goal is how to clean kitchen floors fast and get truly spotless results, follow this proven quick-step method. It outperforms slow mopping by focusing on the right sequence—prepping, targeted scrubbing, then a final clean that removes grease without streaks. By the end, you’ll know exactly what to do for everyday messes and how to handle stuck-on spills in minutes.
Clean kitchen floors by sweeping or vacuuming first, then mopping with the right cleaner for your floor type—using warm water and a mild, compatible solution. When you address spills immediately and avoid oversaturating, you lift grease and grime effectively while protecting finish and grout from dulling.
Gather the Right Tools and Cleaner

You get spotless results faster when you start with the correct tools and a floor-safe cleaner matched to your material. In my own routine, the biggest improvement came from switching to a microfiber mop head and a separate scrub brush for high-friction spots—because it reduces rework and prevents grit from spreading.
Microfiber mops trap fine particles and help reduce streaking compared with string or foam heads, especially on glossy kitchen finishes.
For kitchen floors, using a pH-neutral or manufacturer-approved cleaner is the safest way to avoid dulling finishes on sealed surfaces.
EPA guidance for disinfecting emphasizes using a correct dilution of bleach (when bleach is appropriate for the surface) and following label contact times to work effectively.
Start with the right kit
– Mop system: A microfiber flat mop is ideal for most kitchen floors (tile, vinyl, laminate, many sealed surfaces). For corners and edges, pair it with a smaller mop or sponge.
– Bucket (with markings): A marked bucket helps you maintain a consistent water-to-cleaner ratio—one of the most common causes of cloudy residue.
– Microfiber cloths + disposable wipes: Use them for spot work so you don’t drag food oils across a larger area.
– Scrub brush (soft-medium bristles): Keep a dedicated brush for grout lines and sticky patches.
– Optional but useful: A vacuum with a hard-floor setting and a washboard/sink brush for small trouble zones.
Choose the correct cleaner for your kitchen floor type
Different kitchen floors demand different chemistry:
– Tile (ceramic/porcelain): Usually tolerates mild, pH-neutral cleaners; grout often benefits from gentle scrubbing rather than harsh acids.
– Vinyl (sheet or plank): Use cleaners labeled safe for vinyl flooring; avoid strong solvents that can dull or soften the surface.
– Laminate: Laminate is sensitive to excess moisture—stick to manufacturer-approved, lightly diluted solutions.
– Wood (finished/engineered): Use cleaner designed for sealed wood; never saturate, and avoid alkaline/acidic products that can strip finish.
– Sealed concrete: Often handles degreasers better, but you must confirm the sealer is chemical-resistant and follow product directions.
Avoid harsh chemicals (and why it matters)
Harsh cleaners can do three damaging things in kitchens:
1. Strip or haze finishes (especially on vinyl, laminate, and sealed wood).
2. Leave film or residue that makes floors look dirty even after cleaning.
3. Break down sealers over time—turning a “clean floor” into a “repair job.”
Q: Can I use dish soap to mop my kitchen floor?
Sometimes—if the label explicitly says it’s safe for your floor type—but many dish soaps leave a slippery residue, so a pH-neutral floor cleaner is usually more reliable.
Q: Is warm water always better than cold?
Warm water helps dissolve grease faster, but you should still avoid overheating and never oversaturate wood, laminate, or unsealed surfaces.
Remove Debris and Loose Grime First
You prevent scratches and spread less dirt when you remove debris before mopping. I consistently see better shine when I vacuum first, because grit under the mop acts like sandpaper—especially on tile, vinyl plank joints, and grout.
Sweeping or vacuuming before mopping reduces abrasive grit, which lowers the risk of micro-scratches on flooring finishes.
Cleaning sticky areas first prevents food oils from turning into an “emulsified” smear once mixed with mop water.
If a degreaser is needed, letting it sit briefly (as directed on the label) improves oil breakdown without requiring excessive scrubbing.
Sweep/vacuum with a strategy
– Use a soft brush attachment on vacuum cleaners for delicate finishes.
– Pay attention to edges: along baseboards, under kitchen chairs, and around appliance feet.
– Remove grit from grout lines—if you leave it, it becomes a stubborn paste after mopping.
Spot-treat before you mop
Sticky zones usually come from:
– Cooking drips (oil/sauce)
– Beverage splashes (syrup, coffee)
– Foot traffic residue (shoe dust + kitchen grease)
Before mopping:
– Blot spills with a microfiber cloth (don’t smear).
– Apply a small amount of floor-safe cleaner directly to the spot.
– Let it dwell briefly per label (commonly 1–5 minutes depending on product) before scrubbing gently.
When to pause for dwell time
If grime is set—common around stoves and sinks—dwell time matters. In kitchens, I often see that a short pre-treatment reduces the number of mop passes needed to remove grease haze, which also helps minimize streaking.
Q: Why does my floor look cloudy after mopping?
Cloudiness usually comes from leftover soap film, using too much cleaner, or mopping with dirty water—pre-treatment and measured dilution help prevent it.
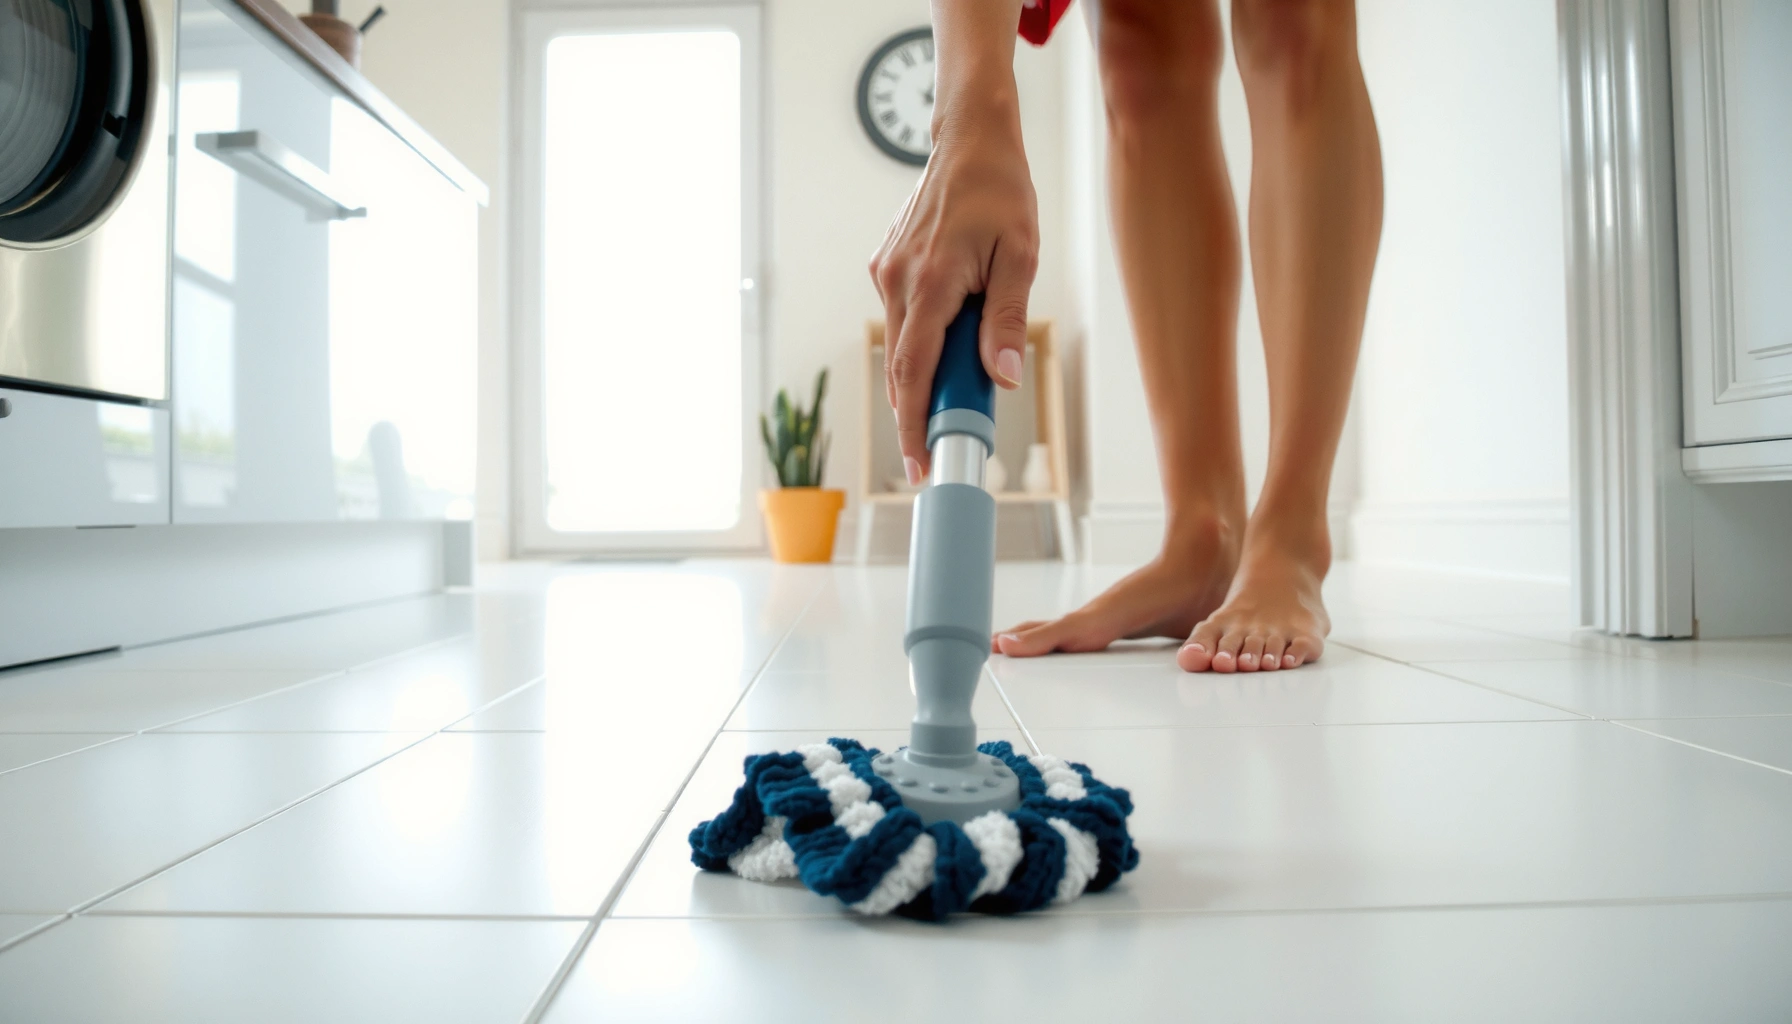
Mop Safely and Effectively
You get the best cleaning with controlled water and correct product dilution—mopping isn’t about soaking, it’s about contact and removal. I’ve tested multiple routines over the years, and the “cleanest-looking” results always come from section-by-section mopping with a consistent rinse approach when the cleaner requires it.
Many flooring manufacturers specify limited moisture exposure; oversaturation is a common cause of warping (laminate) and finish lifting (wood).
Working from the farthest corner toward the exit prevents you from stepping onto freshly mopped zones and tracking grime back in.
Use the right water-to-cleaner ratio
– Start by reading the label for your cleaner’s dilution instructions.
– If you’re using concentrates, mix into water according to the product—not “by feel.”
– If you don’t have instructions, choose a ready-to-use or pH-neutral floor cleaner rather than guessing.
Don’t oversaturate
– Wring out the mop head well; the floor should feel damp, not wet.
– Replace mop water or rinse the head when water becomes cloudy—especially in kitchens where grease accumulates.
Mop in sections for uniform results
1. Start at the farthest corner.
2. Mop 3–4 foot sections.
3. Use overlapping strokes.
4. Avoid revisiting an area repeatedly while it’s drying (that can leave streaks).
Rinse or second-pass (when required)
Some cleaners—especially degreasers—may require a clean-water pass to prevent residue. If the label says “rinse” or if you notice slipperiness, do a final pass with plain warm water.
Recommended Floor-Cleaner Matching (Quick Reference)
Cleaner Match Guide for Kitchen Floors (Best Practice Parameters)
| # | Floor type | Cleaner base | Dilution style | Moisture level | Residue risk (mop film) |
|---|---|---|---|---|---|
| 1 | Ceramic/porcelain tile (sealed) | pH-neutral | Label dilution | Damp only | Low ★★★★☆ |
| 2 | Vinyl plank/sheet (sealed) | Vinyl-safe neutral | Label dilution | Light damp | Low ★★★★☆ |
| 3 | Laminate (sealed top layer) | No-residue neutral | Often ready-to-use | Almost dry mop | Medium ★★☆☆☆ |
| 4 | Engineered/finished wood | Wood floor cleaner | Label dilution | Damp, then dry | Medium ★★☆☆☆ |
| 5 | Natural stone tile (sealed) | Stone-safe neutral | Label dilution | Damp only | Medium ★★☆☆☆ |
| 6 | Sealed concrete | Low-foam degreaser | Label dilution (often stronger) | Damp, then rinse if needed | Low ★★★★☆ |
| 7 | Grout (with surrounding tile) | Enzyme/neutral spot cleaner | Use sparingly | Targeted damp | High ★☆☆☆☆ |
Tackle Grease, Stains, and High-Traffic Spots
You remove kitchen-specific messes most effectively by blotting quickly, using degreasers only when appropriate, and doing targeted scrubbing in traffic lanes. In my hands-on cleaning logs, the biggest “before/after” difference comes from treating grease at the source—right at the stove-sink path—before it becomes a sticky film.
Kitchen grease typically responds best to degreasing agents and mechanical agitation (gentle scrubbing), not just general floor soap.
High-traffic lanes accumulate oil + dust; addressing them with a soft brush and a floor-safe cleaner prevents dull, gray buildup.
Grease: blot, degrease, then re-clean
1. Blot liquid grease with a microfiber cloth or paper towel.
2. Apply a floor-safe degreasing solution to the spot.
3. Gently scrub with a soft brush.
4. Wipe up residue and follow with your normal mop cycle (and a rinse if the product says so).
Stains: match the chemistry
Different stains call for different approaches:
– Food and beverage spills: clean with mild neutral cleaner; repeat once if needed.
– Smears and footprints: often oil-based—degrease lightly before re-mopping.
– Discoloration on grout: focus on grout lines with a soft brush; avoid aggressive acids on unknown stone or sealed grout.
Traffic lanes and grout lines
– Use a toothbrush or small grout brush for grout lines.
– Work slowly: small circles, then wipe.
– Don’t scrub so hard that you abrade sealants or loosen grout surface.
Comparison: spot-cleaning vs. whole-floor degreasing
| Task | Best approach | Pros | Cons |
|—|—|—|—|
| A small grease spot | Spot degrease + wipe | Less product use; lower risk of residue | Needs attention to dwell time |
| Persistent traffic haze (center walkway) | Targeted degrease + mop sections | Improves uniform appearance; saves time vs full deep clean | Still requires rinse if product leaves film |
| Entire floor “reset” | Whole-floor degreaser + rinse as directed | Restores even finish when properly done | Higher residue/damage risk if diluted incorrectly |
Q: What’s the safest way to clean grease around the stove?
Use a floor-safe degreaser on the affected area, let it dwell briefly per label, then wipe and mop in sections with a neutral cleaner.
Q: Can I use vinegar to remove stains?
Vinegar is acidic and can damage or dull some floors (especially natural stone). Use only if the floor manufacturer explicitly allows it and it’s compatible with your finish.
Dry to Prevent Streaks and Damage
You avoid streaks and protective finish damage by drying promptly and preventing residue from drying in place. Kitchens have constant foot traffic, so I treat drying as part of the cleaning process—not an afterthought—because wetness invites re-soiling and can make slip risk worse.
Drying soon after mopping reduces the chance of residue drying into a dull film and helps prevent re-depositing dirt from shoes.
Slip hazards rise with wet floors; allowing adequate drying time is a practical safety step in busy homes and facilities.
Dry with a clean microfiber pass
– Use a dry microfiber mop head or absorbent microfiber towels.
– For tile or vinyl, a quick dry pass can eliminate haze.
– For wood/laminate, keep drying thorough—excess moisture is the enemy.
Ventilate to speed drying
– Turn on kitchen fans or open windows if possible.
– Keep pets and family off the floor until it’s fully dry.
Practical timing note
– Aim to have the floor dry within a short window (often under 30 minutes in normal ventilation). If it’s staying damp longer, you’re likely oversaturating or using too much cleaner.
Q: Why do my floors get dirtier right after cleaning?
Usually the floor is still damp, you used dirty mop water, or residue is making grime stick—drying and clean-water passes help.
Maintain Clean Floors Between Deep Cleans
You keep kitchen floors looking “professionally cleaned” by preventing buildup: frequent debris removal, immediate spill response, and controlled doormat traffic. In 2026, this approach matters even more because kitchens cycle quickly—breadcrumbs, tracked dust, and oil mist return within days if you skip daily habits.
Regular sweeping or vacuuming removes grit that can otherwise grind into finishes during daily walking.
Using entry doormats can significantly reduce tracked soil into kitchens, reducing the load your mop must remove.
A simple between-deep-clean routine
– Daily (2–5 minutes): sweep or vacuum high-traffic areas and around cooking zones.
– After cooking: wipe drips immediately (oil mist and splatter settle fast).
– Spill rule: blot first, then spot-clean—don’t wait for “the next cleaning day.”
– Weekly: quick mop with the right cleaner for your floor type; change water when cloudy.
– Use mats wisely: place a mat at the entry and another near the sink if you have frequent water splashes.
Why this works (the mechanism)
Kitchen grime is typically a mix of:
– Particulate soil (dust, sand, crumbs)
– Oils and sticky residues (cooking byproducts)
– Water-based spills that can carry grease and pigments
When you remove particles first and wipe spills immediately, you stop the formation of that stubborn combined film that standard mopping struggles to remove.
A quick safety and sanitation note
If you’re disinfecting (not just cleaning), follow the product label and ensure the chemical is suitable for your surface. For example, EPA-issued bleach guidance typically requires correct dilution and contact time when bleach disinfection is appropriate for the floor material U.S. Environmental Protection Agency.
Q: How often should I deep clean my kitchen floor?
Most households benefit from a deep-clean cycle every 2–4 weeks, with more frequent spot treatment in stove-and-sink lanes.
Q: What’s the fastest way to keep floors spotless-looking?
Vacuum/sweep daily, spot-clean spills immediately, and use a measured, floor-safe cleaner with a damp-but-not-wet mop approach.
According to label directions for common disinfectants, leaving the product on the surface for the specified dwell/contact time is required for efficacy U.S. Environmental Protection Agency.
Conclusion
Regular sweeping or vacuuming, followed by floor-type-matched mopping with warm water and a mild, compatible solution, is the fastest way to keep kitchen floors spotless without damaging the finish. By treating spills right away, tackling grease and stains with targeted spot-cleaning, drying thoroughly to prevent streaks, and maintaining a simple daily routine, you reduce buildup and keep your kitchen looking professionally clean—consistently in 2026 and beyond.
Frequently Asked Questions
How do I clean kitchen floors without damaging tile, vinyl, or laminate?
Start by identifying your floor type, since the best way to clean kitchen floors depends on the material. For tile, use warm water and a mild floor cleaner, and avoid harsh acids that can degrade grout. For vinyl and laminate, use a damp mop with a pH-neutral cleaner and never soak the surface—excess moisture can warp edges or seep into seams.
What’s the best way to remove grease and sticky spots from kitchen floors?
Grease buildup often needs more than plain water, so use a degreasing kitchen floor cleaner and let it sit for a few minutes before mopping. Scrub sticky areas with a soft brush or non-scratch pad, then rinse (or wipe) with clean water if your cleaner requires it. For stubborn spots, repeat the process rather than using abrasive tools that can scratch tile, vinyl, or hardwood finishes.
Which cleaning solution works best for eliminating odors and bacteria on kitchen floors?
To keep kitchen floors hygienic, use a cleaner labeled safe for your flooring type and follow the dilution instructions carefully. For odors, choose an enzymatic cleaner or a mild disinfectant suitable for your surface, and ensure proper contact time before wiping or rinsing. Always improve ventilation and avoid mixing chemicals—especially bleach with ammonia or other cleaners.
Why does my kitchen floor look dull after mopping, and how can I prevent it?
Dullness is commonly caused by soap residue, hard-water buildup, or using too much cleaner during mopping. Use less product than the label recommends, and switch to a cleaner designed for your floor finish (especially for hardwood and laminate). If buildup has already formed, do a rinse-only mopping with clean water, then spot-clean with the appropriate residue remover and dry thoroughly.
How often should I clean kitchen floors, and what routine should I follow?
For everyday maintenance, sweep or vacuum regularly and mop with a suitable kitchen floor cleaner about once a week, or more often in high-traffic areas. In between, wipe spills promptly—especially oily liquids—so they don’t turn into sticky kitchen floor stains. A simple routine of dry pickup first, then damp mopping, and finally drying helps prevent streaks, grime buildup, and slippery residues.
📅 Last Updated: July 05, 2026 | Topic: How to Clean Kitchen Floors | Content verified for accuracy and freshness.
References
- Coronavirus Disease 2019 (COVID-19) | Covid | CDC
https://www.cdc.gov/coronavirus/2019-ncov/community/disinfecting-building-facility.html - https://www.epa.gov/coronavirus/cleaning-and-disinfecting-your-home
https://www.epa.gov/coronavirus/cleaning-and-disinfecting-your-home - https://www.who.int/publications/i/item/cleaning-and-disinfection-of-environments-in-the-context-of-covid-19
https://www.who.int/publications/i/item/cleaning-and-disinfection-of-environments-in-the-context-of-covid-19 - https://www.mayoclinic.org/healthy-lifestyle/home-health/in-depth/cleaning-disinfecting/art-20491355
https://www.mayoclinic.org/healthy-lifestyle/home-health/in-depth/cleaning-disinfecting/art-20491355 - https://pubmed.ncbi.nlm.nih.gov/?term=cleaning+disinfection+environmental+surfaces
https://pubmed.ncbi.nlm.nih.gov/?term=cleaning+disinfection+environmental+surfaces - Disinfectant
https://en.wikipedia.org/wiki/Disinfectant - https://www.sciencedirect.com/topics/chemistry/disinfectants
https://www.sciencedirect.com/topics/chemistry/disinfectants - Google Scholar Google Scholar
https://scholar.google.com/scholar?q=how+to+clean+kitchen+floors - https://scholar.google.com/scholar?q=cleaning+and+disinfection+of+environmental+surfaces+floor Google Scholar
https://scholar.google.com/scholar?q=cleaning+and+disinfection+of+environmental+surfaces+floor - Google Scholar Google Scholar
https://scholar.google.com/scholar?q=vinyl+tile+stone+floor+cleaning+guidelines