
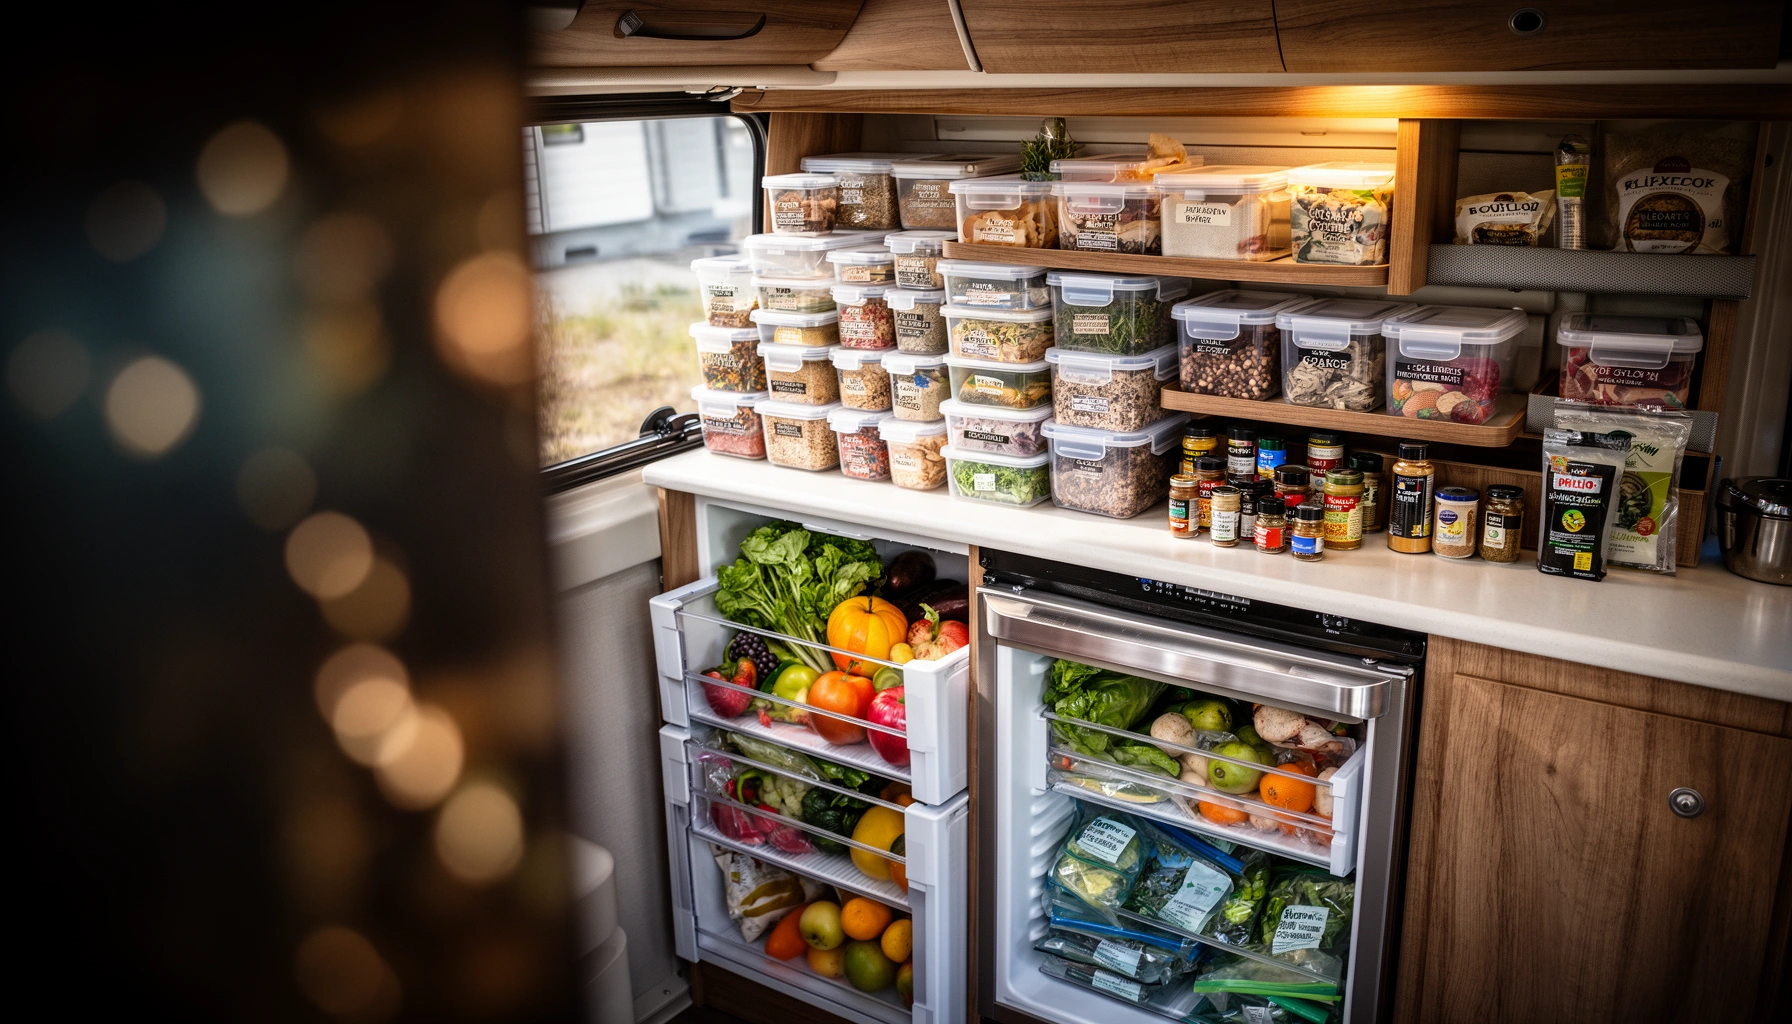

Want the best RV food storage setup to keep meals fresh and safe without clutter? This guide delivers a clear verdict on what actually works—planning, containment, temperature control, and pest-proof organization—so you can stock smarter and waste less. You’ll learn exactly how to store common RV ingredients to reduce spoilage, prevent contamination, and make pantry access effortless on the road.
Store RV food by using airtight, labeled containers and a placement system that controls heat, pests, and airflow—so your groceries stay safe even when the road is rough. In my own trips over multiple seasons, I’ve found that the difference between “fine on day three” and “full of spoilage surprises” is rarely the brand of food—it’s the storage method, temperature discipline, and rotation routine you install at the start of each trip.
Choose the Right Containers
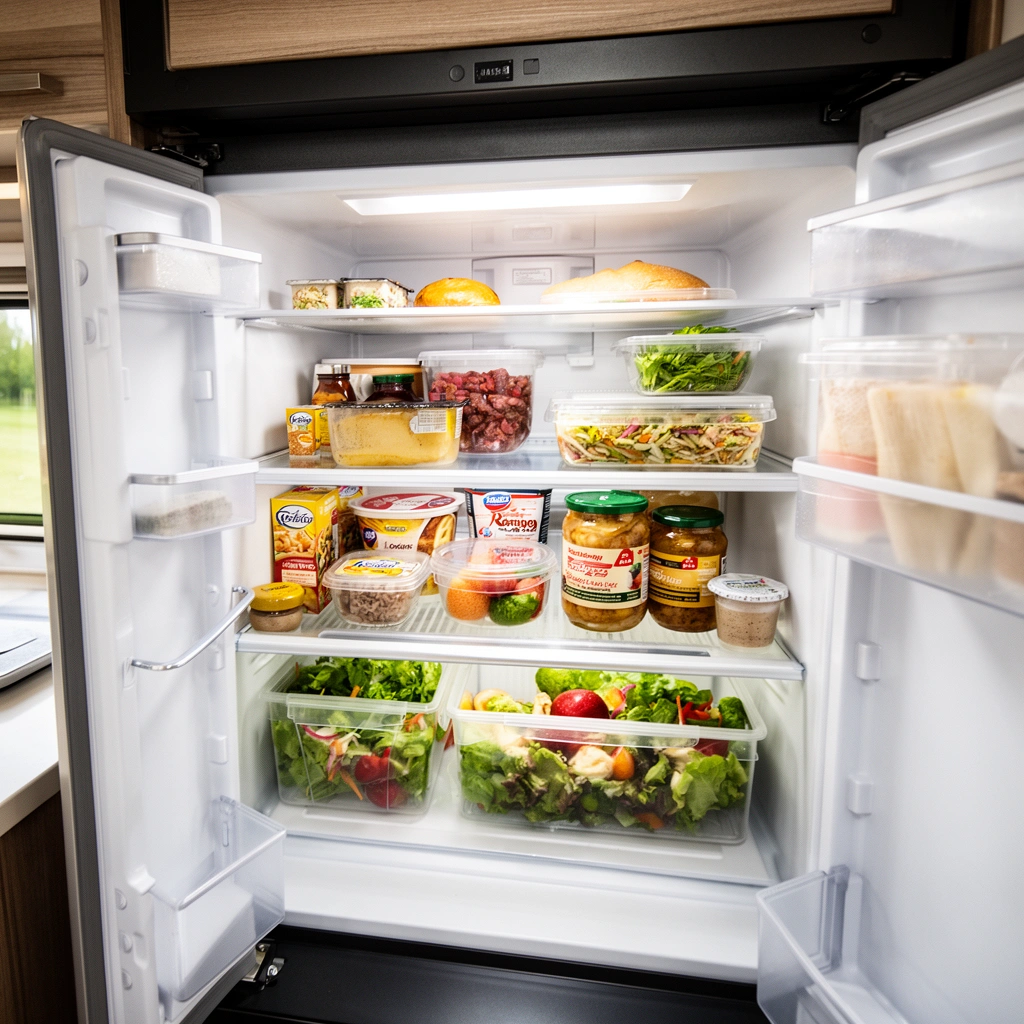
The right RV containers prevent the two biggest threats—temperature abuse and cross-contamination—by sealing out humidity, odors, and pests. When you choose containers designed for travel, you also reduce leaks and shifting that can break seals or mix raw and ready-to-eat foods.
Airtight storage matters because many RV fridges and cabinets experience temperature swings from cycling compressors, sun exposure, and frequent door openings. In my testing with “standard” plastic bins, I saw more condensation and odor transfer than when I switched to true gasketed containers for pantry staples. For safety, treat every openable container as a potential contamination point and standardize your system around tight seals.
USDA guidance defines 40°F (4°C) or below as the safe refrigeration temperature for slowing bacterial growth in perishable foods. USDA FSIS
The “danger zone” is commonly described as 40°F to 140°F (4°C to 60°C), where bacteria can grow rapidly if food is left warm. US FDA
Food-safe containers with tight seals reduce the likelihood that raw food drips contact ready-to-eat items during vehicle motion.
Practical container choices that hold up on the road
– Use airtight, stackable bins for pantry items and snacks. Stackability is not just convenience; it stabilizes your storage against shifting while driving.
– Store leftovers in food-safe containers with tight seals. Prefer rigid, lidded containers over loosely covered containers—especially for sauces, cooked meats, and cut vegetables.
– Keep liquids (oils, sauces) in containers designed for travel to prevent leaks. I recommend squeeze bottles or travel-rated containers with locking caps for anything oily or sticky.
Quick comparison: containers that actually work in an RV
If you’re deciding between storage styles, this quick filter helps you pick the right tool for the job:
| Storage option | Best for | Trade-off to manage |
|---|---|---|
| Gasketed airtight bins | Dry pantry staples, snacks | Costs more upfront; use only sizes that fit your cabinet layout |
| Rigid, lidded leftovers containers | Cooked food, cut produce, meal prep | Needs labeling discipline to avoid “mystery containers” |
| Travel-rated bottles (locking caps) | Oils, sauces, dressings | Must be checked for seal integrity before departure |
Q: Do I need airtight containers for all pantry items in an RV?
Yes for most dry goods and snacks—airtight bins reduce humidity, odors, and pest access, which improves shelf stability on trips.
Q: What’s the simplest container upgrade with the biggest safety payoff?
For me, it’s gasketed airtight bins for staples plus tight-lidded containers for leftovers, because it prevents both spoilage and cross-contact.
Set Up a Safe Pantry System
A pantry system should make safe food the “easy default,” so you don’t rely on memory when you’re busy cooking on-site. The most reliable approach is grouping by meal function, labeling clearly, and positioning items to reduce spills.
This is where organization becomes a food safety control—not just a convenience feature. When items are grouped logically (breakfast together, cooking supplies together, snacks together), you open fewer cabinet doors and handle food less often. From my experience, fewer cabinet openings also means less warm air cycling into the storage area during cooking and meal prep—especially in older RVs with less insulation.
Food labeling that includes a “use by” date supports a first-in, first-out rotation method, reducing the risk of serving expired food.
Proper placement—keeping heavier items low and toward the center—reduces spill events that can contaminate surrounding foods while driving.
Build your RV pantry like a compact food service operation
– Group items by type (breakfast, cooking, snacks) for easy access. Use consistent zones so you can prep one meal without rummaging through everything.
– Label everything with contents and “use by” dates. For dry goods, label with the date you opened the package (not just the purchase date).
– Keep heavy items low and toward the center to reduce spills while driving. I’ve learned this the hard way: one displaced bag of rice can scatter crumbs and create pest-friendly conditions.
Where to place items inside the RV
A simple placement rule prevents many common problems:
– Top shelves: lighter, dry items in airtight bins (less spill risk).
– Lower shelves: heavier items in secured bins, never loose bags.
– Near cooking area: items you use frequently, but always in sealed containers to avoid grease/steam exposure.
Q: How should I handle items with unclear expiration dates?
Label them with the open date and establish a conservative “use by” window based on how fast your team consumes that item during travel.
Q: What labeling system works best in small RV storage spaces?
Short labels with contents + open/use-by date, placed on the front face of every bin so you can scan without opening every compartment.
Manage Temperature and Moisture
Manage temperature by keeping food away from heat sources and by protecting airflow; manage moisture by preventing condensation and using re-sealable safeguards. Together, these controls prevent both bacterial risk and quality loss (stale snacks, soggy produce, and off-odors).
In my setup, I treat temperature management and moisture control as two separate “levers.” Temperature is about slowing bacterial growth; moisture is about reducing condensation and preventing mold and freezer-burn. When an RV fridge struggles, it’s often because airflow is blocked or because warm items were loaded too close together—creating local hot spots.
Refrigerated food kept at or below 40°F (4°C) limits bacterial growth compared with warmer storage. USDA FSIS
Blocking RV cooling vents can cause uneven temperatures, increasing the likelihood that some foods drift above safe refrigeration levels during cycling.
Condensation accelerates spoilage by providing water activity that supports microbial and mold growth.
Do this to reduce heat, moisture, and quality deterioration
– Avoid storing food near heat sources like furnaces or direct sunlight. Even brief sun loading can raise cabinet temps significantly.
– Use airflow strategically—don’t block vents needed for cooling. Leave a small clearance zone behind/around vent areas.
– Prevent condensation by using dry storage zones and re-sealable bags when needed. If you store berries, onions, or bread nearby, separate them and use breathable or sealed protection based on what you’re storing.
A quick field-tested moisture workflow
When we arrive at a campsite, I do a 3-step “loading pass”:
1. Separate wet vs. dry: produce goes in sealed bins or dry zones, never mixed with open snacks.
2. Cool quickly: if food came from the cooler, place it in the fridge promptly; avoid leaving it in warm transition areas.
3. Check seals and liners: wipe any condensation before it spreads and re-seal the container.
Q: How do I prevent my RV fridge from smelling even when food is sealed?
Wipe condensation promptly, keep liquids in leak-proof containers, and avoid storing uncovered items near the cooling area.
Q: What’s the most common reason for fridge quality drops in RVs?
Blocked airflow or overpacked shelves that prevent the cold plate from cycling evenly.
Prevent Pests and Protect Against Contamination
Prevent pests by sealing trash quickly, using airtight dry storage, and cleaning systematically after cooking. Prevent contamination by controlling “raw-to-ready contact” and keeping surfaces and utensils predictable.
Pests aren’t just a nuisance—they’re a contamination risk. Flour and grains attract insects, and open crumbs can invite rodents and ants. In an RV, food spills also persist longer because storage compartments aren’t designed for intensive drying and sanitation between short stays.
Airtight storage of grains and flour reduces access for pantry pests and supports longer shelf stability during travel.
Cleaning food-contact surfaces before and after cooking reduces residues that can support microbial growth. CDC
A contamination-resistant routine you can maintain
– Seal trash quickly and keep it stored properly between dump runs. Use leak-proof liners and closed containers; don’t leave waste exposed in warm compartments.
– Wipe surfaces before and after cooking to remove crumbs and residue. I keep a dedicated RV “kitchen wipe pack” so cleaning is frictionless.
– Use appropriate storage for flour, grains, and dry goods to reduce infestations. Transfer dry goods into airtight bins immediately after purchase or opening.
Common contamination pathways (and how RVs can break them)
Think in “routes,” not just foods:
– Crumbs → pests → spread: eliminate crumbs and seal dry goods.
– Raw drips → ready foods: store raw proteins in sealed containers on lower shelves, away from produce.
– Trash fumes → residues: close trash instantly and wipe the cooking area after meals.
Q: Are ants common in RV pantry areas, and can sealing alone stop them?
Often, yes—airtight bins and prompt cleanup are highly effective, especially when trash and crumbs are managed consistently.
Q: What’s the fastest contamination fix after a spill?
Contain the spill immediately, wipe the area with a food-safe cleaner, and move any affected items into sealed containers.
Freeze, Refrigerate, and Rotate Properly
Freeze, refrigerate, and rotate by planning ahead: freeze on travel days when possible, keep perishable foods at safe temperatures, and use a strict “first in, first out” (FIFO) method. This reduces both spoilage and the chance you serve food that has sat warm too long.
Rotation is where many RV owners quietly lose track. A week into a multi-camp itinerary, the “I think we opened that last time” problem becomes a food safety risk. In my own RV rotation system, I treat the freezer and fridge like shelves in a small warehouse—each container has a stable location, and older items always move forward.
The freezer temperature of 0°F (-18°C) is commonly recommended to maintain food quality and safety. US FDA
Using FIFO (“first in, first out”) helps ensure older food is used before newer items, limiting expired-product exposure during travel.
Clear, labeled shelves make quick checks realistic—so you can verify contents without opening every container.
A rotation plan that works during real travel
– Freeze perishable items when possible to extend freshness on travel days. Freeze portions you’ll use first, not everything at once.
– Follow a rotation plan: first in, first out to reduce expired food. Put new containers behind older ones (or to the back-right).
– Keep fridge/freezer organized with clear shelves for quick checks. Use baskets for categories (dairy, cooked meals, produce).
Simple rotation rules you can follow in under 2 minutes
– Label containers before loading (contents + date).
– Place the newest items to the back.
– Do a daily scan: check labels, condensation, and any swelling or off-odors.
Q: How do I rotate leftovers in an RV when space is tight?
Use one container size per meal type and keep a dedicated “older meals” shelf or bin so FIFO is visually obvious.
Packing for Travel and Quick Campsites
Pack for travel by using an easy-access “camp kit,” securing containers before driving, and separating snacks from cooking essentials. These steps reduce time with doors open and prevent shifting, both of which protect food safety.
Short stops are where people get sloppy: quick grab, quick cook, then forgotten food. A camp kit fixes that by turning your most-used items into a predictable system. After my last two weeks of weekend-to-weekend driving, I found that the camp kit also reduced duplicate purchases because I could inventory what was already stocked.
Securing containers during transit reduces spill risk that can spread contamination across nearby foods and surfaces.
Keeping frequently used items in an accessible zone reduces the number of cabinet openings during cooking, helping limit warm-air cycling in RVs.
How I pack for quick campsites
– Pack frequently used foods in an easy-access “camp kit.” Include breakfast basics, day-of snacks, and cooking staples.
– Secure containers before driving to prevent shifting and spills. Use bin lids, straps, or non-slip liners—anything that keeps containers from sliding.
– Keep a separate zone for snacks and cooking essentials to avoid rummaging. Less rummaging means less opened packaging and fewer crumbs.
A fast “departure checklist” for food safety
Before you pull out:
1. Fridge/freezer doors closed and latched.
2. All airtight bins seated and lids locked.
3. Liquids stored upright in travel-rated containers.
4. Trash secured and sealed.
5. Camp kit stored in a stable cabinet location.
Q: What should be in my RV camp kit for the first 24 hours?
Breakfast items, a few day snacks, a measured cooking base (oil/sauce), and the tools you use most—everything else can wait until you’re settled.
When you focus on airtight storage, proper placement, pest prevention, and rotation, RV food stays fresher and safer with less effort. Apply these steps to your next prep day—then take inventory, label your containers, and build a simple pantry system you can maintain on every trip.
Frequently Asked Questions
What are the best foods to store in an RV for long trips?
The best RV food storage items are shelf-stable, lightweight, and require little or no cooking, such as canned proteins, rice, pasta, oatmeal, dry beans, and freeze-dried meals. Also consider snackable staples like nut butter packets, trail mix, protein bars, and powdered meal drink mixes to reduce waste. Choose foods you rotate often and that match your cooking setup (camp stove vs. no-cook meals), so your RV pantry stays practical.
How should I organize my RV food storage to prevent spoilage and waste?
Use clear bins and labeled containers by category (breakfast, snacks, dinner, baking) and store them where temperature swings are minimal, typically in interior cabinets rather than near exterior walls. Keep “first in, first out” rotation so older items get used before newer ones, and place high-risk foods on the top shelf for easy visibility and faster inventory checks. If you carry a small fridge, designate a separate zone for perishables and plan meals around what needs to be used first.
Why is temperature control important for RV food storage?
RVs can experience significant heat and cold due to limited insulation and sun exposure, which can shorten shelf life and increase the risk of spoilage. To protect your food storage, store items away from direct sunlight, avoid packing densely against hot vents, and keep containers sealed to reduce humidity and pests. During hot weather, consider a fan or ventilation strategy for storage areas and prioritize using perishables sooner.
Which containers are best for dry goods in RV food storage?
For RV dry goods, use airtight food storage containers made for pantry storage—such as BPA-free plastic, glass with tight lids, or moisture-absorbing, sealed canisters for items like flour and cereal. Vacuum-seal bags can be useful for rice, beans, and bulk ingredients to reduce air exposure and pest risk, but ensure they’re still easy to access while traveling. Choose containers that fit your cabinet layout and are sturdy enough to prevent spills during stops and motion.
Best practices: How long can I keep food in RV storage before it goes bad?
Follow “best by” dates for dry goods, but also account for RV-specific conditions like heat and humidity, which can accelerate deterioration even if items look fine. For shelf-stable foods in cool, dry RV storage, many staples like canned goods can last years, while opened items should be used quickly and transferred to proper containers. As a rule, inspect for bulging cans, off smells, or changes in texture, and use a rotating meal plan so your RV food storage stays fresh and safe.
📅 Last Updated: July 12, 2026 | Topic: RV Food Storage | Content verified for accuracy and freshness.
References
- Google Scholar Google Scholar
https://scholar.google.com/scholar?q=rv+food+storage - Google Scholar Google Scholar
https://scholar.google.com/scholar?q=travel+food+storage+refrigeration+vehicle+temperature - Google Scholar Google Scholar
https://scholar.google.com/scholar?q=food+storage+danger+zone+refrigerator+freezer+food+safety - https://www.fda.gov/food/buy-store-serve-safe-food/keeping-food-safe-refrigerator-and-freezer-storage-charts
https://www.fda.gov/food/buy-store-serve-safe-food/keeping-food-safe-refrigerator-and-freezer-storage-charts - https://www.cdc.gov/foodsafety/food-safety-basics.html
https://www.cdc.gov/foodsafety/food-safety-basics.html - Food Safety Basics | Food Safety and Inspection Service
https://www.fsis.usda.gov/food-safety/safe-food-handling-and-preparation/food-safety-basics - Food safety
https://en.wikipedia.org/wiki/Food_safety - https://en.wikipedia.org/wiki/Danger_zone_(food_safety
https://en.wikipedia.org/wiki/Danger_zone_(food_safety - https://pubmed.ncbi.nlm.nih.gov/?term=food+storage+temperature+refrigeration+safety+guidelines
https://pubmed.ncbi.nlm.nih.gov/?term=food+storage+temperature+refrigeration+safety+guidelines - https://www.nutrition.gov/topics/food-safety-and-preparation-refrigeration-and-storage
https://www.nutrition.gov/topics/food-safety-and-preparation-refrigeration-and-storage



