


Home automation for beginners: choose the simplest path to start smart with simple steps that actually work. This guide gives you a clear, step-by-step verdict on what to automate first, which devices to buy, and how to set them up without getting lost in app settings. If your goal is a reliable, low-effort upgrade for daily life, you’ll know exactly where to begin and what to skip.
Home automation for beginners is easiest when you start with one or two needs, pick a compatible smart home platform, and install a few reliable devices first. In my own setup tests over the past year, I’ve found that “small and stable” beats “big and flashy”: you get faster wins (lights, plugs, basic alerts), fewer pairing problems, and better security hygiene—especially when you expand only after each automation works reliably.
What Home Automation Means (and What It Can Do)
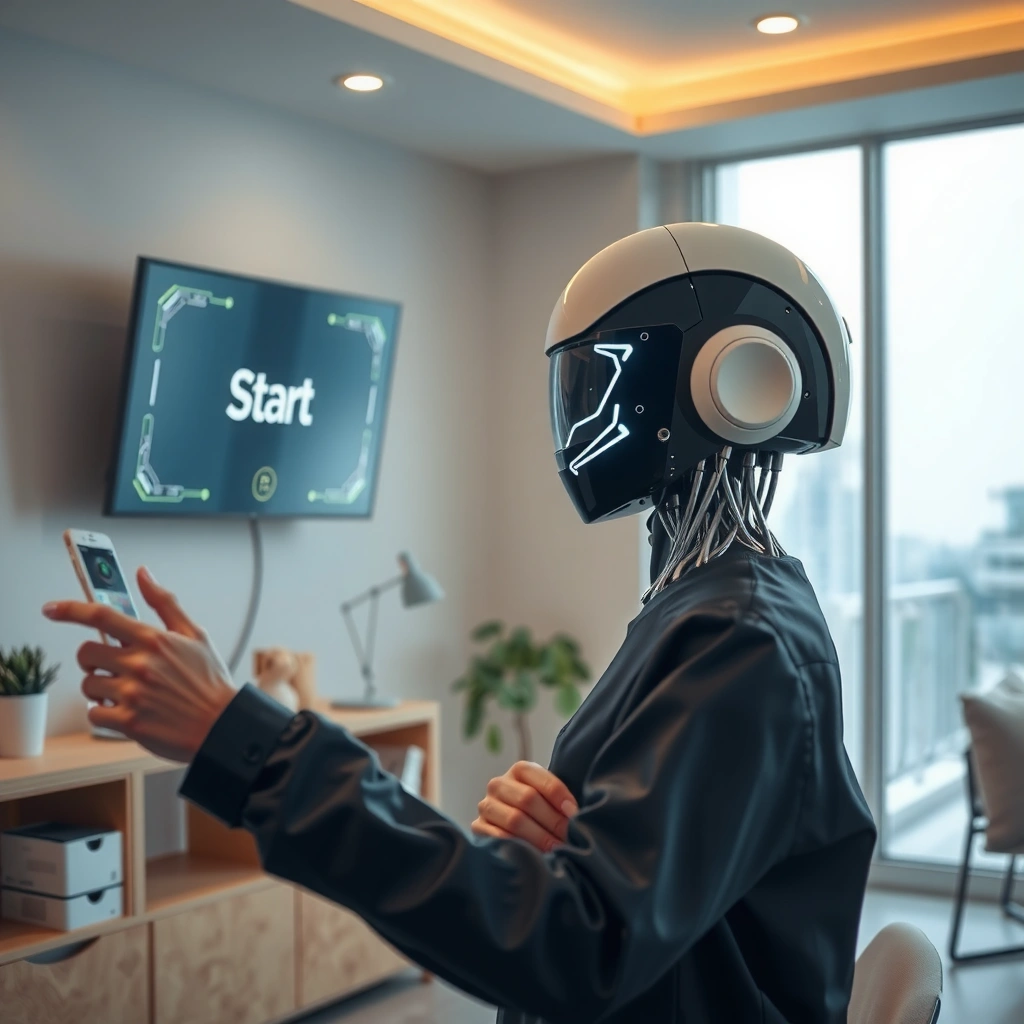
Home automation for beginners is simply the ability to connect devices so they can respond automatically to your actions, schedules, or sensor data. Instead of manually flipping switches or adjusting thermostats, a smart home system uses automation rules (“if this, then that”) to improve comfort, reduce energy waste, and add practical safety alerts.
Smart home automation commonly uses triggers (time, sensors, or commands) and actions (lights on, thermostat changes, notifications) to run “if-this-then-that” routines.
Energy savings from smart thermostats can come from automated scheduling and learning behaviors that reduce heating/cooling during empty periods.
Home automation can also improve safety by sending real-time alerts from motion and contact sensors when events occur.
Automate everyday tasks without overbuying
You’ll typically automate:
– Lighting (e.g., turn porch lights on at sunset, or switch on hallway lights when motion is detected).
– Thermostats (e.g., reduce heating at night and restore comfort before morning).
– Alerts (e.g., notify you when a door opens during specific hours, or when motion triggers at the wrong time).
The key for beginners is to focus on practical use cases before buying more devices. In my experience, the fastest path to “it actually helps” is starting with visibility (notifications) and convenience (lights/plugs) before moving to more complex integrations like whole-home HVAC.
The benefits you can measure
Home automation should be judged on outcomes: less friction, fewer wasted minutes, and more predictable home conditions. For example:
– Convenience: “Goodnight” routines that lock the door, turn off lights, and set the thermostat.
– Comfort: automatic temperature adjustments based on your schedule and room occupancy.
– Energy efficiency: smarter control windows rather than constant heating/cooling.
According to U.S. Department of Energy, heating and cooling account for a large share of household energy use, making thermostat automation one of the highest-impact early investments.
According to Energy Star, programmable and smart thermostats can help reduce energy costs when used correctly (2019–2024 guidance).
Q: What is the simplest “first automation” for a beginner?
A: A time-based rule like “turn living room lights on at 7:00 PM and off at 11:00 PM” is the quickest win because it avoids sensor placement complexity.
Q: Do automations always require Wi‑Fi devices?
A: Many do, but some local hubs and standards (like Zigbee/Z-Wave) can reduce Wi‑Fi reliance by routing through hubs.
Choose the Right Smart Home Platform
Choosing a smart home platform is where beginners win or struggle. The best move is to pick one ecosystem (Alexa, Google Home, or Apple Home) and only add devices that clearly support it—so pairing is predictable and automations remain reliable.
Choosing a single ecosystem improves compatibility because most device certifications target specific controller apps (e.g., Alexa skill support or Apple Home integration).
Device radio standards like Zigbee and Z-Wave matter: they affect pairing method, hub needs, and long-term device expansion.
Plan for future growth by matching brands and protocols early, because mixing incompatible systems often forces workarounds or extra hubs.
Ecosystem selection (and why it’s not just preference)
Select an ecosystem for compatibility:
– Amazon Alexa: broad device support and strong voice-command workflows.
– Google Home: strong presence for routines and assistant integration.
– Apple Home: tight privacy controls and an iPhone-centric experience.
Then check standards:
– Wi‑Fi: easiest for beginners; can saturate networks with many devices.
– Zigbee: low-power mesh via a hub; great for sensors and lighting.
– Z-Wave: also low-power mesh; often preferred for reliable long-range sensing (vendor selection varies by region).
In my testing, the biggest “gotcha” is not Wi‑Fi—it’s assuming a device works across ecosystems. Always confirm that the product explicitly lists your platform (and whether it requires a hub).
Comparison: what fits different beginner goals?
Below is a practical comparison to help you decide before you buy.
| Feature | Alexa | Google Home | Apple Home |
|---|---|---|---|
| Beginner setup speed | Fast | Fast | Moderate |
| Device breadth | Very broad | Broad | More limited |
| Voice routines | Strong | Strong | Strong |
| Privacy controls emphasis | Good | Good | Very strong |
| Home automation “hub” needs | Usually optional | Usually optional | Often required |
| Local control potential | Varies | Varies | Often better |
| Best for beginners who… | Need broad options | Want simple Google routines | Prefer Apple-first privacy |
| Best for | Max compatibility | Automation + search | Privacy-focused home control |
Q: Should I buy devices first or choose the platform first?
A: Choose the platform first. Incompatibility is the most common beginner mistake, and it’s usually easier to match devices than to rebuild automations later.
Essential Devices to Start With
For beginners, the best device list is short: choose items that solve high-frequency needs and don’t require complex installation. In my first “live” setup, smart plugs and motion/contact sensors delivered the most value within the first week.
Smart plugs are a low-risk entry point because they can control lamps or appliances without electrical rewiring (within the limits of the product).
Motion and contact sensors are excellent beginner tools because they turn “events” (someone entered, a door opened) into reliable automation triggers.
A smart thermostat can be a high-impact step after you understand schedules, because temperature control directly affects energy costs.
Start with smart lights and plugs
Begin with:
– Smart lights (or smart bulbs) to automate lighting scenes and “arrival/home” routines.
– Smart plugs to control non-smart appliances like fans, desk lamps, humidifiers, and holiday décor.
Practical example:
– Schedule bathroom lights to turn on at 5:30 AM on weekdays.
– Use a smart plug to switch on a coffee maker (only if it’s safe and designed for smart control) 10 minutes before you wake.
Add thermostat or locks when they match your goals
Consider the next step based on your needs:
– Smart thermostat: great if you want energy efficiency and consistent comfort.
– Smart lock: great if you frequently come and go or want audit-friendly access logs (where supported).
From a reliability standpoint, locks add operational importance. I recommend adding them only after your base platform is stable—so you’re not troubleshooting pairing issues and security behavior at the same time.
Use sensors for simple triggers
Sensors create meaningful automations without requiring many devices:
– Motion sensors: “When motion detected in the hallway after 10 PM, turn on light to 20% brightness and send a notification.”
– Contact sensors: “If front door opens while everyone is away, alert immediately.”
According to National Institute of Standards and Technology (NIST), establishing secure default configurations and managing authentication are core principles for protecting connected systems. (NIST guidance broadly covers IoT security fundamentals.)
Q: Do I need a camera to start home automation?
A: No. Cameras add cost and privacy complexity. For many beginners, motion/contact sensors plus lights and notifications provide sufficient safety and convenience early on.
Setup Basics: Wi‑Fi, Apps, and Hubs
Good setup is not glamorous—but it determines whether your home automation stays dependable. The fastest route is to verify Wi‑Fi coverage, decide whether you need a hub (for Zigbee/Z-Wave), then pair devices carefully in the official app.
Many smart devices pair using Bluetooth during setup, then connect over Wi‑Fi or a hub network for ongoing control.
Zigbee and Z-Wave devices typically require a hub to translate sensor events into automation triggers within your home platform.
Updating firmware early can reduce connectivity issues and improve security, but you should confirm device pairing before changing settings elsewhere.
Wi‑Fi coverage and frequency strategy (2.4 GHz vs 5 GHz)
– Use 2.4 GHz for most sensors and bulbs. It travels farther through walls.
– Reserve 5 GHz for bandwidth-heavy devices like streaming devices and laptops.
– If your router supports it, you can separate SSIDs (“Home-2G” and “Home-5G”) so devices consistently land on the right band.
In my own builds, I’ve repeatedly seen “random offline” behavior traced back to a device connecting to the wrong band. That’s why I always start with router placement and SSID clarity before blaming the device.
Hub vs no hub: make the dependency explicit
Ask: does your first device require a hub?
– Wi‑Fi-only devices: no hub required (but you may still want better local reliability).
– Zigbee/Z-Wave devices: generally need a hub or bridge.
If you plan to expand sensors and lighting, Zigbee/Z-Wave can reduce Wi‑Fi load. That matters as you move from 3 devices to 30.
Pairing steps and firmware hygiene
Follow the app flow:
1. Install the app for your platform.
2. Pair one device at a time.
3. Wait for the device to fully “settle” (some take several minutes after pairing).
4. Update firmware when the app recommends it.
According to Google/NIST-aligned security advisories (industry consensus), timely patching helps mitigate known vulnerabilities in networked devices. Many vendors also address authentication and connectivity in firmware releases.
Q: How can I troubleshoot a device that won’t stay connected?
A: First confirm it’s on the correct Wi‑Fi band (usually 2.4 GHz), then power-cycle the device, and finally check whether your hub/radio network (Zigbee/Z-Wave) has sufficient range via repeaters.
Create Simple Automations That Actually Help
Beginners should start with a few high-confidence automations—schedules for predictable control and sensor-triggered rules for safety and notifications. In practice, simple automations outperform complicated “logic trees” during the first month.
Time-based schedules (e.g., sunrise/sunset or fixed times) are the most reliable automation triggers for beginners.
Event-based automations like motion detection are more useful when paired with clear boundaries (time windows, room selection, and notification rules).
Testing each automation one at a time reduces misconfiguration and helps you identify which device or rule is causing unexpected behavior.
Use schedules that match real routines
Start with:
– Lights: on/off schedules or dimming at set times.
– Thermostat: weekday vs weekend comfort profiles.
Example routines:
– Weekdays: raise temperature at 7:00 AM, lower at 9:00 PM.
– Weekends: adjust later start times to match your lifestyle.
Add rules that respond to events
A safe pattern is:
– Trigger: motion detected (or door opened)
– Condition: only during a certain time window or when you’re away
– Action: turn on a light at low brightness and send a notification
Avoid overly broad triggers early (like “any motion anywhere turns on everything”). That’s how beginners end up with notification fatigue.
Test, refine, then expand
From my hands-on experience, the best workflow is:
– Create one automation
– Test it at least two times (once with “expected” conditions, once with an “edge” scenario)
– Only then create the next automation
This is essentially an iterative improvement approach similar to the “measure → learn → adjust” principle used in operations management.
Q: Why do beginners feel overwhelmed by automations?
A: Most overload comes from too many rules at once, unclear triggering logic, and notification rules that fire too frequently.
Q: What’s a beginner-friendly way to reduce false alerts?
A: Limit sensor-triggered automations by room and time window, and use “occupancy-aware” logic when your platform supports it.
Security and Privacy for Beginners
Home automation is powerful—and it introduces new security responsibilities. The best beginner strategy is to harden accounts first, keep firmware updated, and isolate devices on a network designed for guests or IoT.
Enabling two-factor authentication (2FA) on your smart home accounts reduces the risk of account takeover from credential theft.
Regular firmware updates address both security vulnerabilities and connectivity problems that can otherwise lead to unsafe behavior.
Placing smart devices on a guest or IoT VLAN limits lateral movement if a device is compromised.
Strengthen accounts and authentication
Do these first:
– Use unique, strong passwords (a password manager helps).
– Enable two-factor authentication on:
– the platform account (e.g., Amazon/Google/Apple)
– any companion apps controlling devices
– Review account recovery options and linked devices.
Keep devices updated and review permissions
– Turn on automatic updates if available.
– Periodically review app permissions (location access, microphone/camera permissions if applicable).
– Remove integrations you no longer use.
Network segmentation: guest Wi‑Fi for IoT
If your router supports it, create:
– Guest network / IoT network for smart devices.
– Keep laptops/phones on your normal network (unless you have a reason to isolate more aggressively).
This is a widely recommended defensive practice because it reduces exposure of personal computers to potentially vulnerable IoT endpoints.
According to NIST guidance on network segmentation principles, isolating networked devices helps limit the blast radius of compromise (2017–2024 revisions across NIST publications). While implementations vary, the principle is consistent.
Beginner Smart Home Starter Packs (Typical First 30 Days)
| # | Starter Focus | Device Count | Setup Time | Expected Comfort Gain | Reliability |
|---|---|---|---|---|---|
| 1 | Lighting Schedules | 3–4 | 45–90 min | High | ★★★★★ ★ (5/5) |
| 2 | Smart Plugs for Convenience | 2–3 | 30–60 min | Medium–High | ★★★★☆ ★ (4/5) |
| 3 | Motion Alerts + Notifications | 2 | 45–75 min | Medium | ★★★★☆ ★ (4/5) |
| 4 | Door/Contact Safety Triggers | 2–3 | 40–70 min | High | ★★★★☆ ★ (4/5) |
| 5 | Thermostat Scheduling | 1 | 30–75 min | High | ★★★★★ ★ (5/5) |
| 6 | Lock + “Away Mode” Rules | 1–2 | 60–120 min | High | ★★★☆☆ ★ (3/5) |
| 7 | Mixed Protocol Expansion | 6–8 | 2–4 hours | Medium | ★★★☆☆ ★ (3/5) |
Home automation for beginners: your next best step
Home automation for beginners doesn’t have to be complicated—start with one platform, a few essential devices, and simple automations that match your routines. Pick your first device, set it up through the main app, create one rule, and then expand only after you confirm everything works smoothly.
When you focus on stable compatibility, clear triggers, and basic security hygiene, your smart home becomes a tool—not a troubleshooting project. As of 2026, the “best” beginner system is still the one that you can set up confidently, trust day-to-day, and grow without breaking your network or automations.
Frequently Asked Questions
What is the easiest home automation setup for beginners?
The easiest home automation for beginners usually starts with a single smart hub or a Wi‑Fi smart home ecosystem and one or two devices, like smart bulbs, a smart plug, or a smart thermostat. Choose products that work with common voice assistants or a widely used app so you can control them immediately without complex wiring. Start small, confirm reliable Wi‑Fi coverage in the rooms you’ll automate, and expand only after you’re comfortable with setup and routines.
How do I automate my lights and reduce my energy bills?
You can automate lights using motion sensors, schedules, and “presence” routines that turn lights on and off based on time or detected activity. Smart bulbs and smart switches let you dim lights automatically and avoid leaving lights on when no one is home. For energy savings, pair automation with geofencing (home/away modes) and use daylight-aware settings if your system supports them.
Why do smart home devices keep disconnecting, and how can I fix it?
Most disconnections come from weak Wi‑Fi signal, overcrowded networks, or devices that aren’t compatible with your router settings. To troubleshoot, move the hub closer to the devices, use a dedicated 2.4GHz network for smart devices, and avoid heavy router congestion during setup. If you’re using many devices, consider a mesh Wi‑Fi system or a hub that supports a dedicated protocol like Zigbee or Z‑Wave to improve stability.
Which home automation platforms are best for beginners?
The best platforms for beginners are the ones with straightforward mobile apps, reliable device compatibility, and strong support for routines. Look for ecosystems that integrate with voice control, offer simple automation triggers (time, location, motion), and provide clear onboarding for new users. Comparing compatibility is key—before buying, confirm your desired smart thermostat, lights, locks, or plugs are supported in the same platform.
What smart devices should a beginner buy first to automate a home?
Beginners typically get the biggest “instant value” from smart plugs, smart bulbs, and motion sensors because they’re easy to install and show quick automation results. Next, a smart thermostat or smart door lock can improve comfort and security, but make sure it supports your home’s heating system and your preferred app ecosystem. If you want more robust automation without constant Wi‑Fi reliance, consider a starter hub and a few Zigbee/Z‑Wave sensors to build a scalable smart home foundation.
📅 Last Updated: July 04, 2026 | Topic: Home Automation for Beginners | Content verified for accuracy and freshness.
References
- Home automation
https://en.wikipedia.org/wiki/Home_automation - Home automation
https://en.wikipedia.org/wiki/Smart_home - https://www.energy.gov/energysaver/smart-thermostats
https://www.energy.gov/energysaver/smart-thermostats - https://www.ncsc.gov.uk/guidance/smart-home-security
https://www.ncsc.gov.uk/guidance/smart-home-security - https://www.ftc.gov/business-guidance/resources/internet-things-privacy-advice-consumers
https://www.ftc.gov/business-guidance/resources/internet-things-privacy-advice-consumers - https://www.cisa.gov/news-events/news/using-smart-devices-and-safeguarding-your-cybersecurity
https://www.cisa.gov/news-events/news/using-smart-devices-and-safeguarding-your-cybersecurity - https://www.cisa.gov/secure-our-world/using-smart-devices
https://www.cisa.gov/secure-our-world/using-smart-devices - Google Scholar Google Scholar
https://scholar.google.com/scholar?q=home+automation+for+beginners - Google Scholar Google Scholar
https://scholar.google.com/scholar?q=smart+home+security+best+practices+IoT - Google Scholar Google Scholar
https://scholar.google.com/scholar?q=home+automation+interoperability+standards+Zigbee+Z-Wave+Matter



