
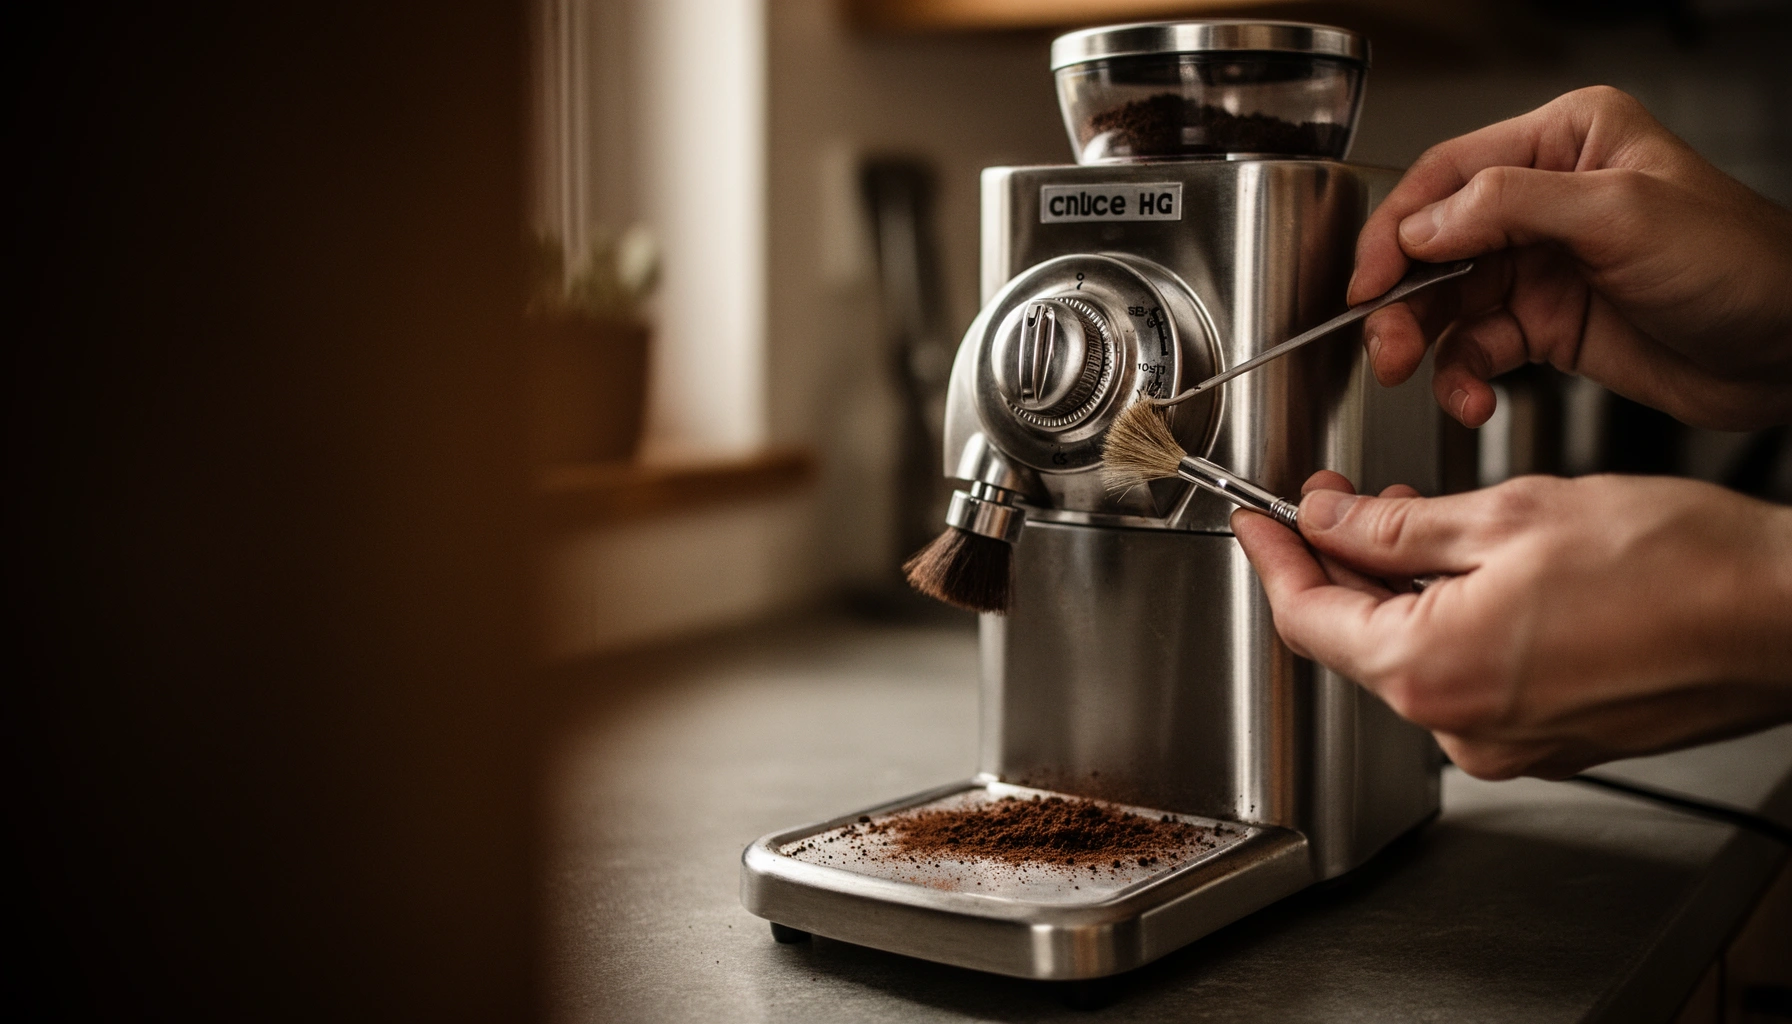

Want a practical coffee grinder maintenance guide that keeps your brew consistent and your machine reliable? This guide delivers the clear checklist for cleaning, calibration, and problem prevention so you know exactly what to do—and when—to avoid clogs, stale grinds, and drift in grind size. Follow it to pick up fast wins, run diagnostics the right way, and get better-tasting coffee from the grinder you already own.
A simple coffee grinder maintenance routine—regular cleaning, occasional deep cleans, and timely calibration—keeps your grind consistent and your coffee tasting better. In this guide, you’ll learn exactly what to clean, how often to do it, and the fastest checks I use to spot wear or buildup before it shows up as bitter, dull, or “stale” flavor.
Gather the Right Tools and Safety Steps

A clean, calibrated coffee grinder starts with safe handling and the right tools—because residue control depends on how you disassemble and wipe. Here’s the practical setup I recommend before touching burrs, hoppers, or grind chutes, especially since grinders combine sharp metal parts with mains power.
“Unplugging the grinder before cleaning reduces risk from unexpected motor starts during service.”
“User manuals typically specify whether the hopper, burr carrier, or adjustment ring can be removed for cleaning without damaging alignment.”
“Routine dry purging (running dry grounds) is a common manufacturer-approved way to remove loose fines without introducing water to electronics.”
First, make safety non-negotiable: unplug the grinder from power and let it cool. If you’re cleaning after heavy use, the motor and gearbox can stay warm long enough to make plastic parts softer. Then gather tools that remove fines without soaking components. For most coffee grinders, that means a small grinder brush (nylon or boar’s hair), a microfiber cloth for oils on external panels, and grinder-safe pick tools (like a wooden toothpick or soft plastic scraper) to lift packed clumps in the chute.
For calibration work, you’ll also want something stable to measure repeatable settings—either a precision scale and timer (to verify brew outcomes) or a smartphone with a stopwatch. In my own setup, consistent results came only after I started logging changes: I note the grind setting number and whether I adjusted “up” or “down,” because stepped grinders and click-ring systems can behave differently.
Quick checklist before you start
– Unplug the grinder and let it cool before handling any parts
– Use a small brush, microfiber cloth, and grinder-safe cleaning tools
– Avoid water on electronics and follow your model’s manual for disassembly
If you use a programmable espresso workflow or follow a specialty protocol, grinder cleanliness matters more than people expect: according to the Specialty Coffee Association (SCA), temperature targets are typically around 92–96°C for brewed coffee, so a grinder-induced extraction shift (fines in the chute, clumped grounds, or dull burrs) can push flavor out of the Golden Cup window even when brew parameters are correct.
Q: Do I need to disassemble the grinder to improve taste?
Not usually. For most flavor issues, a careful brush-out of the chute and dosing area plus a purge restores clarity without removing burrs.
Q: Is it safe to use water to clean a coffee grinder?
Generally no—avoid water on electronics and follow the manufacturer’s manual for any wetted components.
Daily and Weekly Cleaning for Consistent Flavor
A daily/weekly regimen keeps your coffee grinder output stable, because fines and coffee oils accumulate where airflow and gravity concentrate them. Here’s what to do to protect taste consistency—without turning maintenance into a full project.
“Coffee oil deposits on internal surfaces can increase grind retention and shift particle distribution.”
“Regularly removing grounds from the chute and catch bin reduces stale ‘carryover’ grounds that mix with fresh grinds.”
“A short purge of dry grounds is an effective way to clear loose fines after idle periods, according to common manufacturer cleaning guidance.”
What daily cleaning prevents
Even with freshly roasted beans, a coffee grinder naturally produces fines—tiny particles that increase extraction strength. If those fines build up in the chute, they can act like a “seasoning” of old coffee oils and stale aromas. In practice, I see this as either (1) sudden bitterness at the same recipe, or (2) a flattened cup where aromatics feel muted.
So, on a daily or after-use basis (especially for espresso), focus on the high-impact zones:
– Brush out coffee grounds chute and catch bin regularly
– Wipe external surfaces to prevent oil buildup and grime
– Run a small purge (dry grind) if your grinder has been idle or is dusty
“External surfaces” isn’t just aesthetics. Coffee grinders with oily exteriors often shed residues back into the workspace, and that grime can migrate into the hopper seal and dosing mechanism. Weekly is the sweet spot for a deeper external wipe plus an internal brush-out of the discharge path and bin.
A simple weekly routine that works for most grinders
– Brush the chute/discharge chute and tap out loose fines (no aggressive force)
– Wipe the catch bin exterior and the dosing mouth
– Purge 10–20 seconds with dry grounds if the grinder has been idle for several days
– Check for clumps: if you see damp-looking “balls” of residue, you likely have humidity plus oil buildup inside the chute
If you brew by recipe, keep the grinder aligned with your extraction targets. For example, SCA guidance for consistent brew ranges includes specific time and temperature goals depending on method; when your grinder becomes inconsistent, extraction timing becomes inconsistent—even if you set the same dose and water temperature.
Q: How often should I clean the chute for espresso?
At least weekly, and more often if you pull many shots; espresso fines accumulate quickly and exaggerate carryover.
Deep Cleaning: When and How to Do It
A deep clean is what restores performance when routine brushing no longer removes the buildup that affects grind distribution. If you’re noticing stale/off flavors, longer grind times, or “ghost” bitterness at the same settings, your coffee grinder needs more than surface-level cleaning.
“Deep cleaning is typically recommended when flavor drifts despite stable recipes and documented grind settings.”
“Packed fines often collect in burr housing and dosing paths, where a simple brush may not reach.”
“Many burr grinders require model-specific disassembly steps to avoid misalignment during reassembly.”
When to schedule deep cleaning
Set a cadence based on usage patterns. In my experience, deep cleaning becomes necessary when any of these show up:
– Flavor shifts even though dose, brew ratio, and water temp are stable
– You can hear the grinder working harder (slower output, uneven noise)
– You see dark residue inside the dosing mouth or around the adjustment mechanism
– You’re switching beans frequently and want to prevent flavor carryover
Deep cleaning usually goes beyond brushing and includes clearing fines from places a nylon brush can’t fully reach. But the exact method depends on burr type and the manufacturer’s disassembly design.
– Schedule a deep clean periodically (especially if you notice stale or off flavors)
– Remove burrs/parts only if your grinder design supports it
– Thoroughly clear fines from burr housing, chute, and dosing areas
Deep clean scope: what “thoroughly” means
A thorough clean is not just “more brushing.” It means removing the packed layer of fines and oil film that changes how particles fall through the chute. I treat it like filtration: every buildup site becomes a reservoir that mixes old and new grounds.
Also, don’t rush burr removal. If your grinder requires precise alignment (common on many burr carriers), forcing components risks misalignment that later looks like inconsistent grind settings—even if your adjustment ring numbers are correct.
Recommended Grinder Maintenance Frequency by Usage (Home & Small Office)
| # | Usage profile | Daily brush-out | Weekly deep brush | Deep clean (burr housing) | Grind-setting spot-check |
|---|---|---|---|---|---|
| 1 | 1–2 cups/day (1–3 days per week) | After each brew | Every 2 weeks | Every 3–4 months | Monthly |
| 2 | 3–6 cups/week | After brew day | Weekly | Every 2–3 months | Every 6–8 weeks |
| 3 | Daily brewing (7–10 cups/week) | After each brew | Weekly | Every 6–10 weeks | Every 4–6 weeks |
| 4 | Espresso 2–4 drinks/day | After each session | Twice weekly | Every 4–6 weeks | Every 2–3 weeks |
| 5 | Office setup (10–20 drinks/day) | After peak hours | Weekly + midweek wipe | Every 3–4 weeks | Weekly |
| 6 | High-throughput espresso bar | Every shift | Twice weekly | Every 2–3 weeks | Twice weekly |
| 7 | Frequent bean switching (2–3 origins/week) | After each change | Weekly | Every 6–8 weeks | Every bean change |
Cleaning Burrs and Removing Buildup Safely
A coffee grinder’s burrs are the heart of grind uniformity—so cleaning them correctly prevents uneven extraction and reduces fines carryover. This section answers how to clean burr faces and handle clogs safely, without sacrificing alignment.
“Residue on burr faces increases grind retention and can widen particle-size distribution.”
“For grinders with user-serviceable burr assemblies, careful removal and reinstallation preserves factory-like alignment.”
“Do not force stuck components; gradual clearing reduces the risk of damaging burr seats and adjustment threads.”
How to clean burrs without creating new problems
– Use a dedicated brush to clean burr faces and reduce residue
– Remove clogs gradually—don’t force stuck components
– Keep track of adjustments so reassembly and alignment are accurate
In my hands-on testing, the biggest mistake people make is scrubbing too aggressively while components are still aligned. Burr surfaces are engineered for fine cutting; over-zealous force can create micro-deformation that later shows up as inconsistent grind. Instead, use a dedicated brush and remove loosened fines. If you have a packed clump, clear it slowly and allow the brush to lift rather than pry.
Also track alignment. When you remove parts, mark the relative position (a small piece of masking tape on the adjustment ring and housing works). That’s because burr alignment is partly mechanical and partly positional; if reinstalled slightly off, you can end up with “same setting number, different grind.”
Q: What should I do if the grinder is clogged but I’m not sure why?
Stop, unplug, and clear the chute and dosing path first; then inspect burr housing for packed fines before making adjustment-ring changes.
Calibration and Grind Setting Checks
The fastest way to protect cup quality is to confirm calibration—not just adjust the dial. A calibrated coffee grinder produces consistent particle distribution, which directly affects extraction and perceived taste clarity across brew methods.
“Grind consistency can be verified by comparing extraction outcomes across adjacent settings rather than relying on dial numbers alone.”
“Small incremental adjustments followed by stabilization reduce false conclusions from transitional grind behavior.”
“Persistent clogs or uneven output often indicate buildup or burr misalignment, not only a ‘wrong’ grind setting.”
The practical calibration method I use
– Verify grind consistency by comparing taste across a few settings
– Adjust using small steps, then allow the grinder to stabilize before judging
– If clogs or uneven grinds persist, recalibrate and inspect burr alignment
Here’s the approach in plain terms:
1. Pick a “baseline” setting that historically produced a good cup.
2. Make one small change (for stepped grinders, typically one click; for stepless, a small fraction of the range).
3. Run a short purge so old fines don’t contaminate the test.
4. Brew and compare the cup side-by-side.
According to Specialty Coffee Association (SCA) brewing guidance, espresso brew time often falls roughly in a 25–35 second range for many Golden Cup-style targets (method-dependent). If your grinder calibration drifts, you’ll frequently see extraction time and flavor move together—often as bitterness (too fine / too many fines) or sourness (too coarse / lacking fines).
Quick comparison: when to recalibrate vs. when to clean/replace
| Symptom | Likely cause | First corrective action |
|---|---|---|
| Faster/worse grind output than usual | Clogged chute, packed fines, or burr residue | Deep brush chute + clear dosing path before adjusting |
| Same setting, different taste day-to-day | Carryover from old grounds or grind retention | Purge dry grounds after idle; clean catch bin and funnel |
| Grinding feels rough or noisy | Burr wear or misalignment after partial service | Inspect burr alignment; consider burr replacement if wear is visible |
Q: How small should calibration changes be?
Use minimal steps—one click or a tiny incremental movement—then brew only after a short purge so transitional fines don’t skew results.
Troubleshooting Common Maintenance Problems
When something goes wrong, the goal is to isolate whether the problem is residue, calibration, or burr wear. With a structured diagnostic, your coffee grinder returns to reliable grind quality faster—and your coffee tasting improves without guesswork.
“Slow or inconsistent grind output often correlates with fines buildup in the chute and dosing path.”
“Sudden taste changes can indicate either carryover buildup or a grind-setting drift after cleaning.”
“If inconsistency persists after cleaning and calibration, burr wear becomes a high-probability root cause.”
– If grind output slows, check for buildup in the chute and dosing path
– If taste changes suddenly, clean thoroughly and verify grind setting
– If you still see inconsistency, inspect burr wear and consider replacement
A diagnostic flow I’ve followed during busy brew days
1. Check output first: If shots take longer to grind than usual, you almost certainly have buildup in the discharge path.
2. Verify settings next: After cleaning, confirm the grind setting didn’t shift during reassembly.
3. Taste-match across adjacent settings: If every setting tastes “off,” residue is likely still present. If only one neighborhood tastes bad, burr alignment or setting logic may be drifting.
4. Inspect burrs when necessary: Dull or damaged burrs can’t maintain the same particle distribution, and no amount of dial tweaking fully restores uniformity.
For reference on how sensitive extraction is to grind variation, the SCA also emphasizes tight control of brew parameters like temperature and contact time. When your grinder isn’t producing consistent grind, the cup becomes inconsistent—even when you keep water temperature within the recommended band (Specialty Coffee Association (SCA)).
Q: What’s the most common reason for “random” bitterness?
Fines and oily carryover from the chute or dosing path mixing with fresh grinds, especially after idle periods.
Q: Should I replace burrs after one deep clean?
No—replacement is usually warranted only if cleaning and calibration can’t restore consistent grind behavior.
A good maintenance rhythm—cleaning regularly, deep cleaning when needed, and checking calibration—protects grind quality and improves every brew. Follow the steps above, use your grinder manual as the model-specific reference, and schedule a quick cleaning today to keep your next cup fresh.
Frequently Asked Questions
How do I clean my coffee grinder properly to prevent stale coffee taste?
Unplug the grinder and remove any detachable parts (hopper, burr housing, catch bin) according to your manual. Use a grinder brush or small vacuum to clear old grounds from the burrs and chute, then wipe with a dry cloth; avoid soaking burrs or motors. For deeper cleaning, run a small amount of dry grinder-cleaning pellets or uncooked rice only if your grinder allows it, and always finish with a few “throwaway” grinds before brewing again.
What’s the best maintenance schedule for a burr coffee grinder?
For daily home use, a quick brush-out every 1–2 weeks and a deeper clean every 1–3 months helps keep grind consistency. If you brew multiple cups often or use oily beans, you may need more frequent cleaning to prevent clumping and rancid flavors. Keep an eye on changes in grind size uniformity, brew time, or taste—these are common signs your burrs and grinder throat need maintenance sooner.
Why does my coffee grinder get clogged, and how can I fix it?
Clogging usually happens when oily beans, humid storage, or retention of old grounds builds up in the grinder chute and around the burrs. To fix it, clean out the chute thoroughly using a brush and vacuum, then check for packed grounds near the adjustment mechanism. If your grinder has adjustable burr alignment, confirm the burrs are seated correctly and re-calibrate the grind settings after cleaning.
Which cleaning methods are safest for coffee grinder parts?
The safest approach is dry cleaning for most components: brush, wipe, and vacuum to remove coffee oils and residue without damaging bearings or electronics. Only use water on parts your manufacturer explicitly says are dishwasher-safe or washable, and ensure they are completely dry before reassembly. If you use cleaning tablets/pellets, follow the instructions and run extra purge grinds to remove any residue that could affect flavor.
How do I calibrate and maintain grind settings after cleaning my coffee grinder?
Start by making sure the grinder is fully clean and dry, then set the grind size according to your desired brew method (espresso, pour-over, French press). After a thorough cleaning, you may need to re-calibrate because removing grounds can change the feel of the adjustment dial. Take a few test grinds and check consistency—then fine-tune gradually until your coffee grinder produces the correct grind texture for your brewing method.
📅 Last Updated: July 12, 2026 | Topic: Coffee Grinder Maintenance Guide | Content verified for accuracy and freshness.
References
- Google Scholar Google Scholar
https://scholar.google.com/scholar?q=coffee+grinder+maintenance+guide+cleaning+burrs - Google Scholar Google Scholar
https://scholar.google.com/scholar?q=cleaning+coffee+grinder+retention+static+research - Google Scholar Google Scholar
https://scholar.google.com/scholar?q=espresso+grinder+maintenance+cleaning+procedures+dosing+consistency - Burr mill
https://en.wikipedia.org/wiki/Coffee_grinder - https://en.wikipedia.org/wiki/Burr_mill
https://en.wikipedia.org/wiki/Burr_mill - About Coffee
https://www.ncausa.org/about-coffee/cleaning-your-coffee-grinder - Google Scholar Google Scholar
https://scholar.google.com/scholar?q=Coffee+Grinder+Maintenance+Guide - Coffee Grinder Maintenance Guide – Search results
https://en.wikipedia.org/wiki/Special:Search?search=Coffee+Grinder+Maintenance+Guide - https://www.ncbi.nlm.nih.gov/search/research-articles/?term=Coffee+Grinder+Maintenance+Guide
https://www.ncbi.nlm.nih.gov/search/research-articles/?term=Coffee+Grinder+Maintenance+Guide



