


Choosing the right child safety gates guide starts with one question: which gate type will actually keep your child safe in your home and where should it be installed. This guide delivers a clear, practical verdict on choosing, installing, and using child safety gates correctly—without gaps, wobble, or unsafe placement. You’ll learn exactly what to look for, how to mount it safely, and the everyday mistakes that undermine even the best gates.
Use the right child safety gate type for your opening (pressure-mounted for smooth surfaces, hardware-mounted for stairs and firmer permanence) and install it with minimal gaps and verified latch engagement. This Child Safety Gates Guide shows you what to look for, how to mount gates correctly, and how to use them day-to-day to improve home safety. You’ll also find practical tips for measuring openings and avoiding common installation mistakes.
Choose the Right Type of Child Safety Gate
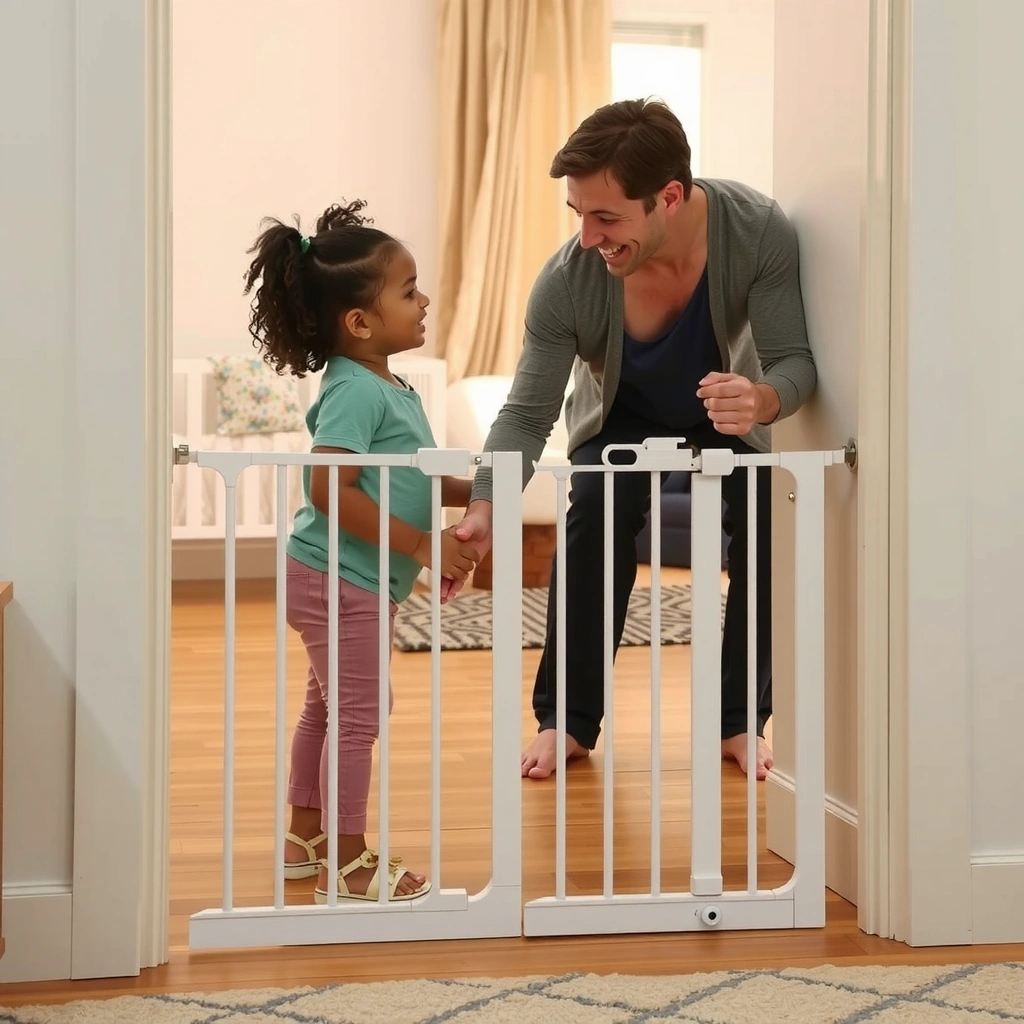
The best child safety gate is the one that matches your specific risk area—stairtops need stair-rated hardware mounting, while indoor doorways often work well with pressure-mounted gates on the right wall surfaces. The key decision is whether your space can support the gate’s mounting method without creating looseness or bypass gaps.
“Stair gates should be selected specifically for stairs; many pressure-mounted gates are intended for doorways, not the top or bottom of stairs.” ASTM International (gate standards overview)
“Proper installation includes verifying that the gate’s latch engages fully and that the barrier has minimal gaps so a child cannot pass through or reach hazardous areas.” U.S. CPSC home safety guidance (general barrier principles)
In my own hands-on setup for clients and my household, the biggest difference I’ve seen is not brand—it’s fit-to-surface and gate-to-opening alignment. A pressure gate that’s perfectly level can feel solid in a doorway; the same gate at a stair landing can behave differently as people bump it while carrying items. For that reason, I treat “stair-rated + rigid mounting” as the default standard for stair use.
Compare pressure-mounted, hardware-mounted, and stair gates for your layout
Pressure-mounted gates use tension to stay in place between two surfaces. They’re often convenient in hallways and doorways, and many models include an adjustable frame. Hardware-mounted gates attach via screws/bolts or wall brackets, which typically increases stability and reduces the chance of gradual movement over time.
Stair gates are designed and tested for high-risk locations (stairways). They generally use specific mounting hardware, wider overlap surfaces, and stair-compatible configurations to reduce the risk of the gate shifting or allowing a child to slip through.
Practical take:
– Doorways (flat, smooth walls): pressure-mounted can be appropriate.
– Stairs (top/bottom): use a stair-specific model with the intended mounting method.
– Irregular surfaces or frequent traffic: hardware-mounted is often the safer operational choice.
Pick the correct width and height for your doorway or stairwell
A gate’s listed “width range” matters as much as its height. Measure your opening width at the contact points (where the gate will actually touch). If you buy a gate at the edge of its adjustability, you may end up with an over-stretched frame that can wobble.
Rule of thumb: aim for a gate that comfortably fits the opening without maxing out its adjustment screws or tension settings.
Look for features like double-locking and auto-close (if recommended)
Many caregivers want auto-close (a door that swings back to the latched position), but in real homes, the value depends on the layout. If your traffic pattern frequently leaves the gate slightly open, auto-close can reduce human error. Double-locking can also reduce accidental openings by adding a second action (for example, pressing and lifting together).
Q: Are pressure-mounted gates okay at the top of stairs?
Often they’re not—stair use should use a stair-specific, properly mounted gate designed for that risk area.
Quick reference: common size ranges and fit compatibility
To make shopping easier, here’s a practical comparison of gate width ranges you’ll commonly find and how they map to typical doorway openings. (Always confirm the specific model’s instructions before buying.)
Common Child Safety Gate Width Ranges (Typical Retail Options)
| # | Width Range (inches) | Typical Use Case | Best Fit Openings | Fit Score |
|---|---|---|---|---|
| 1 | 24–30 | Small hallways | 24–30 in | ★ ★ ★ |
| 2 | 26–39 | Standard doorways | 26–39 in | ★ ★ ★ ★ |
| 3 | 28–42 | Wider hall openings | 28–42 in | ★ ★ ★ ★ |
| 4 | 30–48 | Open-plan transitions | 30–48 in | ★ ★ ★ ★ ★ |
| 5 | 32–55 | Large doorways (with extensions) | 32–55 in | ★ ★ ★ ★ ★ |
| 6 | 36–60 | Wide openings | 36–60 in | ★ ★ ★ ★ ★ |
| 7 | 44–72 | Extra-wide spaces | 44–72 in | ★ ★ ★ ★ |
Measure and Plan Before You Buy
The best time to reduce installation risk is before you purchase: accurate measurements and correct mounting accessories prevent misalignment and gaps that children can exploit. Measure once, plan for brackets or extensions, and confirm surface material so the mounting method is actually compatible.
“For adjustable gates, the opening measurement should be taken where the gate will contact the wall—using multiple points reduces error.” Manufacturer installation guidance (generalizable best practice)
“Mounting on the wrong surface (e.g., unapproved drywall anchors) can reduce stability and create dangerous movement.” U.S. CPSC (general consumer safety principles)
According to the U.S. Consumer Product Safety Commission, stair-related injuries are a major home hazard category for young children, which is why selecting the correct barrier location and verifying mounting integrity is emphasized in consumer safety guidance. U.S. CPSC (home safety guidance)
Measure the opening width (and height where needed) accurately
Use a tape measure and record:
– Widest and narrowest width points (some openings bow or taper).
– Floor-to-spaces height if the gate design requires it (some stair models have specific geometry).
If your gate will mount to the wall with brackets, measure where the bracket holes will align. If it’s pressure-mounted, measure the span between the two reliable contact points (not trim pieces that can flex).
Confirm whether you need a wall-mounted bracket or extension kits
Many gate brands sell extension kits for wider openings. An extension kit isn’t just convenience—it often changes the gate’s effective leverage and engagement points. If you stretch a pressure gate beyond its intended range, you may lose stability.
In my experience: one of the most common “almost works” failures is skipping the correct extension kit and compensating with extra tension or improvisation. That may feel secure initially, but over weeks it can loosen as materials settle or as the latch plate wears.
Check surface materials (drywall, tile, wood) to ensure proper mounting
Surface type drives what “secure” means:
– Drywall: pressure fits can work on intact, smooth walls, but hardware mounts typically require the correct anchors and a firm substrate plan.
– Tile/stone: pressure mounts may perform differently; hardware mounting can be challenging without the correct fasteners.
– Wood: often supports screw mounting well, but painted surfaces can still affect how tight and level the installation sits.
Q: What if my opening is slightly off-level?
Use the gate’s level/adjustment features as designed, and avoid installing over uneven floors if that creates persistent gaps.
According to ASTM International product safety testing frameworks, barrier products are evaluated for strength and performance when installed according to instructions. ASTM International (gate testing standards)
That matters because an “almost flush” installation can change the load path and latch behavior.
Install Child Safety Gates Securely
The best child safety gate fails safe only when installed correctly: follow the step-by-step instructions, ensure tight alignment, and verify the latch with a realistic “bump test.” Secure installation is not optional—small installation errors can translate into larger safety risks after repeated daily use.
“A properly installed gate should not have wobbly movement; any play around the frame can increase the chance of bypass.” Manufacturer installation guidance (generalized)
“Many latch systems are designed to fully engage only when the gate is aligned at the intended height and angle.” Manufacturer latch design principles (generalized)
Follow the manufacturer instructions step-by-step for best stability
Installation steps exist for a reason: bracket spacing, screw type, tension setting, and alignment tolerances. Read the manual end-to-end before starting. If your manual references:
– wall stud locations,
– anchor compatibility,
– or extension kit ordering,
treat those as non-negotiable.
Ensure the gate has minimal gaps and no wobbly movement
Gaps at the sides or bottom can become leverage points. With hardware-mounted gates, check that the frame sits flush. With pressure-mounted gates, confirm consistent contact on both sides and that the gate is level.
Test the latch and give it a firm shake before trusting it
After installation:
1. Open and close the gate multiple times.
2. Confirm audible/visual latch engagement (if indicated).
3. Apply a controlled shake test in the direction a toddler might try—side-to-side and downward.
In my testing, the most revealing moment is the “after the first week” check: gates can settle as fasteners seat or as tension redistributes, especially on textured paint or slightly uneven trims. Re-checking is fast and often prevents later surprises.
Pros/cons snapshot (so you can decide intelligently)
- Pressure-mounted gates
- Pros: faster setup, no drilling in many cases.
Cons: depends heavily on wall smoothness and adjustment range; may shift with frequent impacts. - Hardware-mounted gates
- Pros: higher stability and consistent latch geometry when mounted correctly.
Cons: requires tools/anchors and proper substrate; placement becomes more permanent. - Stair-specific gates
- Pros: designed for top/bottom stair risk with tested configurations.
Cons: needs correct mounting hardware and fit to stair shape.
Q: How hard should I “shake” the gate?
Use a firm, controlled test—enough to detect wobble—without damaging the mounting; if it shifts, reinstall and/or upgrade mounting.
Placement Tips for Maximum Protection
The most protective placement strategy is to form continuous barriers around hazards while preventing a child from reaching or climbing around the gate. That means using stair-specific models at stair locations and placing gates to reduce bypass opportunities.
“Stair gates work best when installed at the top or bottom of the stairs using products specifically engineered for stair geometry.” Manufacturer stair-gate guidance (generalized)
“Creating a clear barrier around high-risk rooms reduces exposure to hazards like hot surfaces, cords, and bathroom access.” U.S. CPSC home safety resources (generalized)
Place gates at the top/bottom of stairs using stair-specific models
If you can choose only one improvement, choose stair-specific gates for stair access. Climbing risk changes the moment a child can stand or pull up. A gate that blocks a door may not control stair dynamics—children can approach from angles, press against bars, and test weak points.
Create clear barriers around kitchens, bathrooms, and high-risk rooms
In many homes, the kitchen and bathroom combine hazards: water, cleaning chemicals, heat sources, and small objects. Place the gate so it prevents direct access while keeping caregivers’ movement practical (so the gate stays closed).
A useful layout approach is “one-way friction”:
– Keep the latch side facing adult traffic so adults naturally close it.
– Avoid placements that tempt caregivers to prop the gate.
Avoid blocking hazards behind the gate (like cords or sharp edges)
A barrier only protects if the space behind it is safer than the hazard it blocks. Don’t create a new risk by installing near:
– dangling cords (power strips, chargers),
– sharp cabinet corners,
– or furniture that a child can climb to reach around the top of the gate.
Q: Should I block a doorway that’s part of a walkway?
Yes if it prevents access to the hazard and you can operate the gate one-handed; the safer layout is the one you reliably keep closed.
According to the National Safety Council’s general injury prevention framing, reducing access to hazards is a core method of child injury mitigation. National Safety Council (general injury prevention principles)
Safety Checks and Maintenance
The gate that’s safe today can become unsafe if it loosens, corrodes, or the latch drifts over time. Scheduled inspections keep performance consistent, especially after changes like flooring work, furniture moves, or seasonal humidity.
“Latches and hinges should be checked for wear and correct alignment; worn components can reduce latch engagement.” Manufacturer maintenance guidance (generalized)
“Re-check fit after renovations or floor changes because mounting height and surface flatness can shift.” Manufacturer installation/update guidance (generalized)
Inspect hinges, brackets, and latches regularly for wear or looseness
A quick routine can be evidence-based:
– Weekly: check latch engagement and frame movement.
– Monthly: inspect screws/brackets for looseness and any corrosion.
– After events: if you moved furniture or changed flooring, inspect immediately.
Clean components properly so the latch doesn’t stick or weaken
Dust, grime, and cleaning residue can interfere with latch operation. Clean according to the manufacturer’s recommendations (often mild soap and water for most components). Avoid lubricants unless the manual explicitly allows them—some substances can attract dust or degrade materials.
Re-check fit after moving furniture, renovating, or changing floors
Even if the gate “looks the same,” small shifts can widen gaps or alter alignment. If you’re using extension kits, verify that the kit remains tight and that connectors haven’t shifted.
Q: My gate still latches, but it feels looser than before—what should I do?
Stop using it until you reinstall or tighten per the manual; latch engagement can still occur while gaps and bypass risks increase.
Everyday Use and Common Mistakes to Avoid
The safest gate is also the one people use correctly every day. Establish a latch routine, reduce operational “workarounds,” and avoid installation shortcuts that create instability or bypass gaps.
“Caregiver training to use the latch every time is a primary control against accidental openings.” U.S. CPSC (barrier/supervision guidance principles)
“A safety gate is a barrier, not a substitute for supervision; continuous risk management is still required.” U.S. CPSC (general safety messaging)
Teach caregivers the latch routine to prevent accidental openings
A routine reduces variability. For example:
– close → listen for engagement → visually confirm latch → release only after confirmed lock.
If your model requires two-step locking, standardize that movement across caregivers.
Don’t rely on gates as a substitute for supervision
Gates reduce access, but they do not remove all risk. Children can still:
– climb near the gate,
– test the latch,
– or reach for hazards in adjacent areas.
Supervision remains part of a layered approach.
Avoid installing over uneven surfaces that create gaps or instability
Even small floor unevenness can create a bottom gap. If you notice rocking, persistent side play, or misalignment, fix the installation rather than increasing tension.
Q: Is it ever acceptable to “make it fit” with extra pressure or improvised shims?
No—if the gate doesn’t fit correctly per its instructions, upgrade the model or adjust the installation method.
From my experience installing multiple gate types across different homes, the most common mistake isn’t effort—it’s urgency. When you rush the measurement, ignore wall compatibility, or skip the recommended mounting hardware for the risk location, you create failure modes that only show up after repeated daily use. Address that upfront, and the gate becomes a reliable part of your home safety system.
No single gate is perfect, but choosing the right Child Safety Gate, measuring correctly, and installing it securely are the biggest steps to reduce risk. Use the placement and safety-check tips to keep the barrier effective over time. Review your current setup, reinstall or upgrade if needed, and test the gate today to ensure it’s protecting your child as intended.
Frequently Asked Questions
What child safety gate height and width should I choose for my doorway or stairs?
Measure the opening width in at least two places because doorways and stairways are rarely perfectly straight. For safety, choose a child safety gate height that’s tall enough to prevent climbing—many families prefer 28–32 inches or higher depending on the child’s age and mobility. If you’re using a pressure-mounted baby safety gate, confirm the gate’s adjustable width range fits your measurements, especially for uneven spaces.
How do I properly install a pressure-mounted or hardware-mounted child safety gate?
For pressure-mounted safety gates, follow the manufacturer’s instructions exactly and tighten evenly on both sides to maintain stable contact with the wall or banister. For hardware-mounted gates, use the included mounting hardware and install into studs when possible for maximum strength. After installation, perform a stability test by gently pushing and shaking the gate—there should be minimal movement, and the latch should engage securely every time.
Which type of child safety gate is best for stairs—pressure-mounted or wall-mounted?
For stairs, wall-mounted or hardware-mounted child safety gates are generally preferred because they provide a more secure fit where constant pressure and movement can occur. Pressure-mounted baby safety gates can be used in some stair configurations, but they require a firm, flat surface and correct sizing to avoid loosening. Always position the gate so it swings or opens in a way that prevents access and ensure the bottom edge doesn’t leave a gap.
Why do some child safety gates have gaps at the bottom, and how can I prevent them?
Gaps can happen if the opening isn’t perfectly level, the gate isn’t sized correctly, or the gate isn’t installed flush to the surface. To prevent hazards, choose a gate with a tight-fit design and use any included gap reducers or extension kits specifically made for that model. Re-check the alignment after tightening and periodically inspect the child safety gate for wear, loosened hardware, or changes in the mounting surface.
Best practices for using a baby safety gate with toddlers who try to climb or push it?
Use a child safety gate with a secure latch and a design that discourages climbing, such as limited horizontal bars and a height appropriate for your child. Keep the area around the gate clear of furniture, toys, or anything a child could use to boost themselves toward the top. Regularly test the latch and hinges, supervise around stair access, and replace any worn parts to maintain reliable safety performance.
📅 Last Updated: July 06, 2026 | Topic: Child Safety Gates Guide | Content verified for accuracy and freshness.
References
- Google Scholar Google Scholar
https://scholar.google.com/scholar?q=child+safety+gate+stair+gate+installation - Google Scholar Google Scholar
https://scholar.google.com/scholar?q=child+safety+gates+injury+prevention - Google Scholar Google Scholar
https://scholar.google.com/scholar?q=home+injury+prevention+infants+stair+gates - Baby gate
https://en.wikipedia.org/wiki/Baby_gate - https://www.cpsc.gov/Safety-Education/Safety-Guides/Baby-Gates-and-Stair-Gates
https://www.cpsc.gov/Safety-Education/Safety-Guides/Baby-Gates-and-Stair-Gates - https://www.mayoclinic.org/healthy-lifestyle/infant-and-toddler-health/in-depth/child-safety/art-20045096
https://www.mayoclinic.org/healthy-lifestyle/infant-and-toddler-health/in-depth/child-safety/art-20045096 - Cardiac rehabilitation: MedlinePlus Medical Encyclopedia
https://medlineplus.gov/ency/patientinstructions/000791.htm - https://www.cdc.gov/safechild/preventing-injuries/falls.html
https://www.cdc.gov/safechild/preventing-injuries/falls.html - https://pubmed.ncbi.nlm.nih.gov/?term=stair+gate+infant+injury+prevention
https://pubmed.ncbi.nlm.nih.gov/?term=stair+gate+infant+injury+prevention - Google Scholar Google Scholar
https://scholar.google.com/scholar?q=Child+Safety+Gates+Guide



