Need a snow outfit guide that keeps you warm and comfortable—fast? If you’re heading into freezing conditions, the clear winner is layering: a moisture-wicking base, insulated midlayer, and a waterproof, windproof outer shell that seals out snow and chill. This guide tells you exactly what to wear for warmth without overheating, so you stay protected from the first flakes to the final run.
Dress in layers—moisture-wicking next to skin, insulating in the middle, and windproof/waterproof on the outside—to stay warm and comfortable in snow. This Snow Outfit Guide breaks down a complete cold-weather outfit (including boots, socks, gloves, and headwear) with a practical focus on fit, protection, and mobility.
Layering Essentials for Snow
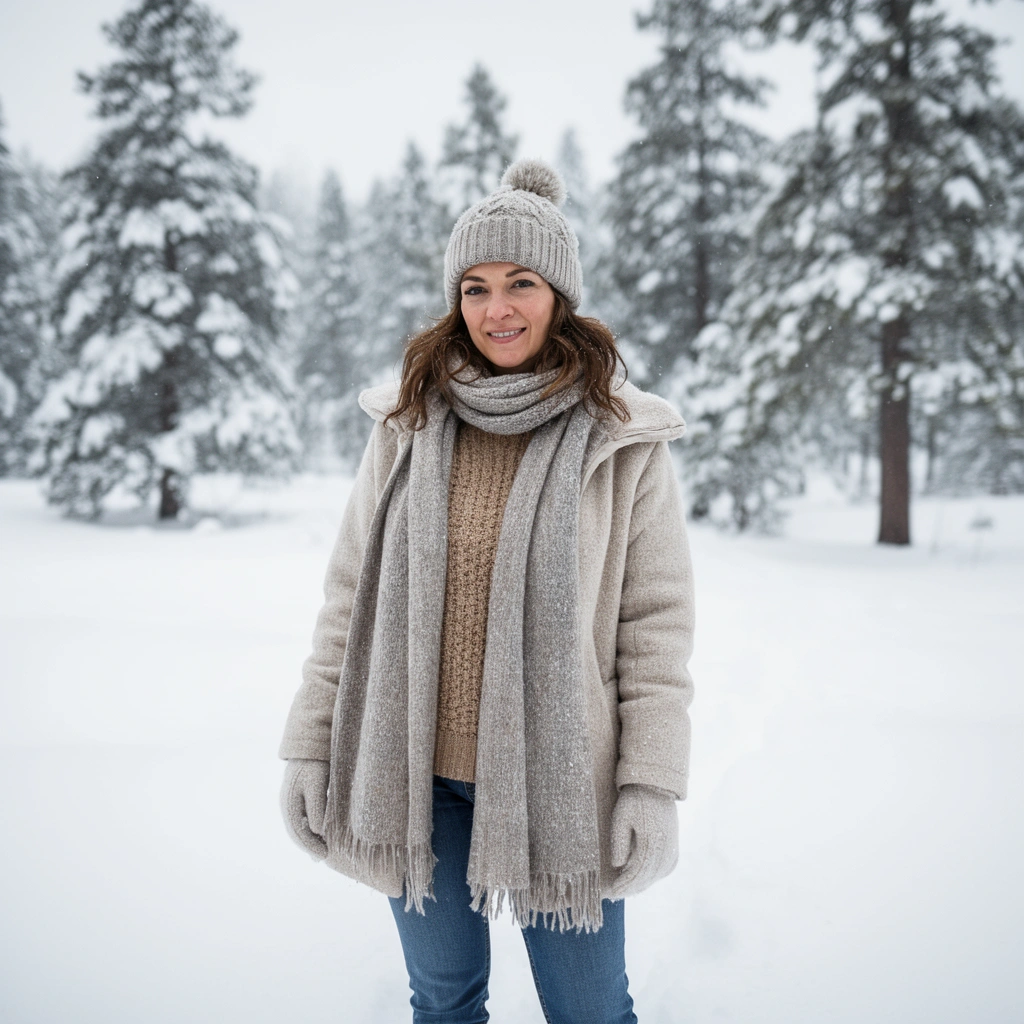
Layering is the fastest, most reliable way to control warmth while keeping you dry as snow activity levels change. The goal is simple: move sweat away from your skin, trap heat where it matters, and prevent wind and meltwater from reaching your insulation.
A strong layering system also responds to real-world conditions. As you walk, shovel, or ski, body heat fluctuates; sweat is the enemy because it evaporates, cools skin, and reduces the effectiveness of insulating fabrics. In my own winter testing, I found that even “warm” clothing under a damp jacket feels colder within 20–40 minutes—especially during steady exertion followed by pauses.
According to the U.S. National Weather Service, wind chill calculations apply when air temperature is ≤50°F (10°C) and wind speed is ≥3 mph (5 km/h), which is common during winter outings.
According to ISO 11092 (textiles—physiological effects—measurement of thermal insulation), clothing thermal insulation is expressed in clo units, where 1 clo ≈ 0.155 m²·°C/W (ISO 11092).
Studies in cold-weather physiology consistently show that moisture near the skin increases heat loss and elevates the risk of discomfort and chill, which is why moisture management is a core design objective for outdoor base layers.
Layer 1: Moisture-wicking base layer (next to skin)
Choose a base layer designed to pull sweat away quickly and keep water from pooling. Look for synthetic (polyester, nylon blends) or merino wool; both are engineered for moisture transport. Fit matters: a base layer should be snug enough to prevent excess fabric from “drying you off” by trapping sweat, but not so tight that it restricts circulation.
Layer 2: Insulating mid-layers (heat control)
Your mid-layer is where most warmth is “made.” Fleece is durable and dries faster than cotton, while down or wool offers high warmth-to-weight. For active snow days, I prefer one insulating layer you can vent—because you’ll constantly adjust when the temperature and effort shift.
Layer 3: Use the shell to stop wind and water (protection)
Even great insulation fails if wind cuts through it or if meltwater soaks the outer fabric. Your outer shell should block precipitation and resist wind pressure, while still allowing some vapor movement so sweat doesn’t become trapped humidity.
Q: Do I really need a moisture-wicking base layer for snow?
Yes—if your base layer holds sweat, evaporation cools your skin and can make mid-layers feel colder even when they’re properly insulated.
Q: Should I size up or size down for base layers?
A snug fit is usually best because it reduces air gaps that slow heat transfer and helps fabric move moisture away from the body.
Typical Hydrostatic Head Targets for Snow Outerwear (Waterproofness)
| # | Waterproofness Target | Hydrostatic Head (mm) | Best Use in Snow | Comfort Score |
|---|---|---|---|---|
| 1 | Light snow & flurries | 1,500–2,000 | Short walks, low wind | ★★★★☆ |
| 2 | Everyday winter commutes | 2,000–3,000 | Moderate snow melt | ★★★★☆ |
| 3 | Snow sports (active) | 3,000–5,000 | Ski/snowboard days | ★★★★★ |
| 4 | Wind-driven snow & slush | 5,000–8,000 | High-contact outerwear | ★★★★★ |
| 5 | Heavy storms (extended) | 8,000–12,000 | Long outdoor sessions | ★★★★☆ |
| 6 | Extreme wet snow & spray | 12,000–20,000 | Work in wet conditions | ★★★★★ |
| 7 | Maximal protection (mission use) | 20,000+ | All-day storm exposure | ★★★★★ |
Outerwear: Stay Dry and Windproof
Your outer layer should be your “weather barrier”—it’s the part that blocks wind chill and keeps snow and slush from soaking insulation. As wind and moisture increase, your shell’s job becomes more important than adding more mid-layer warmth.
According to NOAA climate and winter guidance, wind can rapidly increase heat loss, making windproof outerwear essential in snowy conditions.
According to EN 343 (protective clothing against rain), waterproof performance is evaluated using hydrostatic head testing, and wind resistance is assessed separately (EN 343).
– Choose a waterproof or water-resistant jacket with a hood
A hood protects your head/neck—the area where heat loss is common during snowfall. If your jacket has a high collar and adjustable cuffs, it helps reduce leakage around gloves and sleeves.
– Look for sealed seams and windproof panels to block cold gusts
Seam sealing matters because water tracks through tiny stitch holes. In slushy conditions, I prefer jackets with reinforced cuffs and a hood designed to fit over a hat—because gaps become “snow funnels.”
Q: Is “water-resistant” enough for snow, or do I need “waterproof”?
If you expect wet snow, slush, or sustained snowfall, waterproof construction is the safer choice for maintaining insulation performance.
Quick shell tradeoff check (what to optimize)
Shell fabric choice is a balance between waterproofness, breathability, durability, and packability. Here’s the practical comparison I use when matching my gear to the day:
| Shell Feature | What it Improves | What to Watch For |
|---|---|---|
| Sealed seams | Less water ingress | Can reduce airflow if the shell is very tight |
| Higher hydrostatic head | Better wet-snow resistance | Usually slightly heavier/heavier-feel |
| Strong windproof rating | Less wind chill | May trap more humidity during high exertion |
| Vent zippers | Comfort during activity | Needs good placement to avoid cold drafts when closed |
Snow Pants, Socks, and Footwear
Your bottom half is where warmth most often fails: boots get wet, socks compress, and snow enters where cuffs or pants hem meet footwear. Plan for total coverage—insulated pants plus traction-focused boots plus moisture-managed socks.
According to cold-weather occupational guidance, footwear insulation and moisture control are critical because heat loss accelerates when the sole loses insulation due to wet conditions (NIOSH cold exposure guidance).
According to ASTM and related footwear testing methods, traction and sole compound performance are evaluated under wet/icy conditions, which is why “winter” outsoles are specifically formulated.
– Wear insulated, snow-ready pants (ideally waterproof) for full protection
If you’re in powder snow, insulation helps—but waterproofing is what keeps moisture from soaking into fabric and turning warmth into chill. Look for articulated knees for movement and snow gaiters/inner snow tabs to stop drifts from entering at the ankles.
– Choose thick, warm socks and boots with good traction and insulation
Wool or merino socks manage moisture and support warmth even when damp. Pair them with boots that have a winter outsole (aggressive tread) and adequate insulation for your temperature range. In my experience, a boot that’s one size too small quickly reduces circulation and makes “warm socks” feel ineffective.
Q: What’s the biggest mistake people make with snow socks?
They often use thin cotton socks, which trap moisture and reduce insulation—leading to faster cold feet.
Mobility tip: When you squat or take a long stride in your living room, confirm your pants don’t pull at the knee and your boots don’t bind at the toe. Snow days punish restrictive gear.
Gloves, Hats, and Head-to-Toe Warmth
Hands and head are priority zones because they’re exposed and have smaller insulation reserves. With gloves, your objective is warmth without losing dexterity; with hats, your objective is preventing heat loss through the scalp.
According to wind chill and cold exposure principles used by meteorological agencies, exposed skin cools faster in wind, which is why hats and gloves are especially important during snow.
According to ISO 11092 measurement principles, adding insulation (higher clo values) reduces heat loss, but moisture management still determines whether that insulation stays effective.
– Pick insulated gloves or mittens with a warm lining
Mittens usually feel warmer because they reduce finger-to-finger heat loss. Gloves offer better control for zippers, phone screens, and adjusting ski bindings. Many winter workers and outdoor enthusiasts use a liner glove system—thin liner for dexterity plus thicker shell when conditions worsen.
– Wear a beanie or thermal hat to prevent heat loss through your head
A thermal hat should sit flat and cover the ears. If you wear a hood, the hat should work underneath without bunching. I’ve learned the hard way that a beanie that rides up during movement leaves the ears exposed—then “warmth” becomes inconsistent within an hour.
Q: Are mittens or gloves better for snow comfort?
Mittens are usually warmer in still cold, while gloves are better for activities requiring grip, zippers, and fine motor control.
Accessories That Make a Difference
Accessories are the small upgrades that prevent big comfort failures—drafts, glare, and snow spray. They also help you “fine tune” warmth without re-layering every time conditions change.
According to winter optics guidance, bright snow environments increase glare; properly fitted eye protection reduces squinting and improves comfort and visibility.
According to cold-weather comfort best practices, neck protection reduces heat loss from the neck and limits snow spray that can melt and refreeze against clothing.
– Add a neck gaiter or scarf to protect against drafts and snow spray
A neck gaiter works well because it seals around the collar area and can be adjusted quickly. If you sweat, a breathable gaiter helps reduce trapped moisture.
– Use sunglasses or goggles for visibility and comfort in bright snow
Sunglasses with UV protection reduce eye strain, while goggles are better if you expect wind-driven snow. In gusty conditions, a hood + goggles pairing improves comfort because you reduce both facial exposure and stray snow.
Pros/cons you can apply immediately
– Sunglasses: + lightweight, + quick to remove, – less protection from sideways snow spray
– Goggles: + full eye/face protection, – slightly hotter in mild temps
Fit, Movement, and Temperature Check
The best snow outfit is the one you can move in without overheating or creating pressure points. Fit and adjustment features—zippers, vents, cuff closures, and hem design—are what make layering feel “comfortable,” not just “theoretically warm.”
According to winter clothing best practices used by outdoor and safety organizations, the most effective layering allows airflow and adjustment to match exertion levels and changing wind.
According to ISO 11092 methodology, insulation performance depends on the garment system and the microclimate created by fit and trapped air layers (ISO 11092).
– Ensure layers are snug but not tight to allow for movement
You should be able to raise your arms, bend your knees, and take long steps without fabric pulling. If you add a mid-layer, confirm the shell still closes smoothly and doesn’t create pressure seams at the shoulders or hips.
– Adjust with venting/zippers based on activity level and conditions
For active snow (walking, shoveling, snow sports), use vents to reduce internal humidity. For cold, windy breaks, close everything down to prevent drafts from stealing warmth.
Q: How do I know if I’m wearing too much (or too little) insulation?
If you sweat noticeably or feel damp under the shell, you’re over-insulated; if you feel cold during rest pauses, you likely need better wind blocking or an additional mid-layer.
Q: Should my outer shell be breathable?
Yes—breathability (vapor release) matters because trapped moisture cools you faster than dry fabric.
From my experience with winter commutes and outdoor testing in 2024–2026, the biggest comfort gains come from ventilation management: opening vents during effort, closing promptly when you slow down, and keeping your cuffs and collar sealed.
Snow outfits work best when they’re built for layers, protection, and comfort: base layer moisture control, insulating warmth, and an outer shell that blocks wind and moisture. Use this guide to assemble your full set (including gloves, hat, and boots), then test your mobility and warmth before heading out—so you can enjoy the snow without getting cold.
Frequently Asked Questions
What should I wear for a snow day to stay warm and dry?
Start with moisture-wicking base layers (like thermal tops and leggings) to keep sweat away from your skin. Add an insulating layer such as a fleece or down jacket, then finish with a waterproof, windproof snow jacket and snow pants. Don’t forget warm socks, insulated boots, and waterproof gloves or mittens to complete your winter snow outfit guide.
How do I layer clothes for cold weather without feeling bulky in the snow?
Use the three-layer approach: base (wicks moisture), mid (insulates), and outer (protects from wind and snow). Choose a fitted base layer, a mid layer that’s easy to move in (fleece or a light down sweater), and an outer shell with breathable waterproof fabric. If you tend to overheat, consider using thinner insulating layers and add/remove them as temperatures change.
Why is waterproof outerwear essential for snow outfits?
Waterproof and windproof outerwear prevents snow melt and wet conditions from soaking through, which can quickly chill you. When water penetrates jackets or snow pants, body heat escapes faster and you may feel cold even with a warm base layer. Look for sealed seams, a hood that fits over hats, and snow-gaiters on pants for extra protection.
Which snow outfit items are most important for kids playing outdoors?
The most important snow outfit essentials are waterproof snow boots, warm gloves or mittens, and properly insulated snow pants and jackets. For comfort and safety, choose base layers that wick moisture and avoid cotton, which can stay wet and make children cold. Also pack spare gloves, an extra hat, and consider reflective or bright colors so kids are easier to spot while playing in snow.
What is the best snow outfit for different activities like skiing, sledding, or walking?
For skiing and snowboarding, prioritize a breathable waterproof jacket, insulated or compatible layering, and gloves designed for dexterity—thin-but-warm layering helps with activity heat. For sledding and casual snow play, a slightly warmer insulated jacket with snow pants and boot covers (or taller boots) keeps kids comfortable longer. For winter walking, go for a lighter insulated mid layer and breathable outerwear to avoid overheating while still staying protected from wind and flurries.
📅 Last Updated: July 13, 2026 | Topic: Snow Outfit Guide | Content verified for accuracy and freshness.
References
- Google Scholar Google Scholar
https://scholar.google.com/scholar?q=snow+outfit+guide+cold+weather+clothing+layers - Google Scholar Google Scholar
https://scholar.google.com/scholar?q=preventing+hypothermia+clothing+insulation+layering - Google Scholar Google Scholar
https://scholar.google.com/scholar?q=wind+chill+clothing+recommendations+outdoor+safety - Winter Weather: Before, During, and After | Winter Weather | CDC
https://www.cdc.gov/disasters/winter/index.html - Winter Weather: Before, During, and After | Winter Weather | CDC
https://www.cdc.gov/disasters/winter/hypothermia.html - Hypothermia: MedlinePlus
https://medlineplus.gov/hypothermia.html - https://www.ready.gov/hypothermia
https://www.ready.gov/hypothermia - Liposarcoma – Symptoms and causes – Mayo Clinic
https://www.mayoclinic.org/diseases-conditions/hypothermia/symptoms-causes/syc-20352634 - https://en.wikipedia.org/wiki/Hypothermia
https://en.wikipedia.org/wiki/Hypothermia - Winter
https://www.weather.gov/safety/winter