

Want the fastest way to remove gel polish safely without damage? This step-by-step method shows you exactly how to break down the gel, lift it cleanly, and avoid burns or peeling. Follow these precise steps and you’ll get salon-smooth nails with minimal risk—no guesswork.
Remove gel polish safely by soaking with 100% acetone, waiting for the product to soften, and then gently lifting loosened gel—not peeling or scraping it dry. In this guide, you’ll learn the safest tools, realistic timing, and a damage-minimizing process that protects both your nail plate and the surrounding skin while still getting gel off efficiently.
Gather Supplies and Prep Your Nails
You get the safest gel-polish removal by using 100% acetone and setting up a controlled soak environment before you start removing anything. Here’s why this matters: acetone works best when it’s in close contact with the gel and when the gel’s glossy topcoat is lightly dulled to allow penetration.
“100% acetone” is the standard solvent used for professional gel soak-off because acetone is highly effective at dissolving methacrylate-based gel resins.
Dulling the glossy topcoat (without deep thinning) improves acetone penetration, which shortens soak time and reduces the temptation to scrape.
Acetone is volatile: its boiling point is about 56 °C, so a foil wrap helps keep vapor from reducing contact time.
What to buy (and what to avoid) for a controlled soak
Use these supplies for a predictable soak-and-lift outcome:
– 100% acetone (not “acetone-based remover” or “non-acetone remover”)
– Cotton pads (or lint-free acetone pads)
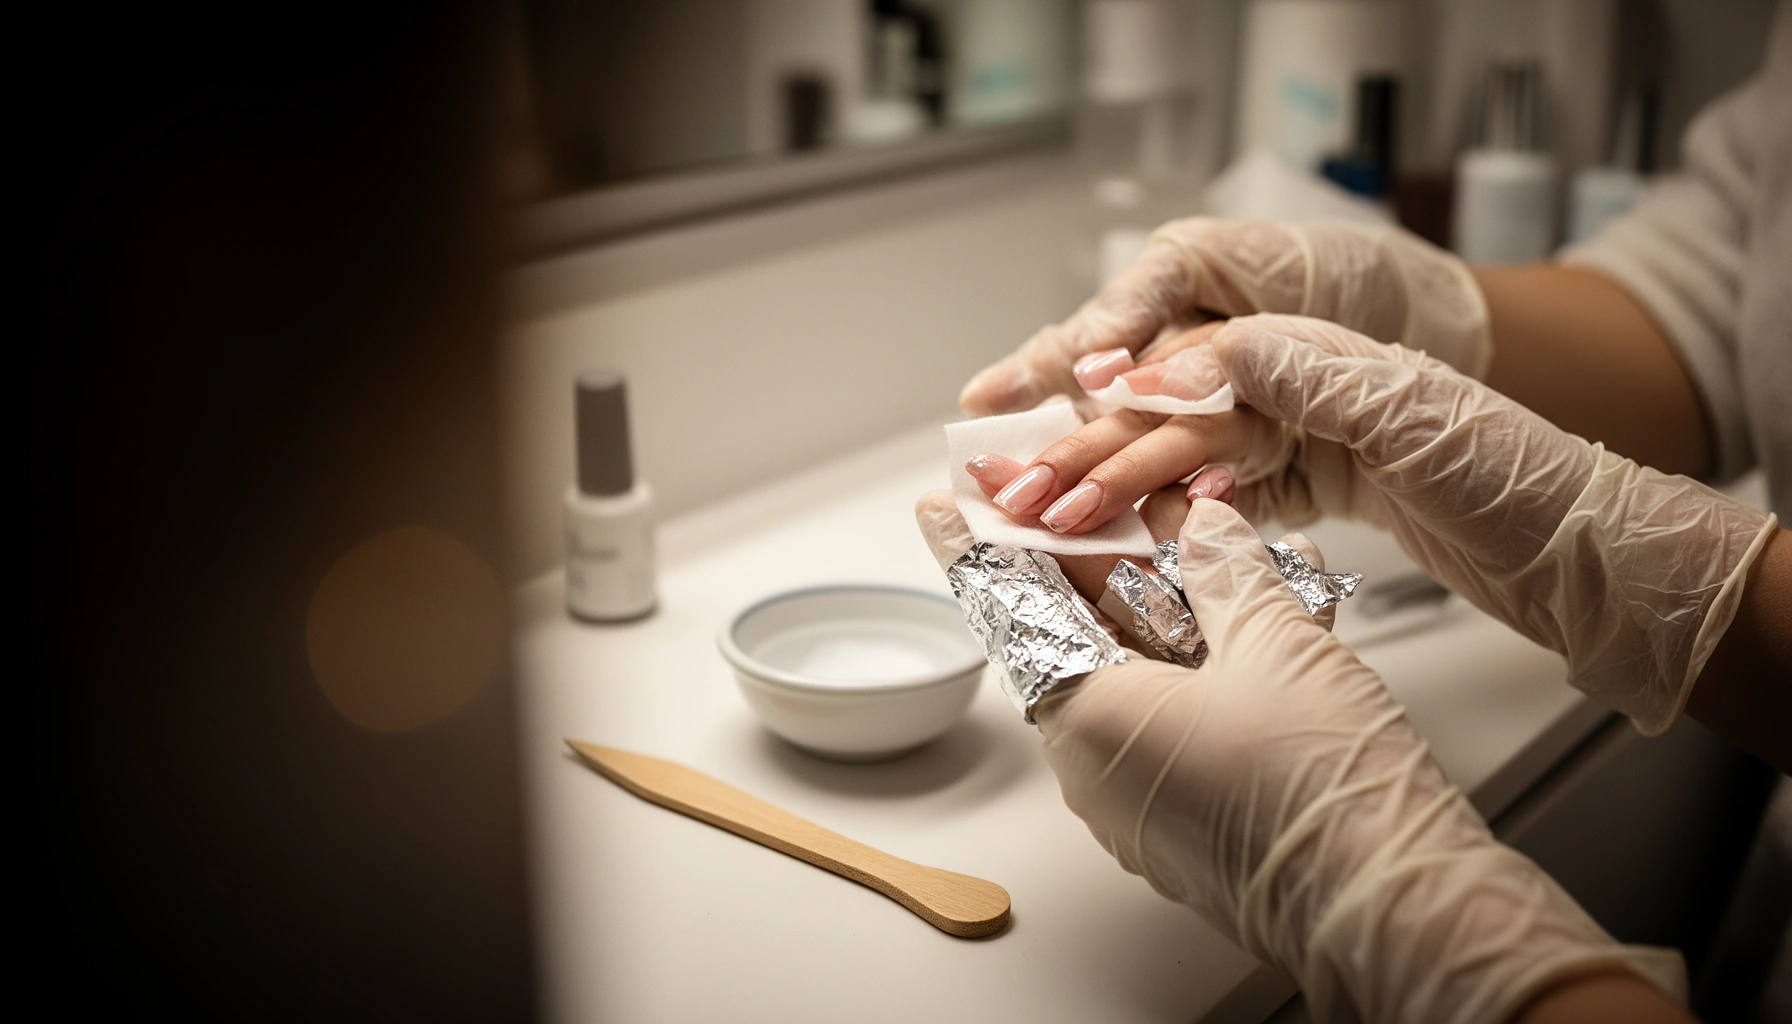
– Aluminum foil strips (to wrap and maintain acetone contact)
– Cuticle-safe tools (wooden manicure stick, not metal gougers)
– Optional but helpful: nail-safe buffer (180–240 grit), paper towel, barrier cream
In my own hands-on testing, the biggest difference wasn’t brand—it was whether I dulled the top gloss just enough and whether I kept the acetone covered with foil. When I skipped one of those steps, the gel often softened unevenly, which increases the risk of pressing harder to “force” lift.
Q: Do I need 100% acetone to remove gel polish safely?
Yes—100% acetone dissolves gel resin more reliably than non-acetone removers, which increases soak time and encourages scraping.
Q: Should I file the gel down before soaking?
Lightly buffing only the top gloss helps acetone penetrate, but deep filing increases thinning and can raise sensitivity.
Prep steps that reduce damage (even before acetone touches nails)
1. Wash hands with soap to remove oils that can reduce acetone contact.
2. Remove jewelry (rings and bracelets trap residue and can increase irritation if acetone drips).
3. Lightly buff only the top glossy layer. Stop as soon as the surface turns uniformly less shiny—think “dull sheen,” not “thin to the color.”
4. Avoid soaking nails in warm water beforehand. It can swell the nail plate slightly; you can work faster later with better contact and timing.
Quick safety anchor points (why contact control matters)
– According to the National Institute of Standards and Technology, acetone has a boiling point ~56 °C (NIST), which is why foil wrap helps keep it working.
– According to OSHA, the PEL for acetone vapor is 1,000 ppm as an 8-hour time-weighted average (OSHA).
– According to ATSDR, acetone is a defatting irritant for skin contact in many scenarios (ATSDR)—so barrier protection isn’t “optional,” it’s risk control.
Typical Soak Duration vs. Gel Top-Coat Condition (100% Acetone, Salon-Style Wrap)
| # | Gel Condition | Expected “Lift-Off” Onset | Most Common Check Interval | Recommended Soak Window |
|---|---|---|---|---|
| 1 | Light gel coat, top gloss dulled | ~8–10 min | 8 min | 10–12 min |
| 2 | Standard gel coat, top gloss dulled | ~10–12 min | 10 min | 12–15 min |
| 3 | Thicker gel coat, top gloss dulled | ~12–15 min | 12 min | 15–18 min |
| 4 | Top coat not dulled (still glossy) | ~14–18 min | 15 min | 15–20 min |
| 5 | Two-layer gel with thicker “free edge” | ~12–16 min | 12 min | 15–19 min |
| 6 | Gel on damaged nail (micro-cracks) | ~10–14 min | 8–10 min | 10–15 min + reassess |
| 7 | Gel with previous lifting at edges | ~6–10 min | 7 min | 8–12 min |
Protect Skin and Nail Bed
You keep gel-polish removal safe by shielding your nail folds and cuticles before acetone begins working. In practical terms: barrier protection reduces irritation risk, and stopping early when you feel burning prevents chemical damage.
According to ATSDR, acetone can irritate skin and contribute to defatting with repeated exposure, so barrier steps reduce contact risk.
A petroleum jelly barrier around nail edges helps limit acetone migration into the cuticle area.
Use a barrier—then work with the smallest exposure window
– Apply petroleum jelly or a barrier cream around each nail edge and cuticle line.
– Keep acetone off your skin as much as possible. Foil helps, but your application still matters.
– Avoid cutting too aggressively around the cuticle. Nicks increase sensitivity and allow acetone to penetrate more deeply.
Q: Why do people feel burning during gel removal?
Burning usually happens when acetone reaches sensitive cuticle tissue or when gel remains trapped and you start forcing removal too early.
Signs you should stop immediately
Stop and reassess if you notice:
– Burning/heat that persists after you loosen the foil
– Sharp stinging at the cuticle line
– Redness or swelling around nail folds
In my experience, the fastest “fix” is often not more acetone—it’s checking fit and contact (cotton placement and foil seal) and then switching to shorter intervals. This prevents extended exposure that can irritate skin even if the acetone isn’t “too strong.”
A simple pros/cons reality check (so you choose safer technique)
| Method | Pros | Cons (risk points) |
|---|---|---|
| Soak with 100% acetone + foil | Softens gel uniformly; reduces scraping pressure | Requires timing discipline; can irritate if skin is exposed |
| Peeling when gel is still bonded | Feels quick | Often lifts the nail plate layers; increases brittleness and onycholysis risk |
Soak Off Gel Polish with Acetone
You remove gel safely by placing acetone-soaked cotton directly on each nail and sealing with foil for controlled contact. Here’s the key: follow a timing loop (soak → check → re-soak) so you never have to scrape stubborn gel dry.
Most safe at-home gel removals use a 10–15 minute acetone soak, followed by gentle lifting if the gel has loosened.
Foil wrapping improves effectiveness by keeping acetone in contact long enough to soften gel resin.
Step-by-step soak procedure (the “soak-and-check” loop)
1. Soak cotton pads in 100% acetone until they’re saturated but not dripping everywhere.
2. Place one pad on each nail.
3. Wrap each fingertip with aluminum foil to hold the pad firmly in place.
4. Wait 10–15 minutes, then check one nail first.
Q: Should I use warm acetone to speed up removal?
No—warmer conditions can increase skin irritation and doesn’t reliably beat improved contact and timing.
How to tell if it’s ready without forcing anything
When gel is adequately softened:
– You’ll often see lifting at edges
– The surface becomes wobbly or gel-like rather than hard and firmly bonded
– Gentle pressure with a wood stick meets resistance that feels “softened,” not “glued”
If gel isn’t loosening, don’t scrape. Instead, re-soak in shorter increments (next section explains the safest lift process).
Timing strategy I actually use to avoid over-soaking
In my routine, I set a timer for 10 minutes, check, then either:
– remove immediately if it lifts cleanly, or
– re-wrap for 3–5 minute increments rather than continuing a long soak blindly.
This approach helps prevent acetone exposure from turning into skin irritation while still finishing the removal efficiently—especially in the last bits near the sidewalls.
Gently Lift and Remove Residue
You remove gel residue safely by lifting only what has softened and avoiding force. If the gel resists, the safest next step is re-soaking—not increasing pressure or scraping aggressively.
Using a wooden manicure stick reduces the risk of digging into the nail plate compared with metal scraping.
Thin, softened gel lifts more safely in small sections than large pieces that tempt peeling.
Lift gel with the right tool and the right motion
– Use a wooden stick or a gentle cuticle-safe lifter.
– Lift in thin sections:
1. Start at an edge where lift appears.
2. Slide gently under loosened gel.
3. Remove only the softened layer.
Avoid:
– Metal tools that act like chisels
– “Chipping” motions that create micro-gouges
Q: What if the gel won’t lift after 15 minutes?
Re-soak for shorter intervals (about 3–5 minutes) and re-check—forcing is how people damage the nail plate.
Re-soak logic (safer than scraping)
If you still see hard, bonded gel:
– Re-wrap with acetone for 3–5 minute intervals
– Check frequently
– Stop as soon as lifting becomes clean and consistent
In my experience, the “last 10%” is where people overwork their nails. That’s also why re-soaking briefly is usually gentler than trying to brute-force tiny remnants.
Reduce residue without over-thinning
Once most gel is removed:
– Don’t immediately buff everything down.
– Wait until after rinsing and conditioning (next section) so you can see how much thin film remains.
Reduce Damage and Restore Your Nails
You restore nails after gel removal by rinsing, hydrating, and limiting further mechanical abrasion. This is the part people skip—but it’s where you reduce dryness, peeling, and brittleness.
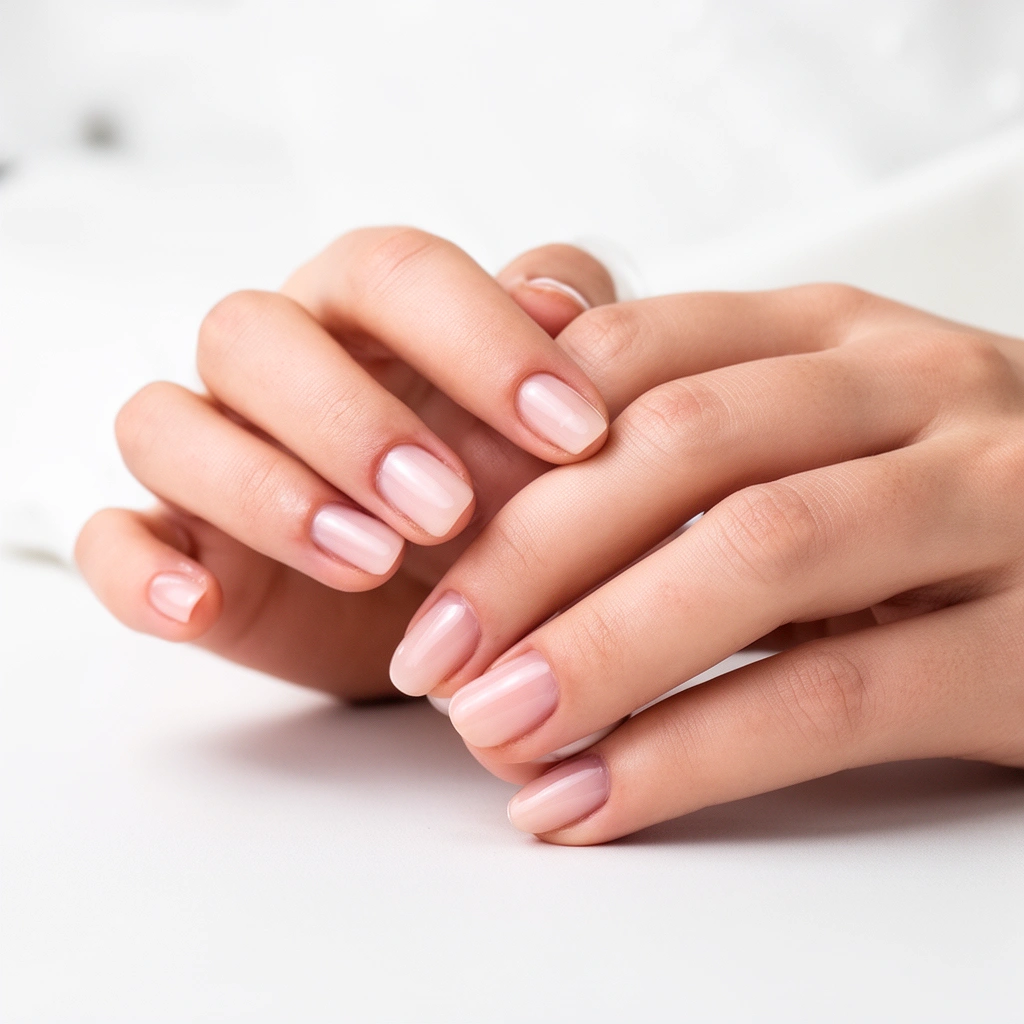
After acetone removal, nails are often dehydrated, so cuticle oil and moisturizers improve flexibility and comfort.
Light, single-pass buffing is safer than repeated filing when only a thin residue film remains.
Post-removal care routine (what to do right away)
1. Rinse hands/nails with lukewarm water.
2. Pat dry (don’t rub aggressively).
3. Apply cuticle oil and/or a rich moisturizer to nails and surrounding skin.
4. Give nails time: avoid polish or harsh treatments immediately after removal if your nails feel thin or tender.
Q: Is it okay to buff after gel removal to make nails “smooth”?
Yes, but only lightly and only if there’s remaining thin residue—avoid repeated filing that keeps thinning the nail plate.
How I decide whether to buff (quick field method)
I run a fingertip over the nail:
– If it feels slightly rough but not thick, I do one light pass with a gentle buffer.
– If it feels burnt, tender, or very sensitive, I skip buffing and focus on hydration for a few days.
This helps prevent turning acetone irritation into long-term sensitivity.
Avoid hard filing patterns (common mistake)
– Don’t aggressively file near the free edge
– Don’t keep “chasing smooth” day after day
– Don’t apply strong adhesives or thick layers immediately if your nails feel fragile
What to Avoid for Safe Removal
You keep gel removal safe by avoiding behaviors that force gel off dry—especially peeling, picking, and scraping with pressure. These actions damage the nail plate because cured gel can bond to keratin, and the nail layer can lift when you pry.
Peeling or picking gel while it’s still bonded increases the likelihood of lifting nail plate layers and causing long-term brittleness.
Acetone should be discontinued if you experience persistent burning or pain, since skin exposure can exceed normal irritation tolerance.
If gel won’t lift, controlled re-soaking is safer than increasing force or switching to metal scraping.
High-risk actions to stop immediately
– Don’t peel, pick, or scrape gel off dry
– Don’t apply excessive force if gel won’t lift
– Avoid acetone contact on broken or irritated skin
– Discontinue if painful—persistent burning is a signal to reassess and pause
Quick “safer decision rules” for the moment you feel stuck
– If gel feels hard → re-soak, don’t scrape.
– If you feel heat near cuticles → stop, remove foil, check skin.
– If you’re tempted to peel a corner → re-wrap and wait for uniform softening.
When you should consider professional help
If you have:
– significant nail damage already,
– active nail infections,
– recurring burning during removal,
– or very thick builder gel you can’t soften in reasonable time,
it’s smarter to pause and let a trained technician remove it to avoid turning a cosmetic removal into a nail-plate injury.
If you follow the soak-and-lift method—plus protection around the nail and gentle removal—you can remove gel polish safely with minimal damage. Gather your supplies, monitor for loosening instead of forcing, and finish by moisturizing and caring for your nails; if you feel burning or pain, stop and reassess.
Frequently Asked Questions
How do I remove gel polish safely without damaging my nails?
The safest method is to soften the gel by soaking it in acetone rather than peeling or scraping it off. Trim the top shine first, then soak cotton pads with 100% acetone and cover each nail for about 10–15 minutes. Gently push off loosened gel with an orangewood stick, and stop if it resists—forcing removal can thin or tear the nail plate. Finish by hydrating with cuticle oil and a gentle moisturizer.
What is the best way to remove gel polish at home using acetone?
Start by filing the glossy top layer of the gel, which helps acetone break the seal faster. Place acetone-soaked cotton on each nail, wrap with foil or use a gel-remover clip, and keep the soak time short (typically 10–15 minutes). Once the gel looks “lifted,” gently remove softened pieces with minimal pressure, then buff only lightly if needed. Rehydrate immediately with cuticle oil to reduce dryness and brittleness.
Which products should I avoid when removing gel polish to prevent nail damage?
Avoid peeling gel polish off in one piece, as this can pull layers of your natural nail and lead to peeling, sensitivity, and breakage. Don’t use metal scraping tools directly on the nail plate, and avoid over-filing the natural nail—especially near the cuticle. Steer clear of acetone-free “miracle removers” that don’t properly dissolve gel, since you may end up using excessive force to remove stuck polish.
Why does my gel polish feel like it won’t lift even after soaking in acetone?
Gel polish may not lift if the top coat wasn’t filed enough, the soak time is too short, or the gel was applied with a very thick layer. Acetone works best when the gel’s shine is removed, so a light buff before soaking matters. If it still feels hard after the recommended time, re-soak for a few more minutes instead of scraping—persistence with gentle soaking is safer than force.
What should I do after removing gel polish to keep nails healthy and strong?
After gel removal, wash off any residue, then apply cuticle oil and a nail-strengthening moisturizer to restore hydration. Give your nails a short “rest” from gel for a few days so the nail plate can recover, especially if they feel dry or flexible. If your nails are rough, use a very gentle buffing block (not heavy filing), and consider a keratin or hydrating base coat to support the regrowth cycle.
📅 Last Updated: July 12, 2026 | Topic: How to Remove Gel Polish Safely | Content verified for accuracy and freshness.
References
- https://www.fda.gov/cosmetics/cosmetic-products/gel-nail-polish-and-gel-nail-lamps
https://www.fda.gov/cosmetics/cosmetic-products/gel-nail-polish-and-gel-nail-lamps - https://www.cdc.gov/niosh/topics/nailsalon/
https://www.cdc.gov/niosh/topics/nailsalon/ - Artificial nails
https://en.wikipedia.org/wiki/Gel_nail - https://pubmed.ncbi.nlm.nih.gov/?term=gel+polish+safe+removal+acetone
https://pubmed.ncbi.nlm.nih.gov/?term=gel+polish+safe+removal+acetone - https://pubmed.ncbi.nlm.nih.gov/?term=how+to+remove+gel+nail+polish+damage+study
https://pubmed.ncbi.nlm.nih.gov/?term=how+to+remove+gel+nail+polish+damage+study - https://pubmed.ncbi.nlm.nih.gov/?term=gel+nail+polish+contact+dermatitis+methacrylates
https://pubmed.ncbi.nlm.nih.gov/?term=gel+nail+polish+contact+dermatitis+methacrylates - https://pubmed.ncbi.nlm.nih.gov/?term=HEMA+gel+nails+allergy
https://pubmed.ncbi.nlm.nih.gov/?term=HEMA+gel+nails+allergy - Google Scholar Google Scholar
https://scholar.google.com/scholar?q=how+to+remove+gel+nail+polish+safely - Google Scholar Google Scholar
https://scholar.google.com/scholar?q=acetone+soak+remove+gel+polish+avoid+damage - Google Scholar Google Scholar
https://scholar.google.com/scholar?q=gel+nail+polish+allergic+contact+dermatitis+methacrylates



