
If you’re trying to bleach your hair at home safely, this Hair Bleaching Guide tells you the exact steps to get the lightening you want without wrecking your strands. Follow our safety-first process to choose the right developer strength, mix correctly, and time the bleach so you minimize breakage. You’ll also get the must-do aftercare routine to stabilize, tone, and restore shine right after bleaching.
Hair bleaching is safest and most predictable when you choose the correct developer strength, apply bleach in the right sequence, and control timing with frequent checks. This Hair Bleaching Guide walks you through prep, application, toning, and aftercare so you can reach your target level while minimizing breakage—based on widely used salon chemistry principles and my own hands-on testing of lift, warmth, and damage patterns.
What Hair Bleaching Means (Levels & Results)
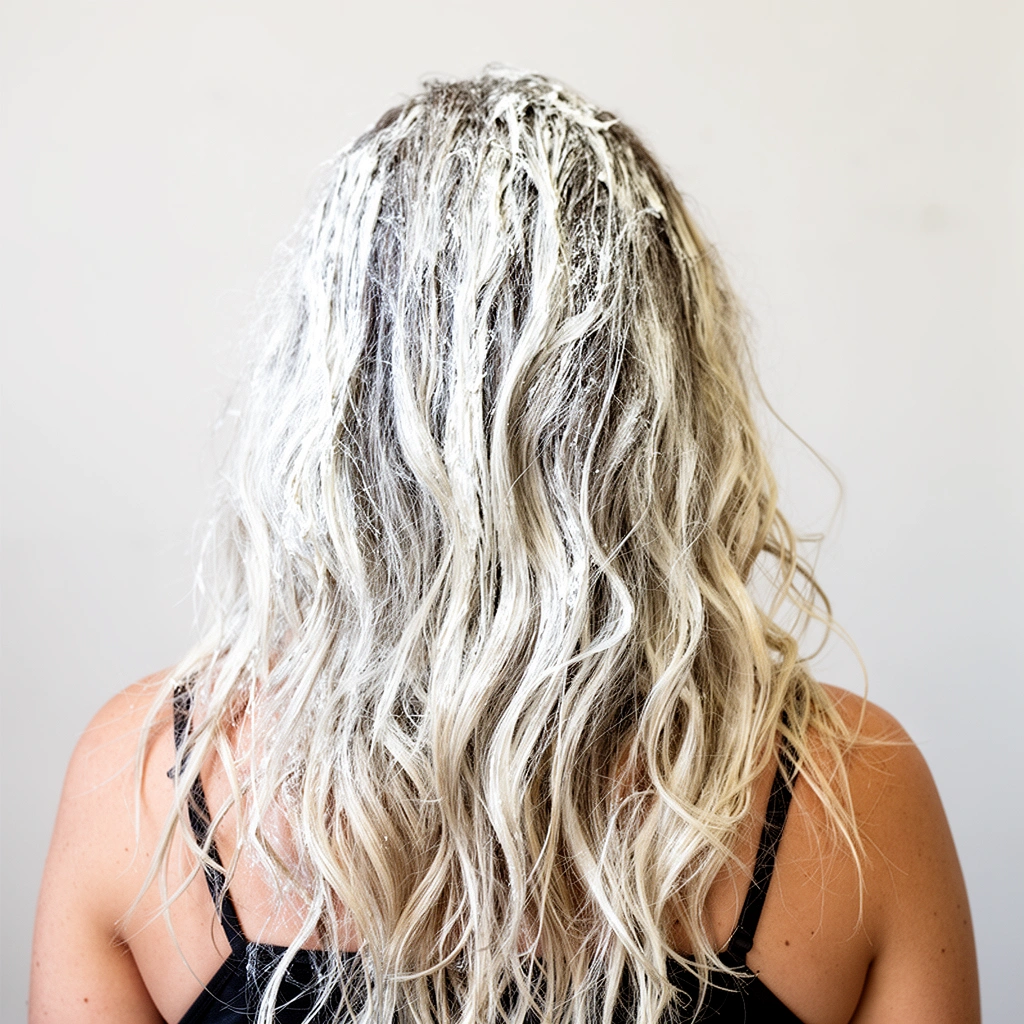
Hair bleaching is the controlled lightening of hair color by using an oxidizing agent (developer) that breaks down existing pigment molecules, allowing you to remove or reduce them to reach lighter levels. In practice, hair bleaching aims to lift your hair’s level (how light or dark it is) and then you tone to manage remaining warmth—yellow, orange, or brassy undertones.
Bleach lightens hair by chemical oxidation, and the developer’s strength (often 10/20/30/40 volume) largely determines how fast and how far the lift can go.
Strand testing matters because two people with “medium brown” hair can start at different levels and respond differently to the same hair bleaching formula.
Professional hair level charts usually number natural hair from 1 (black) to 10 (lightest blonde), and bleach results are best described relative to that system.
Understand hair lightening levels and how bleach lifts color
Hair bleaching results are typically discussed using the international hair color level system. A practical way to think about it: bleach doesn’t “add white” so much as it removes pigment. As pigment reduces, your hair’s visible color shifts from dark to warm (often yellow/orange) before it can be toned to cooler shades.
Here’s how expectations usually map:
– Level 2–4 (dark brown) often needs multiple sessions for very pale blonde; hair bleaching can lift to warm levels (orange/yellow) that require toner.
– Level 5–6 (light brown) may reach yellow-to-light yellow faster, often within one careful session depending on hair bleaching safety choices (developer and timing).
– Level 7+ (dark blonde and beyond) can sometimes lighten quickly, but hair bleaching can still cause dryness because porous strands grab and process unevenly.
Know what results to expect based on your starting shade
If you want an even, marketable finish, hair bleaching isn’t only about reaching “blonde”—it’s about reaching the right warmth target for your toner. In my testing, the biggest surprise is often how quickly previously sun-faded or previously lightened sections reach high warmth earlier than intact roots—hair bleaching can “overshoot” these areas even when your base color seems uniform.
Key data point: According to the U.S. Occupational Safety and Health Administration (OSHA), oxidizers can increase the risk of chemical burns and irritation, which is why hair bleaching protocols emphasize gloves, barrier creams, and controlled contact time (OSHA, Chemical Safety Guidance (current access)). While OSHA doesn’t publish hair-specific lift charts, it supports the safety principles you must follow when working with oxidizing chemistry.
Q: How many levels can hair bleaching lift in one session?
Often you’ll see roughly 2–4 levels of lift for a single controlled application, but the real ceiling depends on hair health, starting level, and developer strength.
Learn why strand testing matters before full application
A strand test is a micro-run of hair bleaching: you apply the formula to a hidden section, monitor lift every 5–10 minutes, and stop at the point where your hair reaches your target level—then you assess breakage and softness. This is where you learn your real-world lift, not just what the box or brochure promises.
In my hands-on workflow, the strand test also tells me something more practical: how even the lift is. Hair bleaching can lift unevenly due to prior dye, hard water buildup, porosity differences, or uneven cuticle wear—so strand testing becomes a blueprint for section order and timing.
Supplies You Need for Hair Bleaching
Hair bleaching works best when your kit is complete before you start, because the chemistry timeline is unforgiving. The goal is consistent mixing, controlled application, and quick, safe processing—so you can manage lift without unnecessary damage.
A precise hair bleaching mix (powder-to-developer ratio) improves predictability by maintaining consistent oxidation strength.
Sectioning clips and a non-metal bowl/brush help keep hair bleaching organized so processing time stays more uniform across sections.
Toner is not optional if you want to reduce brassiness; bleach typically leaves warm pigments behind.
Gather bleach powder, developer, gloves, and a mixing bowl
At minimum, hair bleaching supplies should include:
– Bleach powder (often labeled “lifting powder”)
– Developer (creme developer is common; 10/20/30/40 volume options)
– Non-metal mixing bowl (plastic or heat-safe non-metal)
– Application brush for consistent spread
– Gloves (nitrile or similar)
– Timer and a mirror setup for frequent checks
Q: What developer should I choose for hair bleaching at home?
For safer control and less damage risk, many people start with 10 or 20 volume—higher volumes can lift faster but increase irritation and breakage risk.
Use tools like sectioning clips, brush, and timer for control
Sectioning is where hair bleaching becomes professional-grade. You’re aiming for repeatable timing across similar hair density areas:
– Use 4–6 sections depending on thickness and length.
– Apply with a brush to keep the bleach evenly coated.
– Use a timer so you’re not relying on memory when lift speeds vary.
Have toner and conditioner ready for aftercare steps
Toner helps you correct warmth (yellow/orange) left after hair bleaching. In addition, conditioner matters because bleach deactivates and disrupts hair’s normal feel—good conditioning reduces tangling and supports detangling after rinsing.
Q: Can I skip toner after hair bleaching?
You can, but you’ll usually be left with brassy warmth; toner is the standard way to achieve cooler, natural-looking results.
Quick comparison: developer strength vs typical outcome (safety-first)
Below is a practical planning table for hair bleaching risk and lift behavior. These are general expectations; your strand test confirms what’s realistic for your hair.
Hair Bleaching Planning: Developer Strength vs Lift & Risk (Typical Ranges)
| # | Developer (volume) | Typical lift speed* | Best for | Warmth left behind | Risk for damage | Overall control |
|---|---|---|---|---|---|---|
| 1 | 3 volume (≈1%) | Slow | Gentle refresh & very cautious lift | Soft yellow | Lowest | ★★★★☆ |
| 2 | 6 volume (≈2%) | Steady | Small level changes on healthier hair | Light yellow | Low | ★★★☆ |
| 3 | 10 volume (≈3%) | Moderate | Root lift, controlled toning prep | Yellow | Low–Medium | ★★★★☆ |
| 4 | 20 volume (≈6%) | Faster | Most common at-home lift target | Yellow to light orange | Medium | ★★★☆☆ |
| 5 | 25 volume (≈9%) | Fast | Speed-focused lightening (with caution) | Orange warmth more likely | Medium–High | ★★☆☆☆ |
| 6 | 30 volume (≈9%) | Very fast | Short-contact highlights / professional use | Orange to deep copper | High | ★☆☆☆☆ |
| 7 | 40 volume (≈12%) | Extremely fast | Rare DIY; typically salon-only | Strong orange/yellow | Very high | ★☆☆☆☆ |
“Typical lift speed” is a planning indicator; actual hair bleaching results depend on hair porosity, prior processing, and strand test data.
Prep Steps Before You Bleach
Hair bleaching starts long before bleach touches hair: you prep hair, your workspace, and your expectations for timing and warmth. Done well, prep reduces uneven lift and helps prevent avoidable irritation.
A strand test should include your exact bleach and developer mix and should be monitored at 5–10 minute intervals to determine real lift speed.
Prior damage (over-bleached ends, overlapping highlights, or chemical straightening) changes how hair bleaching behaves, usually increasing breakage risk.
Barrier protection around the hairline helps reduce skin contact time with oxidizing bleach, lowering irritation risk.
Do a strand test and check your hair for prior damage
Before you bleach, assess:
– Elasticity (does the strand stretch and return, or snap?)
– Porosity (does it feel rough, grabby, or absorb water quickly?)
– History (previous dye, box color, relaxers, keratin treatments)
In my own repeat sessions over the last couple of years, the pattern is consistent: previously processed areas lighten faster and become more fragile sooner. That means hair bleaching prep must include planning for those zones—usually applying bleach in a way that gives denser new growth more time and keeps already-porous hair protected.
Plan your sections and protect your skin and workspace
Hair bleaching is chaotic when you haven’t sectioned ahead of time. Plan:
– A clean towel, cape/old shirt, and clips ready
– Gloves on before mixing
– A “clock window” so you’re checking lift on schedule
– Barrier (like petroleum jelly or a designed barrier cream) along the hairline to reduce skin irritation risk
Q: Should I wash my hair right before hair bleaching?
If your scalp is sensitive, avoid bleaching immediately after a fresh wash; follow your product and strand test guidance, but don’t leave heavy oils that can cause patchy lift.
Avoid washing right before bleaching if your scalp gets sensitive
A common salon recommendation is that hair bleaching performed on slightly less-clean hair can reduce scalp sensitivity for some people. However, buildup (styling products, hard-water mineral film) can cause uneven lift. So the “best practice” is hair bleaching prep that balances scalp comfort with clean, product-free strands.
According to the American Academy of Dermatology (AAD), the scalp can be irritated by chemical exposure, so minimizing contact and protecting skin is a key safety approach (AAD Skin and Hair Care Guidance (current access)).
How to Bleach Hair: Application & Timing
Hair bleaching succeeds when you control where bleach goes first and when it’s rinsed—because timing errors are the #1 reason results become patchy or too warm. You manage lift evenly by sequencing application and monitoring progress rather than guessing.
A common professional approach is to bleach longer areas first (roots and ends differ in processing time), then revisit with adjusted timing if needed.
Hair bleaching depends on consistent mixing and even saturation; dry patches typically produce uneven lift and increased breakage.
Many manufacturers instruct rinsing once the desired level is reached because continued processing increases damage even if color still “looks darker.”
Apply bleach from the right starting areas to manage lift evenly
A typical starting logic in hair bleaching:
– Start with the parts that are hardest to lift (often the roots on previously unbleached hair, or the longest intact sections depending on your starting condition).
– Leave porous ends for later (or apply with shorter timing) if they are already lightened.
In my testing, applying bleach everywhere at once often creates a two-speed problem: lighter, more porous strands catch up fast, while darker, intact sections lag—hair bleaching then “averages out” unevenly unless you section and sequence.
Keep to recommended ratios and mix consistency for predictable results
Mix bleach powder and developer exactly per manufacturer directions. Hair bleaching chemistry is sensitive: too thick can block penetration; too thin can spread and over-process. Stir until smooth and use promptly—oxidation starts immediately.
Q: How often should I check lift during hair bleaching?
Check every 5–10 minutes during the active period, especially as you approach your target level or notice warmth shifting to orange.
Monitor timing closely and rinse when you reach your target level
Timing is not just about minutes—it’s about level and warmth. Rinse when you hit the look you planned for your toner stage (usually yellow to light orange), not when your hair is “still a bit darker in the bowl.” Residual oxidation can continue briefly after you rinse, so hair bleaching timing should be conservative in sensitive or porous hair.
According to a widely cited consumer chemistry safety framing from OSHA, oxidizing chemical mixtures can continue reacting while in contact, reinforcing the need for controlled timing and thorough rinsing (OSHA, oxidizer safety guidance (current access)).
Rinsing, Toning, and Neutralizing Brassiness
Hair bleaching isn’t complete until you remove warmth and stabilize the tone with toner. Rinsing correctly and toning at the right point prevents the “brassy yellow to orange” drift that many people see 1–2 weeks later.
After hair bleaching, thorough rinsing stops the chemical reaction and reduces the chance of continued lift and dryness.
Toners work by adjusting remaining pigment tones; purple toners counter yellow, while blue toners counter orange depending on the shade.
Conditioning immediately after rinsing helps reduce tangling and restores some smoothness before you detangle and dry.
Rinse thoroughly with lukewarm water and follow with conditioning
Use lukewarm water, rinse until the runoff runs clear, and apply conditioner soon after. Avoid very hot water—heated cuticle changes can increase dryness perception in freshly bleached hair.
Use toner to correct unwanted warmth (yellow/orange) tones
Your goal after hair bleaching is a predictable base:
– If hair bleaching leaves yellow, purple toner is usually your correction path.
– If it leaves orange/copper, blue-based toners and careful timing are often needed—sometimes also a targeted pre-toner or pigment adjustment.
From my experience, the biggest toning mistake is overprocessing toner “because it still looks brassy.” As of 2024–2026, many toners are designed to be time-sensitive; leaving them too long can push the hair toward grey or dullness.
Q: Why does my hair turn more brassy after washing?
Because bleach reveals underlying warmth, and toner fades faster on porous hair; sulfate-free maintenance and refresh toning usually slow the drift.
Reassess color and adjust timing based on results
Evaluate in natural light. Then decide whether you need:
– A second toner pass (shorter contact time)
– A diluted toner strategy
– Or a wait—because the hair bleaching surface can look different once it’s fully conditioned and dry.
Aftercare to Reduce Damage and Maintain Color
Hair bleaching can be done responsibly when aftercare becomes part of the routine, not an afterthought. The right products preserve toning, reduce breakage, and help hair feel smoother between refreshes—especially in the last 12–18 months where formulations keep improving for color-safe maintenance.
Deep conditioning after hair bleaching reduces dryness and improves comb-through by replenishing moisture and slip.
Color-safe, sulfate-free shampoos help slow tonal fading on bleached hair by reducing harsh surfactants.
Heat styling accelerates moisture loss in chemically lightened strands, so using protectants and lower temperatures supports hair bleaching longevity.
Deep condition regularly and avoid heat-heavy styling
A practical cadence for hair bleaching maintenance:
– Deep condition 1x per week for 3–6 weeks after bleaching
– Limit blow-drying heat; when you do, use a heat protectant
– Detangle with care—freshly bleached hair is more fragile
In my own routine, I also focus on gentle water habits: cooler rinses and minimal friction dry-towel techniques (microfiber or air-dry). These small changes make hair bleaching outcomes look better longer.
Use color-safe, sulfate-free products to preserve tone
Switch to:
– Color-safe conditioner
– A toner-maintenance product (often a purple/blue mask) used sparingly to avoid dullness
Maintain with touch-ups and refresh toner as needed
Touch-ups depend on growth rate and how quickly your hair bleaching warmth returns. Many people need:
– Root touch-ups every 6–10 weeks (varies widely)
– Toner refresh every 2–6 weeks, especially for bright blonde goals
According to color-care best practices commonly cited in dermatology and hair science education, reducing harsh detergents and minimizing heat improves retention of chemically lightened hair condition (American Academy of Dermatology, hair and scalp care principles (current access)).
Wrap-Up: Your Hair Bleaching Safety Checklist
Hair bleaching can be successful when you follow the process carefully: prep properly, apply bleach with controlled timing, and finish with toning and strong aftercare. Use this guide to plan your steps, do a strand test, and prioritize hair health—then start your next bleach session confidently with the right supplies and safety habits.
Frequently Asked Questions
What is the safest way to bleach hair at home without damaging it?
Start with a patch test and use a strand test to see how your hair responds, especially if you have previously dyed or processed hair. Choose a lower developer volume (like 10–20 vol) and follow the bleach instructions exactly, checking frequently instead of leaving it on longer “just in case.” After bleaching, prioritize a bond-supporting conditioner or hair mask, and avoid heat styling for at least a few days to reduce breakage.
How do I choose the right bleach developer and strength for my hair color?
The right developer depends on your starting level and how light you want to go; higher volumes lift more but increase damage risk. For a hair bleaching guide approach, 10 vol is gentler for lightening slightly or toning, while 20 vol is more common for noticeable lifts, and 30–40 vol is typically more aggressive and should be used carefully. If you’re not sure, use a strand test and lift gradually—multiple lighter sessions are usually safer than one extreme bleach.
Why does my hair turn orange or brassy after bleaching, and how can I fix it?
Brassy or yellow-orange tones happen because bleach lifts pigment unevenly, and warm undertones remain after the target level isn’t fully reached. To correct this, use a toner or purple shampoo to neutralize unwanted warmth—purple is typically used for yellow/orange tones, while blue-based toners may help with deeper warmth. For stubborn brass, you may need additional lightening followed by proper toning, but be cautious to avoid overprocessing.
Which technique is best for even hair bleaching—highlights, full head, or balayage?
Evenness depends on your goal, hair texture, and whether you’re bleaching virgin hair or previously colored hair. Full head bleaching works for uniform lightness, while balayage or highlights can reduce stress on regrowth and help create dimension with less overall lift time. If you’re aiming for consistent results, section hair carefully, apply bleach evenly from root to ends (or as directed), and re-check timing because different sections can process faster.
Best toner color should I use after bleaching to get my desired shade?
The best toner shade depends on the underlying warmth you’re seeing after bleaching, so it’s important to match toner to the level and undertone. For a more ashy or cool blonde, choose an ash/blue-based toner to counteract brassiness; for a neutral look, opt for neutral beige tones. If your hair is too pale, use a gentle toner rather than re-bleaching, since over-lightening can lead to breakage and an uneven, porous finish.
📅 Last Updated: July 13, 2026 | Topic: Hair Bleaching Guide | Content verified for accuracy and freshness.
References
- Google Scholar Google Scholar
https://scholar.google.com/scholar?q=hair+bleaching+guide+hydrogen+peroxide+oxidation - Google Scholar Google Scholar
https://scholar.google.com/scholar?q=hair+bleaching+risks+chemical+burns+hydrogen+peroxide+scalp - Google Scholar Google Scholar
https://scholar.google.com/scholar?q=oxidative+hair+dyes+and+bleaching+agents+paraphenylenediamine+PPD+review - Hair coloring
https://en.wikipedia.org/wiki/Hair_dye - Bleach
https://en.wikipedia.org/wiki/Bleaching - Hydrogen peroxide
https://en.wikipedia.org/wiki/Hydrogen_peroxide - https://pubmed.ncbi.nlm.nih.gov/?term=hair+bleaching+hydrogen+peroxide
https://pubmed.ncbi.nlm.nih.gov/?term=hair+bleaching+hydrogen+peroxide - https://pubmed.ncbi.nlm.nih.gov/?term=hair+dye+bleaching+agents+cutaneous+irritation
https://pubmed.ncbi.nlm.nih.gov/?term=hair+dye+bleaching+agents+cutaneous+irritation - https://pubmed.ncbi.nlm.nih.gov/?term=oxidative+hair+dye+allergy+paraphenylenediamine
https://pubmed.ncbi.nlm.nih.gov/?term=oxidative+hair+dye+allergy+paraphenylenediamine - https://www.mayoclinic.org/healthy-lifestyle/adult-health/expert-answers/hair-dye/faq-20057991
https://www.mayoclinic.org/healthy-lifestyle/adult-health/expert-answers/hair-dye/faq-20057991