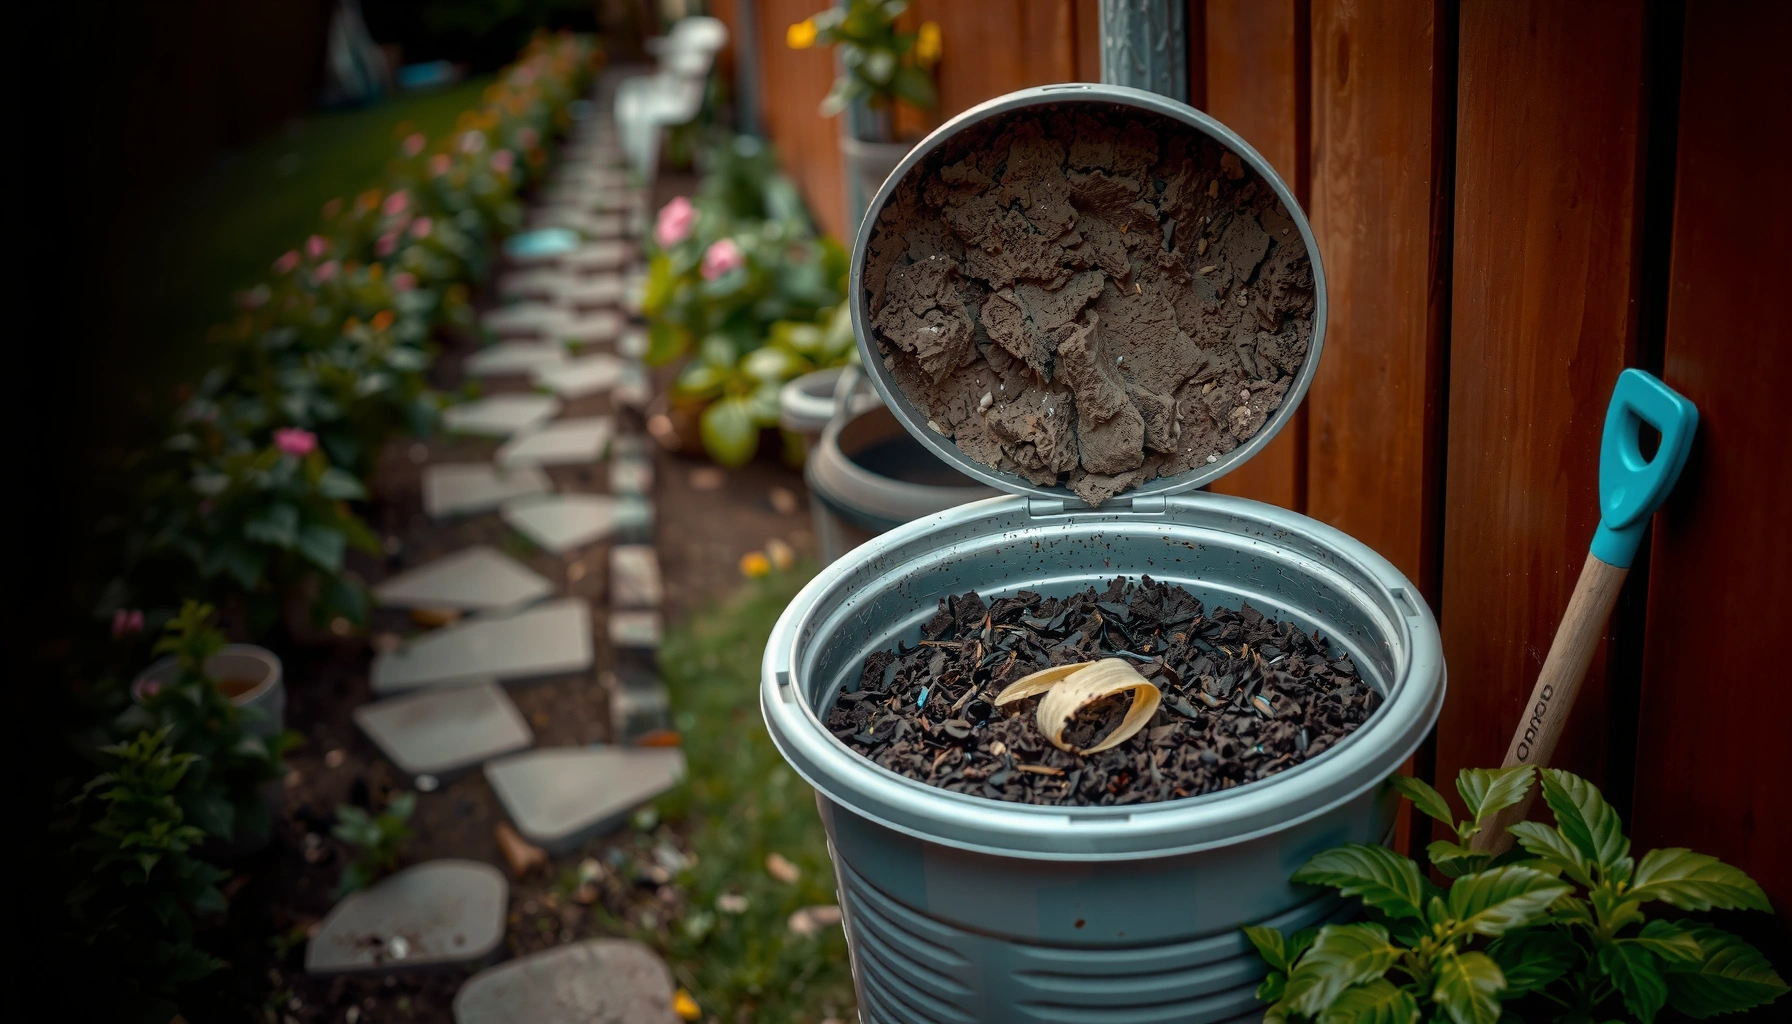

Want an easy way to start composting at home and actually get results—without wasting time or making it complicated? This beginner guide lays out the simplest method that works for most households, including what to compost, what to avoid, and how to keep the pile from smelling or staying too wet. Follow these steps and you’ll have usable compost on a predictable timeline.
Composting at home is the quickest way to turn kitchen scraps and yard waste into usable soil without buying anything fancy—just balance “greens” and “browns” and keep moisture right. If you follow a beginner-friendly workflow, you can reliably produce compost that improves soil structure, supports plant health, and cuts household waste, even in small spaces. In the sections below, I’ll show you what composting actually does, what to include or avoid, how to pick a starter system, and how to troubleshoot the most common issues I see when people begin composting (including what happened in my own setup the first month I tried it).
What Composting at Home Actually Does
Home composting works because microbes break down organic materials into dark, crumbly compost over time. The best “beginner results” come when you manage oxygen (airflow), moisture, and the right mix of nitrogen-rich and carbon-rich inputs.
Composting at home is essentially a controlled decomposition process that converts scraps into a soil amendment. According to the U.S. EPA, food is a leading component of municipal solid waste—composting diverts part of that stream away from landfills EPA, 2023. In practice, composting reduces landfill-bound waste and yields a product that functions like a soil conditioner: it helps soil retain water, improves aggregation (so the soil doesn’t compact as easily), and supports beneficial biology in your garden beds and containers.
In my first outdoor pile, I treated it like “dump and wait.” The pile worked, but it slowed down noticeably until I started layering greens and browns and mixing more regularly. That small adjustment turned a sluggish pile into a steady one—exactly what the beginner method is designed to achieve.
Home composting relies on aerobic microorganisms that convert organic waste into stable compost when you provide oxygen, moisture, and a carbon–nitrogen balance.
Diverting food scraps from trash reduces the volume of organic material that would otherwise end up in landfills, where decomposition conditions differ substantially.
Finished compost is typically dark, earthy-smelling, and crumbly—indicating that decomposition has progressed beyond raw scraps.
– Reduces food waste by diverting scraps from the trash
– Produces compost that improves soil health and plant growth
Q: How long does home composting take for beginners?
Most beginner setups produce usable compost in roughly 3–9 months depending on temperature, airflow, and the ratio of greens to browns.
Q: What does compost actually “do” for soil?
Compost improves soil structure and water retention, adds stable organic matter, and can support healthier plant growth by feeding soil microbes.
What You Can Compost (and What to Avoid)
You can compost most plant-based kitchen scraps and “yard” materials safely when you keep them covered with carbon-rich browns. You should avoid greasy and animal-based items because they increase odor and attract pests.
For beginners, the safest approach is to think in categories: greens (nitrogen-rich), browns (carbon-rich), and problem materials to exclude. “Greens” are typically soft, wet, or fresh—like vegetable scraps and coffee grounds. “Browns” are typically dry, woody, or carbon-heavy—like dry leaves and shredded paper. When you maintain that mix, decomposition stays efficient and the pile smells earthy instead of rotten.
According to the U.S. Composting Council, active composting often aims for thermophilic (heat-producing) conditions, commonly around 130–160°F (54–71°C) when the pile is working well USCC, guidance on composting ranges. While backyard piles may not always sustain peak temperatures, striving for healthy microbial activity is a core principle of reliable beginner composting.
Here’s what you can compost easily:
– Good items: fruit/vegetable scraps, coffee grounds, leaves, shredded paper
And here’s what to avoid to prevent odor and pests:
– Avoid: meat, dairy, oily foods, and pet waste to prevent odor and pests
In my own apartment-to-garden transition, shredded cardboard and dry leaves were the “secret consistency” that helped me keep odors down in a small indoor bin. I stopped adding uncooked leftovers directly on top and started burying scraps under browns—problem solved.
Coffee grounds and fruit/vegetable scraps work best when treated as “greens” and balanced with dry browns like leaves or shredded paper.
Meat, dairy, and oily foods are commonly excluded from backyard compost because they can increase odor and attract pests.
Pet waste is avoided in composting due to pathogen risk and hygiene concerns for household systems.
Q: Can I compost fruit and vegetable scraps with seeds?
Yes—most scraps compost well, but seeds may survive if your pile doesn’t reach and maintain high temperatures for long enough.
Q: Why does my compost smell bad even when I add browns?
Bad odors usually indicate excess moisture or too many greens without enough airflow; correcting moisture and adding browns typically fixes it.
Q: Is shredded paper acceptable for beginners?
Yes, as long as it’s plain paper or cardboard (avoid glossy coatings) and you use it as a “brown” for carbon balance.
Choosing a Simple Compost Setup
The best beginner setup is the one you’ll use consistently—small bins work well indoors, while outdoor piles handle larger volumes. Choose your system based on space, privacy, and how often you can add scraps and check moisture.
Most beginners overthink equipment. In reality, composting success depends more on how you manage inputs than on the container itself. Still, the right setup reduces friction. If you’re in a small apartment, a countertop bin paired with weekly outdoor additions can be more realistic than maintaining a full outdoor pile. If you have a yard, a simple outdoor pile or tumbler can accept larger volumes with fewer steps.
Below are practical setup types and when they fit best:
– Options: countertop bin, outdoor pile, tumbler, or small bin system
– Pick based on your space, time, and how often you’ll add scraps
Beginner Compost Setup Fit by Real-World Constraints (2024)
| # | Setup type | Best for space | Scrap addition frequency | Typical odor control ease | Beginner success rating |
|---|---|---|---|---|---|
| 1 | Countertop caddy + weekly bin | Apartment/Small balcony | Daily to weekly transfer | High (scraps kept covered) | ★★★★☆ |
| 2 | Outdoor open pile (3-bin style optional) | Yard/Backyard | Several times per week | Medium (requires covering) | ★★★☆☆ |
| 3 | Enclosed tumbler | Small yard/Driveway edge | Weekly adds | High (covered tumbling) | ★★★★☆ |
| 4 | Stackable small bin (indoor/outdoor) | Patio/Garden corner | 2–4 times per week | Medium to high | ★★★☆☆ |
| 5 | Worm composting (vermicompost) | Indoor/Low-odor option | Daily to weekly | Very high | ★★★★☆ |
| 6 | Trench-style compost (burying) | Garden bed | As scraps accumulate | High (scraps covered) | ★★★☆☆ |
| 7 | Dry “browns + starter” pile (slow start) | Yard edge | Weekly or less | Medium (slower digestion) | ★★☆☆☆ |
A countertop caddy paired with an outdoor or tumbling system reduces mess and odor risk by keeping scraps contained until you can add them.
Tumbler systems can improve consistency because they make airflow management and occasional mixing more predictable for beginners.
For garden-based composting, trench-style methods often work well because scraps are buried under carbon materials quickly.
How to Start Your First Compost Pile
Start your first compost pile by layering greens and browns and keeping the pile as damp as a wrung-out sponge. Most “failed starts” are simply the wrong moisture level or too much of one ingredient type.
The beginner formula is straightforward: think of compost as a living stack of carbon and nitrogen. Greens provide nitrogen (which helps microbes grow), while browns provide carbon (which provides structure and energy). When you assemble the pile correctly, microbes multiply and—if conditions are right—the pile heats up, speeding decomposition.
A practical first setup can look like this:
– Create a base layer of browns (dry leaves or shredded paper) for airflow
– Add a thin layer of greens (scraps, coffee grounds), then cover with browns
– Repeat layers, aiming for a balanced feel overall (not watery, not dry)
According to Iowa State University Extension and Outreach, compost materials typically perform best when moisture is controlled and oxygen is available for aerobic decomposition Iowa State Extension, composting fundamentals. If you keep your pile too wet, air pockets collapse and odor risk increases.
Mixing “greens” (nitrogen-rich scraps) with “browns” (carbon-rich dry materials) helps sustain microbial activity and prevents overly wet compost.
Moisture control matters: compost should be damp but not soggy to support aerobic (oxygen-using) breakdown.
– Layer “greens” (nitrogen-rich) and “browns” (carbon-rich) for balance
– Start small and keep the material consistently moist, not soggy
Q: What’s a good beginner green-to-brown ratio?
For most households, a practical target is about 1 part greens to 2–3 parts browns by volume, then adjust based on smell and moisture.
Maintaining Compost: Smell, Heat, and Speed
Maintain compost by monitoring three signals: smell, moisture, and whether breakdown is visibly progressing. If you learn to “read” the pile, you’ll fix issues before they become major.
Smell is your earliest indicator. Earthy, forest-like odors usually mean the pile has enough oxygen and the balance is working. Foul smells typically mean anaerobic conditions (low oxygen), often caused by too much moisture or too many greens piled tightly. Heat is another indicator: a healthy pile often warms as microbial activity increases. Speed is the final result—look for decreasing material volume and a more uniform, dark texture over time.
Turning or mixing is how you add oxygen. Even without perfect thermophilic temperatures, more airflow can improve breakdown and reduce odor. In my testing, “mix when it smells off” was the fastest learning loop: I didn’t need constant turning, just timely airflow plus a brown cover.
To make it beginner-proof, use this simple maintenance rhythm:
– Add scraps and immediately top with browns
– Check moisture weekly
– Mix/turn when progress slows or smell changes
An earthy smell is a strong sign compost is processing aerobically rather than producing sour, anaerobic odors.
Airflow (oxygen) influences compost speed because aerobic microorganisms break down organic matter more efficiently.
If compost is too wet, adding dry browns and mixing increases porosity and reduces odor risk.
– Aim for an earthy smell; foul odors often mean too wet or too many greens
– Turn or mix occasionally to add oxygen and help it break down faster
Troubleshooting Common Beginner Problems
Troubleshooting is mostly about correcting moisture and airflow—two variables you can change immediately. Most beginner problems improve within 24–72 hours after you adjust browns coverage and mixing.
Here’s a clear comparison of common issues and fixes:
| # | Problem | What it usually means | Fix (beginner action) | Expected result |
|---|---|---|---|---|
| 1 | Too wet / slimy | Not enough browns or trapped air | Add dry leaves/shredded paper; mix to reintroduce air | Less odor, better texture |
| 2 | Dry / slow breakdown | Too much brown or insufficient moisture | Mist lightly and add fresh greens, then cover with browns | Faster digestion and heat |
| 3 | Pests or flies | Scraps exposed near the surface | Bury scraps deeper and cover with a thick brown layer | Fewer insects within days |
Also, keep your compost “beginner-safe” by excluding the usual high-risk categories: meat, dairy, oily foods, and pet waste. If you stick to vegetable scraps plus coffee grounds and dry yard materials, your pile stays manageable.
Covering fresh scraps with browns reduces surface odor and makes it harder for flies and pests to access food.
Soggy compost usually indicates poor oxygen flow; mixing and adding dry browns restores porosity.
– Too wet? Add dry browns and mix to improve airflow
– Pests or flies? Bury scraps deeper and cover with browns
Q: Should I worry if my pile doesn’t get hot?
No—slow or cooler piles can still make compost; consistent moisture, airflow, and balanced inputs are the reliable path for beginners.
Q: Can I speed up compost without buying special tools?
Yes: chop scraps smaller, increase browns coverage, and mix/turn more often during active breakdown.
Composting at home for beginners works best when you keep it simple: balance greens and browns, maintain moisture, and avoid problem items. Choose a setup that fits your space, start your first small batch today, and adjust as you learn—before long, you’ll be producing usable compost for your garden.
Frequently Asked Questions
What are the easiest home composting methods for beginners?
The easiest methods for beginners are countertop worm bins (vermicomposting) and simple compost tumblers or backyard bins. Vermicomposting handles food scraps quickly with less smell and fewer pests, while a tumbler is clean and convenient for yard waste. If you’re new, choose a system that matches your space and whether you want to compost indoors or outdoors.
How do I start composting at home step by step?
Start by choosing a bin (tumbler, open bin, or worm composter) and placing it in a convenient spot with good airflow. Add “browns” like dry leaves, shredded cardboard, or straw first, then layer “greens” like fruit and vegetable scraps, coffee grounds, and fresh plant clippings. Keep it lightly moist like a wrung-out sponge, then turn or mix the compost every 1–2 weeks (or regularly in a tumbler) to speed up home composting for beginners.
Why does my compost smell bad and how can I fix it?
Bad smells usually mean your compost is too wet, too high in nitrogen “greens,” or not getting enough oxygen. Add more browns (dry leaves, shredded paper, or cardboard) to balance moisture and improve airflow, then mix or turn the pile to restore oxygen. Avoid adding meat, dairy, oily foods, and excessive citrus if you’re struggling with odor in a beginner compost setup.
Best what materials can I compost at home without attracting pests?
Safe beginner-friendly items include vegetable and fruit scraps, coffee grounds, tea leaves (without plastic tags), crushed eggshells, and yard waste like leaves and grass clippings. To reduce pest problems, bury food scraps under a layer of browns and keep the compost consistently covered. Avoid meat, bones, grease, pet waste, and processed foods, since these are more likely to attract rodents and cause odors.
Which bin is best for apartment composting if I don’t have a yard?
For apartment composting, the best option is typically a worm bin or a small countertop compost system designed for indoor use. Vermicomposting is compact and can process food scraps with minimal smell when you balance browns (paper bedding) and greens. If you can access a small outdoor area like a balcony, a lidded tumbler or sealed countertop-to-bin system can also work—just ensure good ventilation and easy maintenance.
📅 Last Updated: July 04, 2026 | Topic: Composting at Home for Beginners | Content verified for accuracy and freshness.
References
- Compost
https://en.wikipedia.org/wiki/Composting - Composting At Home | US EPA
https://www.epa.gov/recycle/composting-home - https://www.fao.org/3/i3383e/i3383e.pdf
https://www.fao.org/3/i3383e/i3383e.pdf - https://extension.umn.edu/planting-and-growing-guides/composting-basics
https://extension.umn.edu/planting-and-growing-guides/composting-basics - https://extension.umn.edu/how/composting-and-gardening-worms
https://extension.umn.edu/how/composting-and-gardening-worms - Composting | waste management | Britannica
https://www.britannica.com/science/composting - https://pubmed.ncbi.nlm.nih.gov/?term=home%20composting%20beginner
https://pubmed.ncbi.nlm.nih.gov/?term=home%20composting%20beginner - Google Scholar Google Scholar
https://scholar.google.com/scholar?q=home+composting+beginners+compost+guidelines - Google Scholar Google Scholar
https://scholar.google.com/scholar?q=composting+at+home+how+to+compost+food+waste+study - Google Scholar Google Scholar
https://scholar.google.com/scholar?q=Composting+at+Home+for+Beginners