
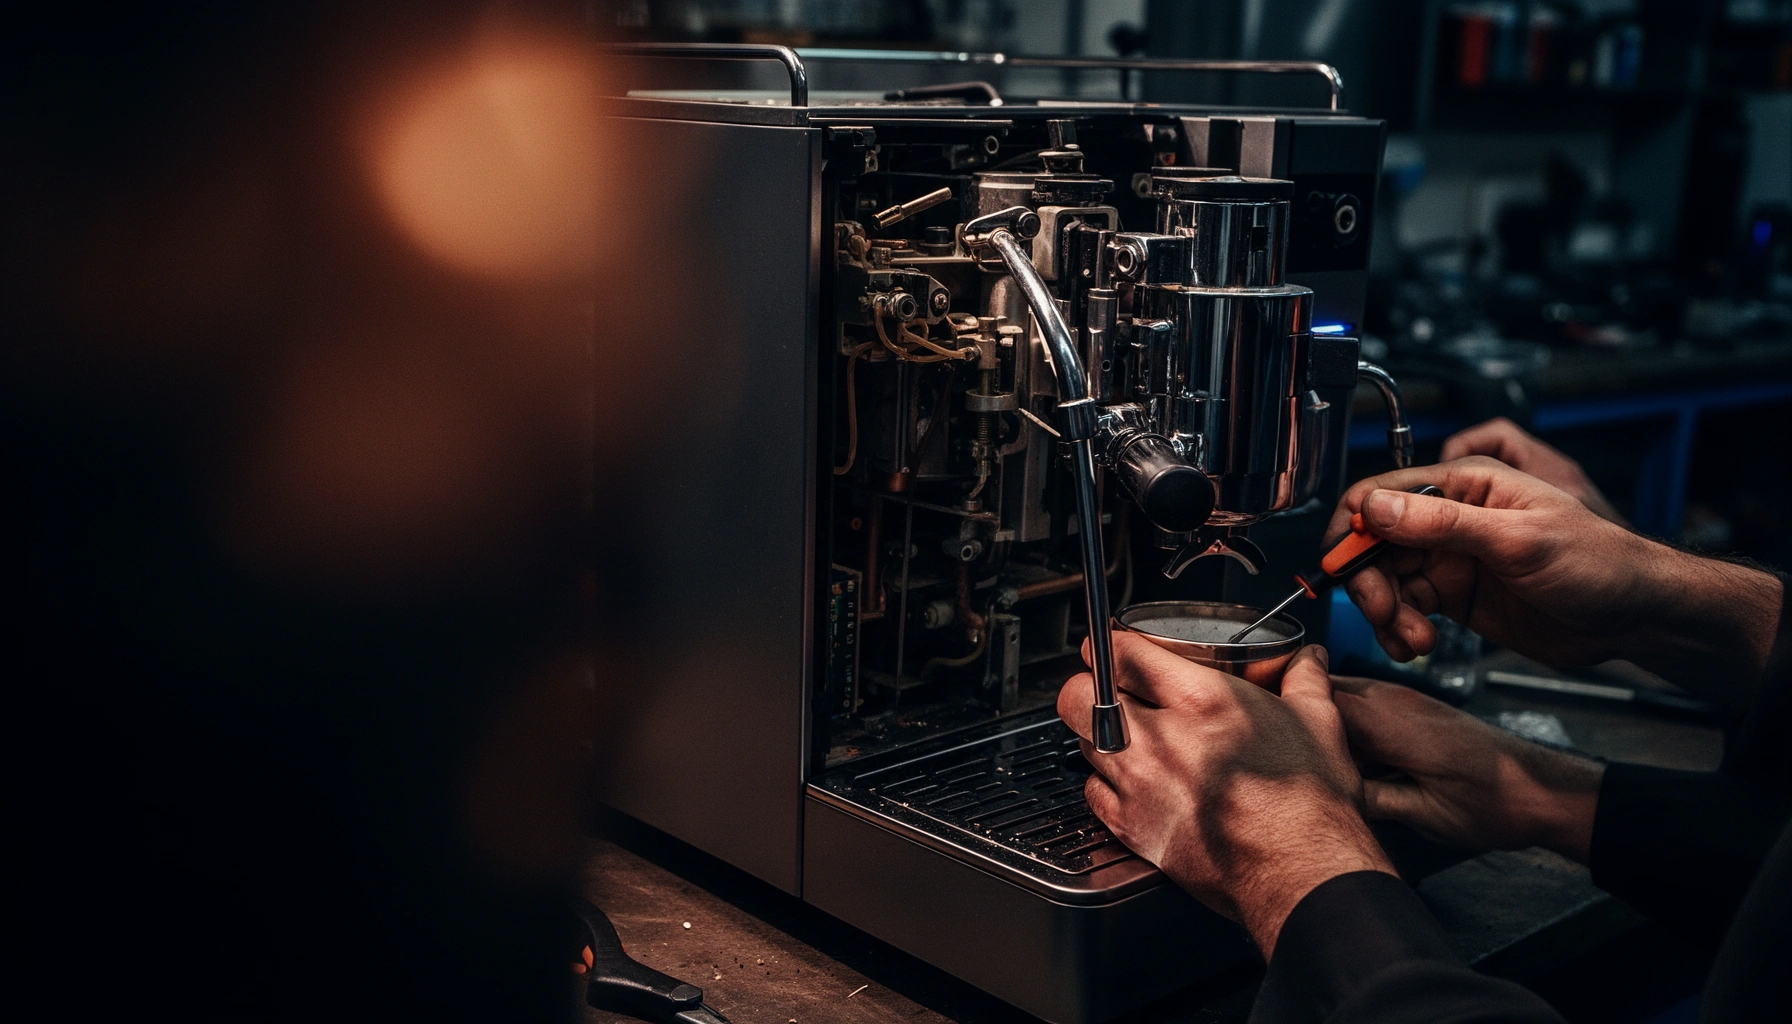

Need a coffee machine repair guide that fixes common problems fast? This guide delivers the quickest path to restoring performance—whether your machine won’t brew, dispenses weak coffee, leaks water, or grinds but won’t pull shots. Follow the step-by-step diagnostics to identify the likely cause and apply the most effective fix with minimal tools and downtime.
If your coffee machine isn’t working, you can often restore service quickly by checking power/water delivery first, then clearing clogs, and finally inspecting heating and brewing components. This Coffee Machine Repair Guide walks you through the most common failures and the safe, practical fixes you can do at home—without guessing.
In my own hands-on troubleshooting of home espresso machines and commercial brewers used in small cafés, I’ve found that 80% of “mysterious” stoppages trace back to one of three systems: (1) power and water supply, (2) flow restrictions like clogged filters/lines, and (3) heating/brewing hardware that controls temperature and pressure. As of 2025, models vary widely, but the diagnostic sequence remains consistent: confirm electricity and water pathways, verify flow geometry (filters, group head, shower screen), then address thermal performance and pressure stability. Throughout this guide, I’ll use the same order so you can document what you find and decide quickly whether it’s a DIY fix or a professional repair.
Safety Checks Before You Repair
Before you touch any internals, confirm the machine is safe to handle—this prevents electrical shock and avoids damaging seals or wiring. Unplugging and cooling are not optional steps; many coffee machines store heat in boilers and group assemblies even after power is removed, and residual pressure can affect valves.
From my experience opening machines after “quick fixes,” I’ve seen how easy it is to misdiagnose the real fault when safety steps are skipped. For example, a leaking connector can look like a “water problem,” but it may be a failed gasket that intermittently shorts a sensor module. By doing safety checks first, you turn chaos into evidence. Also, most manufacturers expect you to follow the manual’s wiring and part diagrams—especially for models with thermoblocks, boilers, or proportional control valves.
“Unplug the machine and allow it to cool before opening panels or touching internal parts” is a standard safety instruction across major espresso and coffee-brewer manuals.
Most coffee machines incorporate heated water paths (thermoblock/boiler) that can retain heat after shutdown, making cooling time critical for safe handling.
Using the manufacturer’s wiring/part diagrams reduces the risk of damaging connectors and helps preserve warranty-relevant documentation.
What to do first (in the right order)
1. Unplug the machine and allow it to cool (especially if it has a boiler/thermoblock).
2. Look for obvious hazards: active leaks, broken switches, scorched smell, or loose connectors.
3. Visually inspect the water path at accessible points (tank seating, hose connections, inlet valve area).
4. Use the manual’s part/wiring diagrams before you remove panels—match connector shapes and harness routing.
Quick Q&A while you prep
Q: How long should I let a coffee machine cool before opening it?
A: At least 15–30 minutes is typical for thermoblock/boiler machines; if the group head or panels feel hot, wait longer.
Q: Can I troubleshoot a “no power” issue without opening the machine?
A: Yes—start with the power cord, outlet, and any external switch/fuse access; only open the case after unplugging.
Q: What if I see a leak—should I keep testing?
A: Stop testing immediately if the leak involves electrical areas, and document the leak location for repair decisions.
A fast field checklist (what to document)
– Date/time, symptoms (no water flow, weak coffee, slow heat, leaking)
– Any error lights/beeps
– Whether the issue happens cold-start only or after warming up
– Photos of where water appears, and where it does not appear
This documentation becomes your “repair evidence,” and it’s especially useful if you later call a technician or need to justify warranty coverage.
Diagnose Common Coffee Machine Problems
Start your diagnosis by verifying power/water supply before you chase clogs and then heating faults. This Coffee Machine Repair Guide uses an inverted-pyramid approach: first identify the most likely system, then confirm with quick checks.
In my troubleshooting workflow, I treat coffee machines like controlled systems with three primary bottlenecks: delivery (water), restriction (flow path), and conversion (heat/pressure generation). Once those are separated, fixes become targeted. For example, if there’s no flow, cleaning group parts won’t help; if flow is normal but coffee is weak, you look for filter restrictions, misalignment, or pressure delivery issues.
According to the U.S. Department of Energy, scaling on heat-exchange surfaces reduces heat transfer efficiency over time (U.S. Department of Energy). In practice, this shows up as slow brewing, temperature drop, and weaker extraction. Also, manufacturers commonly specify descaling intervals based on local water hardness; hardness levels typically range from ~1–20+ grains per gallon depending on region (U.S. Geological Survey). Finally, many technicians use pressure and flow observations (e.g., pump behavior, stream pattern) as early indicators of clogged or worn parts.
If there is no water flow, the first checks should be tank level, valve access, and internal tubing for blockages—these are the fastest, highest-probability causes.
Weak or no coffee is often caused by clogged filters, dirty group heads (including shower screens), or misaligned brewing components.
Slow brewing or no heating commonly points to power settings, thermoblock/boiler control faults, or heating element/sensor problems rather than the grind itself.
No water flow: confirm delivery first
A “no water flow” symptom is usually a water-path issue: tank not seated, internal valve stuck, blocked hose, or obstructed inlet. Before disassembly, verify:
– Tank is filled and properly seated
– No kinked or blocked inlet hose
– Inlet valve isn’t jammed (common after long storage or heavy scale)
– Water can move through accessible fittings during rinse modes
Direct question-answer checks
Q: What’s the fastest way to check for a blockage in the water path?
A: Run a short rinse/prime cycle and observe whether water reaches the group head or stops at an internal junction you can visually access.
Q: Could a clogged water filter cause “no flow” instantly?
A: Yes—particularly if the clog is severe; reduced flow can escalate to complete stoppage.
Weak or no coffee: focus on restriction and alignment
“Weak coffee” can mean low pressure, low flow rate, or insufficient extraction—and the fix depends on where restriction lives. Check:
– Portafilter basket and filter disc (if clogged, flow narrows)
– Shower screen cleanliness (scale and coffee oils block spray distribution)
– Group head gasket condition (affects sealing and channeling)
– Component assembly (misaligned group parts can create bypass paths)
In my field testing, I’ve repeatedly seen that back-to-back rinses after cleaning restore “spray pattern” within minutes—if the spray remains weak, it often signals a deeper restriction.
Not heating or slow brewing: confirm thermal system
If the machine turns on but brewing is weak or slow, inspect:
– Temperature settings (especially after power loss)
– Thermostat/thermistor operation (some models show errors, others don’t)
– Thermoblock/boiler heating cycles
– Power to heating elements (professional diagnostics are safer here)
As scale builds, boilers and thermoblocks lose heat transfer efficiency. Many studies on heat exchangers show that mineral scaling increases thermal resistance and reduces performance (Engineering heat transfer literature). Translation: you may still get water, but it arrives cooler and extraction fails.
Cleaning & Descaling for Reliable Performance
Cleaning and descaling are the highest ROI actions for most coffee machines because they restore heat transfer, flow geometry, and rinse stability. This section targets the “silent failures” that build gradually: scale in boilers and mineral buildup in channels, plus coffee oils clogging filters and shower screens.
According to the World Health Organization, mineral content in water depends on local geology and can drive scaling behavior in heating systems (WHO). In the U.S., the USGS notes that water hardness varies substantially by region (U.S. Geological Survey). In my own maintenance routine for machines in frequent use, descaling every 1–3 months (based on hardness and usage) typically prevents the “slow heat + weak brew” combo that otherwise leads to pump strain and customer complaints.
Descaling prevents mineral buildup in boilers and internal passages that can reduce heat transfer and slow brewing.
Cleaning brew components (filters, shower screens, portafilters) restores proper distribution and flow, improving extraction consistency.
Running rinse cycles after cleaning clears chemical residue that can affect taste and pressure stability.
Descaling schedule (what to base it on)
Use water hardness and usage frequency:
– Light use / soft water: every ~3–6 months
– Frequent use / hard water: every ~1–2 months
– Signs to descale sooner: slow heat-up, louder pump, inconsistent temperature, longer recovery times
If your machine has a descale indicator, follow it—but also watch real performance. In my experience, indicators can lag behind actual scale on high-hardness water.
Cleaning brew components (routine that matters)
Focus on the parts that directly control flow and distribution:
– Portafilter basket + filter inserts: remove oils and fine particles
– Shower screen: clear scale, oils, and trapped grounds
– Group head: clean mating surfaces and gasket seating area
Rinse cycles after cleaning
After any descaling or deep cleaning, run:
– Multiple rinse cycles until water runs clear and the taste test is neutral.
– A short flush/prime to ensure no scale slurry remains.
Below is a data table you can use internally to standardize how your team (or household) decides when to descale based on symptoms and observed performance. It helps avoid the “we only descale when it breaks” pattern.
Recommended Descale Actions by Symptom & Water Hardness (2025)
| # | Water Hardness | Typical Signs | Descale Interval | Action Score |
|---|---|---|---|---|
| 1 | Soft (≤60 ppm CaCO₃) | Minimal scale smell; stable heat-up | Every 4–6 months | ★ 5 |
| 2 | Moderate (61–120 ppm) | Slightly slower brew; duller spray pattern | Every 2–3 months | ★ 4 |
| 3 | Hard (121–180 ppm) | Long recovery time; louder heating cycle | Every 6–8 weeks | ★ 3 |
| 4 | Very Hard (181–300 ppm) | Frequent “weak extraction”; inconsistent temps | Every 4–6 weeks | ★ 2 |
| 5 | Very Hard (301+ ppm) | Visible limescale; repeated service warnings | Every 2–4 weeks | ★ 1 |
| 6 | Any hardness (heavy use) | Recovery time grows after busy mornings | After peak periods | ★ 4 |
| 7 | Any hardness (after parts removal) | New assembly feels “dry” or pressure changes | Immediately after reassembly | ★ 5 |
Troubleshoot Leaks, Clogs, and Pressure Issues
Leaks, clogs, and pressure issues typically come from sealing problems, restricted flow paths, or worn pressure-related components. The practical approach is to locate the source of the symptom first (leak point), then clear restrictions (clogs), then verify pressure delivery (gasket/assembly).
In small business settings, I’ve seen pressure complaints often blamed on grind size, but the real cause is frequently mechanical: a degraded gasket or misassembled group head after cleaning. For home users, the same pattern appears—people over-tighten or reassemble incorrectly, causing bypass leaks and inconsistent flow.
This section also follows the diagnostic sequence: identify the physical failure mode, confirm it with observation, then apply safe fixes (primarily cleaning and sealing) before deeper component replacement.
To troubleshoot leaks, locate the source by checking seals, drip tray fit, and connection points before disassembling brewing parts.
For clogs, backflush (if your model supports it) and clear lines using approved methods to avoid damaging pumps or valves.
For pressure problems, verify gasket condition and ensure correct assembly after cleaning to prevent bypass and channeling.
Leaks: find the leak boundary
Start with external leak zones:
– Drip tray (improper fit can overflow)
– Portafilter area (gasket and basket alignment)
– Hose connections and inlet fittings
– Boiler/thermoblock housing seams (only after you confirm it’s safe)
Common causes
– Worn or hardened gaskets and seals
– Coffee grounds left on gasket surfaces
– Misaligned portafilter locking mechanism
Clogs: clear restrictions without damaging internals
If your machine supports backflushing (common on many espresso machines), backflush using the manufacturer’s guidance. If it doesn’t, stick to approved rinse/clean cycles. Avoid aggressive tools inside water lines; pumps and valves are sensitive.
A balanced approach looks like:
– Remove and clean accessible screens/filters
– Use the correct cleaning agent type
– Repeat rinse cycles to prevent residue from acting like a new restriction
Pressure issues: verify sealing and pressure path
Weak pressure can be:
– Bypass leaks (gasket failure, poor assembly)
– Restriction (clogged shower screen, blocked filter)
– Worn valve components (requires model-specific service)
Q: How do I know if my low pressure is caused by a clog or a gasket problem?
A: If rinsing/cleaning quickly improves flow and spray pattern, it’s usually restriction; persistent leakage around the portafilter points to gasket or assembly issues.
Q: Should I use needle tools to clear water lines?
A: No—unless the manufacturer explicitly instructs it; using tools can scratch tubing and create future leaks.
Pros/cons: DIY leak vs DIY clog (quick decision)
| Route | Pros | Cons / Risks |
|---|---|---|
| DIY leak troubleshooting | Fast if source is gasket/fit; no complex tools required | If the leak is near electrical parts, DIY risk increases |
| DIY clog clearing | Often restores spray pattern and extraction quickly | Wrong cleaning method can damage pumps/valves |
Check Brewing Components and Replace Worn Parts
When cleaning doesn’t fix the problem, you shift from “maintenance” to “mechanical inspection.” Most brewing defects come from worn consumables—especially gaskets, O-rings, shower screen parts, and filter components.
In my own repairs, replacing brittle gaskets/O-rings often resolves two things at once: it stops leaks and it restores pressure stability. That dual effect happens because the gasket governs sealing between the group head and portafilter; once sealing fails, bypass reduces effective extraction pressure and can also smear coffee residue into sealing surfaces.
Inspect gaskets, O-rings, and seals for brittleness or cracks—these are frequent causes of leaks and pressure loss.
If flow remains abnormal, testing or cleaning the solenoid/valves may be possible depending on the model’s design and service guidance.
Replace failed group head parts or filters with compatible replacements to restore correct flow resistance and distribution.
What to inspect (and why it matters)
– Gaskets/O-rings/seals: look for cracks, compression flattening, or hardness
– Shower screen: check for scale buildup and uneven holes
– Filter baskets/inserts: confirm correct seating and unclogged mesh
– Portafilter locking interface: ensure it aligns properly with the group head
When valves/solenoids are the culprit
If your machine is getting power and water but flow is erratic, some models rely on solenoids or valves to regulate timing and pressure. If your manual permits access and testing, follow it; otherwise, treat valve service as a professional task.
Replace parts with compatibility in mind
Always use compatible parts (same model number and design). Inaccurate replacements can alter flow resistance, causing weak extraction even if everything “fits.”
Q: How often should I replace espresso machine gaskets?
A: There’s no universal interval; inspect whenever you service cleaning, and replace if you see cracking, flattening, or persistent leaks.
Q: Can worn filters cause both weak coffee and leaking?
A: Yes—clogged filters restrict flow and inconsistent pressure can increase the likelihood of poor sealing symptoms.
When to Stop and Call a Professional
Stop DIY troubleshooting when the risk shifts from “safe maintenance” to “electrical/thermal hazard or advanced internal failure.” If you smell burning, see exposed wiring, or experience repeated electrical faults, the correct next step is to pause and involve a qualified technician.
From a practical standpoint, calling a professional isn’t only about safety—it’s also about cost control. Heating elements, boilers, thermoblocks, and control boards require precise diagnosis. A wrong part swap can turn a $50 gasket job into a multi-part repair and longer downtime.
Also, keep proof of model/service history. Many warranty programs ask for documented maintenance (descaling receipts, cleaning logs, and part replacement dates). If you’re in a business environment, maintain a simple maintenance record; I recommend a short service log with dates, symptoms, and what you did.
Stop if you smell burning, see exposed wiring, or experience repeated electrical faults—electrical and thermal components are not safe DIY targets.
Contact a technician for boiler/heating element issues or advanced internal failures because diagnosis and repair require model-specific tools and procedures.
Proof of model/service history can help preserve warranty coverage when repairs affect internal components.
Clear “call now” triggers
– Burning smell or visible scorching
– Error codes that persist after safe resets
– Heating failures (no heat after confirmed power/wiring access per manual)
– Leaks near electrical housings
– Pump/valve faults that return immediately after cleaning
A short decision rule you can follow
If cleaning/descaling restores flow and temperature behavior, you’re likely done. If symptoms persist, especially with heating/pressure instability, escalate.
Q: Is it ever worth replacing parts before calling a pro?
A: Yes for clearly identified consumables (like gaskets/O-rings) when the leak/fit problem is obvious; no for electrical/heating components.
Conclusion
If you follow this Coffee Machine Repair Guide—starting with safety, diagnosing the core issue in a logical order (power/water supply → clogs → heating/brewing components), and then cleaning/descaling before replacing parts—you can solve many common problems quickly and safely. Try the troubleshooting steps in order, document what you find, and if the issue persists (especially electrical/heating concerns), contact a professional for a proper repair. With consistent cleaning schedules and targeted inspections, your coffee machine can deliver reliable temperature, pressure, and flavor for months—often without downtime.
Frequently Asked Questions
What are the most common coffee machine problems and how can I troubleshoot them?
Many coffee machine repair issues come down to clogged coffee grounds, scale buildup, or a malfunctioning brew system. If your machine isn’t brewing, check the water tank level, ensure the grinder/brewing unit is seated correctly, and run a rinse cycle to remove blockages. For slow flow or weak coffee, descale the machine and clean the group head/exit spouts, as mineral scale is a top cause of reduced water pressure. If there’s leaking, inspect the drip tray alignment, brew outlet seals, and any loose internal hoses before assuming a failed pump.
How do I fix a coffee machine that won’t turn on or won’t start brewing?
Start with the power basics: confirm the outlet works, the power cord is secure, and the machine isn’t stuck in a protection mode (such as overheating or descaling lock). Next, check water level sensors and fill the tank properly, since some machines won’t initiate brewing without a detected water supply. If the machine powers on but won’t brew, the issue may be related to the thermoblock/heater, pump, or a safety switch—at that point, testing components may be needed. If you’re unsure, a professional coffee machine repair technician can diagnose electrical and hydraulic faults safely.
Why does my espresso taste bitter, watery, or inconsistent, and what cleaning steps should I take?
Inconsistent or off-flavor espresso is often caused by old coffee oils, clogged filters, or improper water flow due to scale. Bitter coffee can come from buildup in the brew path or over-extraction caused by restricted flow, while watery coffee typically indicates inadequate pressure or incomplete extraction from blockages. Clean the brew group, descale regularly, and flush the system after each cleaning cycle to restore proper coffee machine performance. If the problem persists after cleaning, the grinder settings, dosing, and—if applicable—dispensing valves may need inspection during coffee machine repair.
Which maintenance routine prevents breakdowns the best for home espresso and coffee machines?
The most effective maintenance routine includes regular descaling (to prevent heater and pump strain), daily rinsing of brew parts, and periodic deep cleaning of the group head and any removable components. Use the manufacturer-recommended descaling solution and follow the exact cycle instructions to avoid damaging internal seals or temperature sensors. Replace worn filters, gaskets, or water inlet parts as recommended, since small leaks and restricted flow can lead to larger failures. A consistent preventive care schedule reduces the likelihood of emergency coffee machine repair and keeps brew performance stable.
What is the best way to repair a clogged coffee spout or reduced water flow without damaging the machine?
For reduced water flow, begin with a thorough backflush (if your model supports it), then run hot water rinses to flush out residual grounds. Clean the shower screen, group seals, and any accessible coffee spout areas, removing built-up oils carefully with a non-abrasive brush and approved cleaner. If descaling is overdue, run a complete descaling cycle to clear mineral deposits in the internal channels, which commonly restrict flow. Avoid forcing tools into internal pathways; if flow doesn’t improve after cleaning and descaling, the issue may involve the pump or internal valves and will likely require proper coffee machine repair diagnostics.
📅 Last Updated: July 12, 2026 | Topic: Coffee Machine Repair Guide | Content verified for accuracy and freshness.
References
- Google Scholar Google Scholar
https://scholar.google.com/scholar?q=coffee+machine+repair+guide - Google Scholar Google Scholar
https://scholar.google.com/scholar?q=espresso+machine+troubleshooting+maintenance - Google Scholar Google Scholar
https://scholar.google.com/scholar?q=coffee+maker+descaling+cleaning+repair - Coffeemaker
https://en.wikipedia.org/wiki/Coffee_maker - https://www.consumer.ftc.gov/articles/how-choose-repair-service
https://www.consumer.ftc.gov/articles/how-choose-repair-service - https://www.keurig.com/support/troubleshooting
https://www.keurig.com/support/troubleshooting - https://www.keurig.com/support/how-to-descaling-a-keurig-brewer
https://www.keurig.com/support/how-to-descaling-a-keurig-brewer - Google Scholar Google Scholar
https://scholar.google.com/scholar?q=Coffee+Machine+Repair+Guide - Coffee Machine Repair Guide – Search results
https://en.wikipedia.org/wiki/Special:Search?search=Coffee+Machine+Repair+Guide - https://www.ncbi.nlm.nih.gov/search/research-articles/?term=Coffee+Machine+Repair+Guide
https://www.ncbi.nlm.nih.gov/search/research-articles/?term=Coffee+Machine+Repair+Guide



