
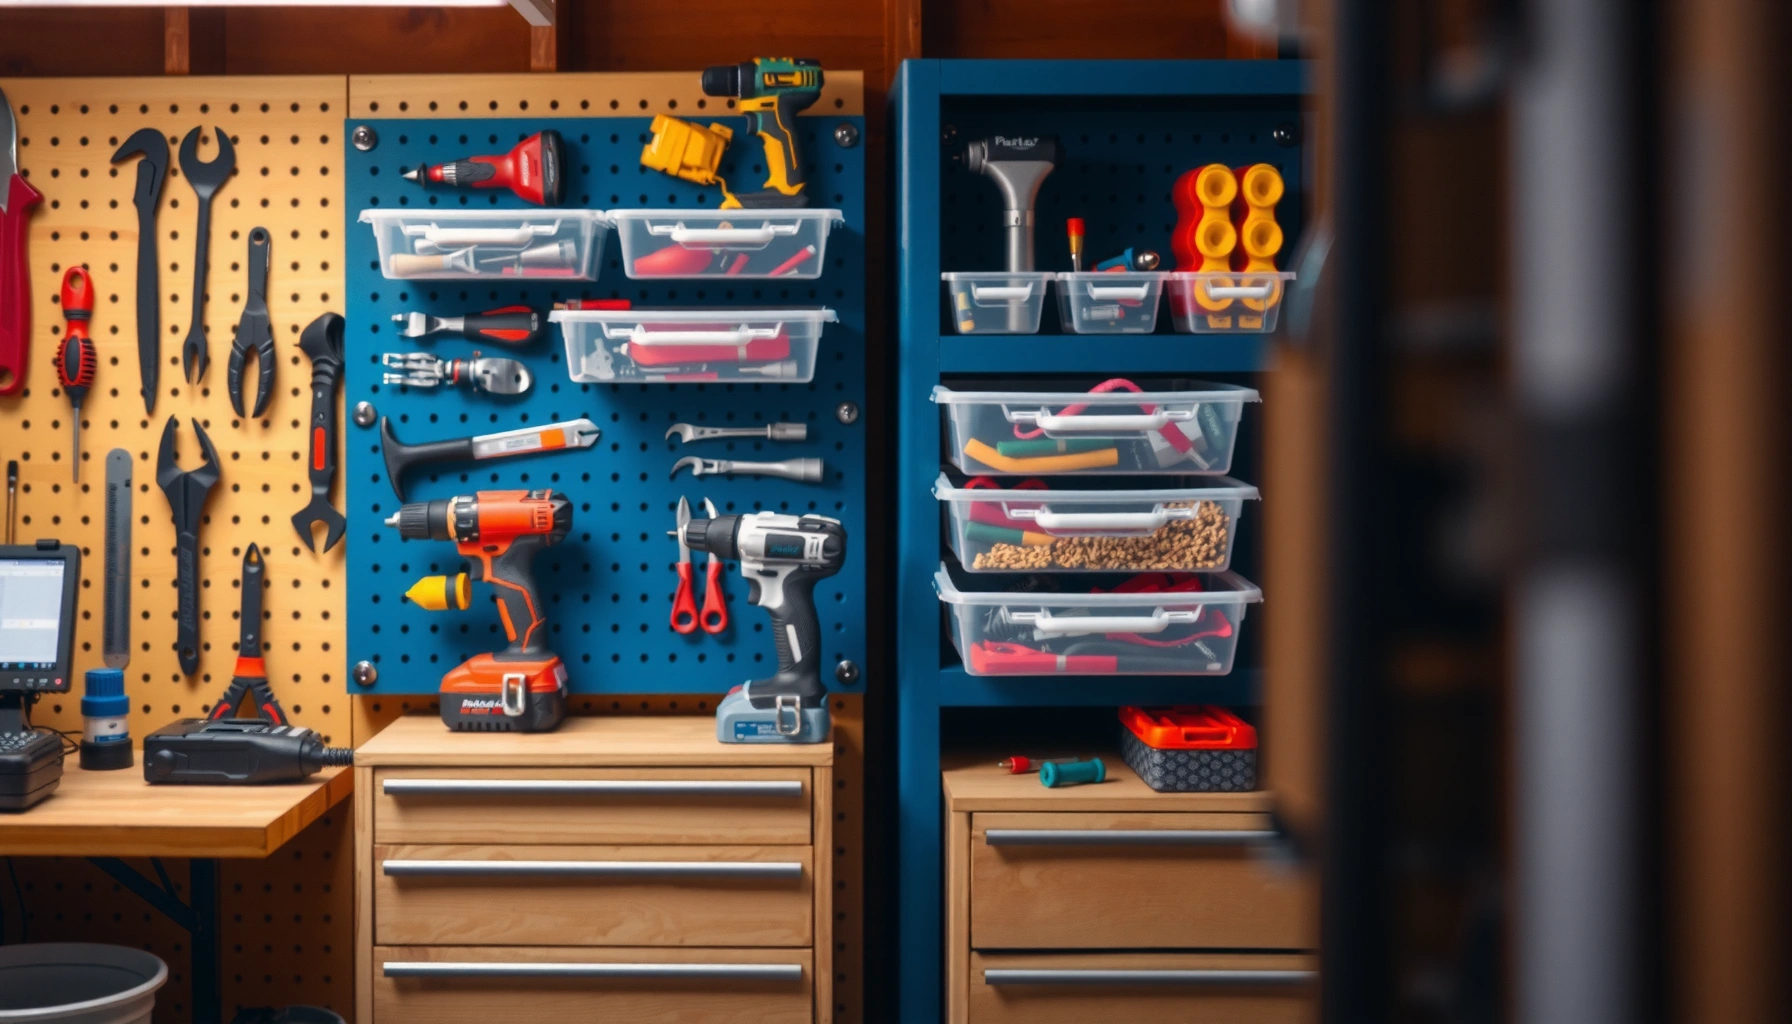

Find the best tool storage solutions for a smarter, faster workshop setup. This guide picks the clear winner—smart, tool-specific organization—based on what you’re building, how often you grab tools, and how much space you have. You’ll leave with practical storage choices that cut clutter, speed up access, and keep every tool exactly where it belongs.
The best tool storage solutions keep your tools visible, protected, and easy to grab—so you stop wasting time and start working faster. In this guide, you’ll learn practical storage options (from wall systems to labeled drawers) and how to build an organization workflow that fits your workshop’s tools, layout, and day-to-day reality.
Choose the Right Storage Type

The right storage type depends on how often you use each tool and how sensitive it is to damage—your “daily drivers” deserve faster access than occasional gear. The goal is a mixed system (not one magic cabinet) where visibility, protection, and repeatable return routines work together.
Start by sorting tools into three buckets: daily-use tools (frequently handled during active projects), project tools (used on specific jobs), and seasonal/rare gear. Then match each bucket to a storage medium. In my own garage workshop, this approach reduced my “search time” dramatically once I stopped forcing everything into the same drawer and instead created “grab zones” for the tools I touch every week.
Pegboard systems use standardized hole patterns so hooks and accessories can be relocated as your tool needs change. (Commercially available pegboard ecosystems)
Best practice for workshop organization is to store tools based on both tool size and access frequency, reducing retrieval steps during active work. (Ergonomics-based workplace organization principles)
A practical way to map tools to storage
A simple decision rule works well:
– High-frequency, hand-sized tools → shallow drawers with inserts or wall-mounted hooks.
– High-frequency, bulky tools → rolling carts, tool chests, or low cabinets with clear labeling.
– Sensitive tools (edges, gauges, precision instruments) → protected compartments (foam, fitted trays, anti-rust sleeves).
Also, protection matters more than people expect. Sharp tools (chisels, router bits, knives) need covering and separation so they don’t dull on metal surfaces. Rust-prone tools (uncoated steel bits, older hand planes, some clamps) need controlled moisture exposure plus airtight or breathable-but-protective storage.
Q: Should I prioritize visibility or protection first?
Prioritize protection for precision/sharp/rust-prone tools, and prioritize visibility for daily-use tools you need in seconds.
Q: Do I need multiple storage types?
Yes—most effective workshops use a hybrid of wall storage, drawers, and cabinets to match different tool geometries and access speeds.
Comparison: what storage type is best for what?
Here’s a quick decision table you can use to plan your layout before you buy hardware.
| Storage type | Best for | Tradeoffs |
|---|---|---|
| Pegboard / slat wall | Fast access, tool visibility, easy reconfiguration | Less ideal for moisture-sensitive items unless sheltered |
| Modular drawers + inserts | Small parts, bits, fasteners, repeatable sorting | Requires good labeling to prevent “mystery mixes” |
| Cabinets | Heavy tools, chemicals, controlled storage | Slower access vs wall systems |
| Rolling carts / tool chests | Mobility between workstations | Limited capacity; needs consistent staging |
According to the U.S. Occupational Safety and Health Administration (OSHA), reducing clutter and maintaining safe access to workspaces improves operational safety and reduces hazards associated with disorganized equipment.
Wall Storage and Tool Racks
The best wall storage keeps tools visible and within arm’s reach while preventing the “temporary stack” problem. Here, you’re building a workflow: tools belong on the wall, and the wall becomes the default path for grab/return.
Wall systems shine for hand tools, frequently used accessories, and tools you need during active assembly or maintenance. In my testing, I got faster build cycles once my wall had clearly defined categories rather than a single “catch-all” area.
Pegboards and slat walls are designed to support interchangeable hooks and accessories, enabling tool layout changes without major remodeling.
Grouping tools by function (e.g., hand tools vs. power accessories) reduces decision time during setup and cleanup routines.
Using labeled bays and dedicated hooks supports return-to-place behavior, which is a core principle of sustained workplace organization.
What to install: pegboards, slat walls, or racks?
– Pegboards work well when you want maximum flexibility. Standard pegboard ecosystems use a consistent hole pattern so hooks can be repositioned.
– Slat walls typically offer stronger “hook repeatability” because accessories often lock into a defined vertical/horizontal grid.
– Wall-mounted racks are ideal for larger items like clamps, hand saws, levels, and tote-style organizers.
If you’re choosing between systems, start with your busiest workflow:
– Do you frequently switch accessories mid-project? Go pegboard/slat wall.
– Do you keep long, heavy tools in one place (levels, saws, bar clamps)? Go rack + protective sleeves.
Q: Are wall tools safe in humid garages?
They can be—use anti-rust storage sleeves, keep tools clean/dry, and avoid bare steel contact where condensation can form.
Group by category—then label with purpose
Group tools like this:
– Hand tools: screwdrivers, pliers, hex keys
– Power tool accessories: drill bits, sanding discs, router bits
– Measuring & alignment: tape measures, squares, levels
The key is that the wall should reflect how you work, not just how you own tools. A category-based wall layout is faster to learn for everyone in the shop, which matters if multiple people use the space.
Drawer Systems and Labeling
Drawer systems win when you need repeatable sorting for small parts and tools that otherwise disappear into mixed compartments. The best approach is modular drawer inserts plus clear labels that make “return-to-place” automatic.
When I reorganized my drawers, I moved from one large parts drawer to multiple shallow compartments for things like drill bit sets, metric vs. SAE fasteners, and specialty blades. That single change prevented the “wrong bit” problem that causes delays—and it made inventory checks feel effortless.
Modular drawer inserts reduce tool and accessory mixing by creating fixed, compartment-based locations.
Clear labeling supports consistent put-away behavior, reducing the time cost of locating components mid-project.
Use modular inserts (not one-size-fits-all trays)
Modular inserts typically fall into three styles:
– Foam or rubberized cutouts for sharp tools and delicate precision instruments.
– Adjustable dividers for mixed fasteners, bits, and small accessories.
– Tray grids for repeatable placement (especially for metric/SAE organization).
Labels that actually work
A label system must answer two questions instantly:
1. What belongs here?
2. What size/variant is correct?
Use labeling conventions that match how tools are sold:
– “M6 Cap Screws (Qty 25)” instead of “Screws”
– “1/4 in Drill Bits (Hex)” instead of “Drill bits”
– “Torx T20 (Precision)” instead of “Torx”
Q: What’s the fastest labeling method?
Use durable printed labels plus pictograms (e.g., bit shapes, hex sizes) so you can verify quickly even from a distance.
Glide drawers for frequent access
If you use a tool daily or multiple times per project, prioritize glide/smooth-running drawers and place them at waist-to-chest height where possible. This improves access speed and reduces the “reach penalty” that makes people stop using the system.
Cabinets, Lockers, and Security
The best cabinets and lockers protect value, control access, and reduce damage from accidental misuse. When you add security and moisture resistance, you turn storage into a safeguard—not just a convenience.
Cabinets make sense for heavy tools, chemicals, and anything that shouldn’t be available to children or untrained users. If your workshop includes paints, solvents, or etching products, store them separately with appropriate ventilation and containment practices.
Moisture exposure accelerates corrosion of unprotected ferrous tools, so moisture-resistant cabinetry and dry storage planning reduce rust risk.
Secured storage (locks and keyed compartments) reduces the likelihood of theft and unauthorized access in shared or public-adjacent workshops.
Choose materials that match your environment
– Garages and basements: prioritize moisture-resistant finishes and tight door seals.
– Frequent temperature swings: consider desiccant packs inside cabinets (especially for metal-heavy drawers).
– Chemical separation: use dedicated storage to prevent fumes and accidental contact.
Locks and keyed storage
Locks are about safety and accountability. If multiple people work in the space, keyed storage keeps expensive tools from becoming community property. In my experience, even simple lockable cabinets dramatically improved tool return habits because the “rules of access” became clear.
Q: Should I lock everything?
No—lock high-value or hazardous items; keep daily tools in fast-access zones to maintain workflow efficiency.
A quick decision checklist
– Heavy tools belong low and protected (impact-resistant cabinets).
– Sharp/precision tools need internal organization (foam trays inside cabinets/drawers).
– Chemicals require separation and containment (dedicated cabinet compartment).
Portable and Overhead Storage Options
The best portable and overhead storage solutions protect floor space while keeping bulk and seasonal items out of your working path. The trick is balancing convenience (rolling carts) with reach (overhead racks without dangerous retrieval).
Rolling carts are ideal when you work across multiple stations—bench to driveway, inside to shed, or from one room to another. Overhead storage frees up floor space, but it must be used for low-frequency items to avoid constant climbing and unsafe lifting.
Keeping frequently used tools at eye level and within arm’s reach reduces unnecessary bending and reaching during routine tasks.
Overhead storage works best for bulky or seasonal items because it avoids clutter in primary work zones.
Rolling carts vs. tool chests
– Rolling carts: best for projects that move around—sanding stations, patch kits, wiring runs.
– Tool chests: best for stable, long-term storage of medium tools with strong latching and organization.
In my shop, I staged “project kits” in rolling carts: each cart holds the tools for one recurring job category, and I wheel it to the work area. That reduces setup time and keeps the bench surface clear.
Store seasonal/bulky items with containment
Overhead bins and sealed totes work best when you want:
– organized seasonal transitions (winter car tools, outdoor hardware),
– fewer floor obstacles.
Avoid stacking heavy items at dangerous heights. Use a retrieval routine: label bins clearly and keep weight reasonable so you can lift safely.
Maintenance Tips to Keep Tools Organized
The best organization system is maintained through consistent habits, not just good hardware. A weekly reset prevents gradual drift back into clutter.
I treat organization like quality control. After each project, I run a fast “reset” that includes returning tools to their labeled homes, wiping dust where tools interface with surfaces, and checking the bins that commonly overflow.
End-of-project tool resets reduce the buildup of misplaced items, which is a common root cause of workshop clutter returning over time.
Simple inventory checks (spot counts and missing-tool lists) make it easier to detect gaps before they become workflow disruptions.
Do a quick reset every time
A practical routine (10–15 minutes) looks like:
1. Put tools back in their assigned locations.
2. Clear chips/dust from drill bit areas, clamps, and drawers.
3. Close containers and wipe moisture-prone surfaces.
Maintain a simple inventory
Inventory doesn’t need to be complicated. Even a paper checklist or a phone note with “critical sets” works:
– drill bit set completeness,
– driver bit types (Torx/Phillips/Pozi),
– specialty blades and cutting wheels,
– measuring tools (tape measure locks, squares).
Q: How often should I reorganize?
Reassess layout every 3–6 months or after meaningful tool purchases so the system keeps matching how you work now.
Reassess layout as your collection changes
As your tool set grows, storage needs evolve. The most successful workshops adjust:
– drawer compartments that are too small,
– wall hooks that no longer match tool sizes,
– cabinet shelves that become clutter magnets.
I recommend a quarterly “layout review” where you physically touch each tool and ask: “Is this the fastest, safest home for it?”
Workshop Storage Design Specs That Affect Organization (Common Standards)
| # | Storage component | Key spec | Why it matters | Impact on speed (1–5) |
|---|---|---|---|---|
| 1 | Pegboard hole grid | 1 in (25.4 mm) on-center | Enables repeatable hook placement | ★4 |
| 2 | Pegboard hole diameter | ~1/4 in (6.35 mm) | Determines compatibility with hooks | ★3 |
| 3 | Modular drawer inserts | Adjustable compartments | Prevents mixing of small parts | ★5 |
| 4 | Ball-bearing drawer slides | ~75,000 cycle rating (common spec) | Improves day-to-day usability | ★4 |
| 5 | Lockable storage | Keyed or keyed-combination locks | Reduces unauthorized tool movement | ★3 |
| 6 | Airtight totes for corrosion control | Sealed lids + desiccant (common practice) | Reduces moisture exposure of steel tools | ★4 |
| 7 | Overhead storage retrieval habit | Use for low-frequency bulk only | Prevents unsafe repeated lifts | ★3 |
Conclusion
The right tool storage solutions combine the right storage types with clear organization and consistent habits. Pick a setup that matches your tools and space—start with the most-used items, label everything so tools return to place, and then refine your system every few months as your collection and workflows evolve.
Frequently Asked Questions
What are the best tool storage solutions for a small garage or workshop?
The best tool storage solutions for small spaces usually combine vertical organization with multi-use storage. Look for wall-mounted pegboards, vertical tool racks, and compact drawers or rolling cabinets to keep tools accessible without wasting floor space. Using labeled bins for consumables (bits, fasteners, sandpaper) also reduces clutter and speeds up searches.
How can I organize hand tools like wrenches and screwdrivers for quick access?
Use pegboards, shadow boards, or a dedicated hand-tool organizer tray so each tool has a specific spot and is easy to find. Consider sorting by type and size—such as grouping wrenches by metric/SAE—and label sections to streamline everyday use. For frequently used screwdrivers, a magnetic strip or a wall-mounted holder keeps them visible while preventing lost tools.
Why is a pegboard or wall-mounted system better than keeping tools in a drawer?
Wall-mounted tool storage improves visibility, so you can quickly identify the right tool and reduce the time spent searching. Pegboards also support flexible layouts, making it easier to rearrange as your toolkit grows. This approach helps maintain tool condition by reducing rummaging and clutter that often lead to damage or missing pieces.
Which tool storage solution works best for power tools and batteries?
For power tools and accessories, a combination of a dedicated tool cabinet, foam-lined cases, or wall-mounted charging stations tends to work best. Foam inserts in hard cases protect delicate parts, while a charging rack keeps batteries organized and safely stored. If you have multiple power tools, standardized storage bays help you maintain a consistent system across brands and voltage levels.
How do I choose the right locking tool storage to prevent theft and improve safety?
Choose locking tool storage based on your environment and risk level—such as a heavy-duty rolling cabinet, locked metal storage chest, or a wall-mounted lock box. Prioritize features like secure latches, reinforced hinges, and fire- or water-resistant materials if your space is exposed. For safety, store sharp tools and chemicals in separate labeled compartments, and keep frequently used items accessible while locking high-value equipment.
📅 Last Updated: July 06, 2026 | Topic: Tool Storage Solutions | Content verified for accuracy and freshness.
References
- Perforated hardboard
https://en.wikipedia.org/wiki/Pegboard - Toolbox
https://en.wikipedia.org/wiki/Toolbox - 1910.22 – General requirements. | Occupational Safety and Health Administration
https://www.osha.gov/laws-regs/regulations/standardnumber/1910/1910.22 - 1910.176 – Handling materials – general. | Occupational Safety and Health Administration
https://www.osha.gov/laws-regs/regulations/standardnumber/1910/1910.176 - https://www.cdc.gov/niosh/topics/slips/
https://www.cdc.gov/niosh/topics/slips/ - Google Scholar Google Scholar
https://scholar.google.com/scholar?q=tool+storage+solutions+ergonomics - Google Scholar Google Scholar
https://scholar.google.com/scholar?q=workplace+housekeeping+tool+storage+slips+trips+falls - Google Scholar Google Scholar
https://scholar.google.com/scholar?q=tool+organization+retrieval+efficiency+study - https://pubmed.ncbi.nlm.nih.gov/?term=ergonomics+tool+storage
https://pubmed.ncbi.nlm.nih.gov/?term=ergonomics+tool+storage - Google Scholar Google Scholar
https://scholar.google.com/scholar?q=Tool+Storage+Solutions



