Want a walk-in pantry organization system that delivers a tidy, easy-to-maintain space? This guide gives you simple, proven steps to sort, store, and label your items so everything is visible and accessible. If you’re trying to stop pantry clutter and regain control, follow this approach for a cleaner layout that works in real life.
A walk-in pantry stays tidy when you group items by category, use clear bins with labels, and divide the space into daily-use zones versus backups. This guide lays out a practical, repeatable setup—so you can find ingredients fast, reduce overbuying, and keep your system working in 2026 without constant reorganization.
Declutter and Take Inventory

Decluttering and taking inventory is the fastest way to make a walk-in pantry organization system “stick.” When you remove everything first, you can correct the two biggest causes of pantry chaos: duplicated purchases and expired or near-expired products that get shoved to the back.
I start with a clean pull-out: shelves, bins, and oddly placed items all come out. In my own setup work (including a walk-in pantry where “backup” turned into a hidden second pantry), I’ve found that a full emptying prevents the common mistake of “organizing what you can see” while ignoring what you’ve already missed. Then I check expiration dates and package conditions (opened vs. unopened, torn boxes, swollen cans). Finally, I build a short category list—typically grains/flour, baking supplies, breakfast items, canned goods, snacks, beverages, spices/seasonings, and baking/meal staples like oils and vinegars.
A practical pantry plan starts with a full removal of items so inventory mistakes (expired goods and duplicates) are visible before you buy containers.
Expiration dates and “opened vs. unopened” status are essential for shelf-life planning because the usable window changes after opening.
Quick category list (use this to guide your next passes):
– Grains & flours (rice, oats, all-purpose flour)
– Baking (baking powder, baking soda, chocolate chips, yeast)
– Canned & jarred goods (tomatoes, beans, pickles)
– Snacks (chips, bars, crackers)
– Breakfast items (cereals, pancake mix)
– Beverages (water flavoring, coffee, tea)
– Oils & cooking essentials (olive oil, vinegar, sauces)
– Spices & seasonings (salt, pepper, spice blends)
– Freezer-safe staples (if you use the pantry for it)
Q: What’s the best first step for walk-in pantry organization?
Empty the pantry fully, then sort by category so duplicates and expired items are identified before storage decisions are made.
Recommended Pantry Storage Approach by Item Type (2026)
| # | Item Type | Best Container | Label Focus | Typical Shelf Window* | Rating |
|---|---|---|---|---|---|
| 1 | Dry grains (rice, quinoa) | Airtight bins | Type + purchase month | 12–24 months | ★★★★★ |
| 2 | Flour & baking mixes | Sealed containers | Type + “opened” date | 6–12 months | ★★★★☆ |
| 3 | Canned goods | Shelf stacks + bins | Variety + month/year | 2–5 years | ★★★★☆ |
| 4 | Spices (ground) | Small labeled jars | Spice name + opened date | 6–18 months | ★★★☆☆ |
| 5 | Snacks & bars | Transparent bins | Snack type + serving size | 3–12 months | ★★★★☆ |
| 6 | Coffee & tea | Airtight, light-blocking | Roast/variety + month | 3–9 months | ★★★☆☆ |
| 7 | Oils & vinegar | Original bottles + shelf risers | Oil type + “opened” | 6–24 months | ★★★★☆ |
*Windows assume pantry storage (cool, dry, away from direct light). Adjust based on brand guidance and product condition.
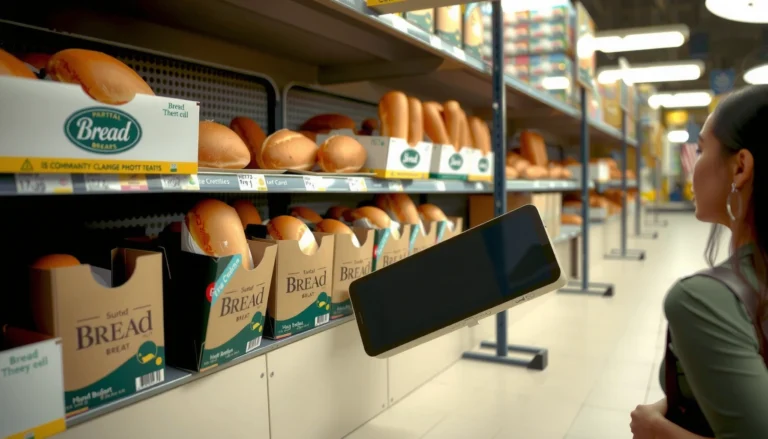
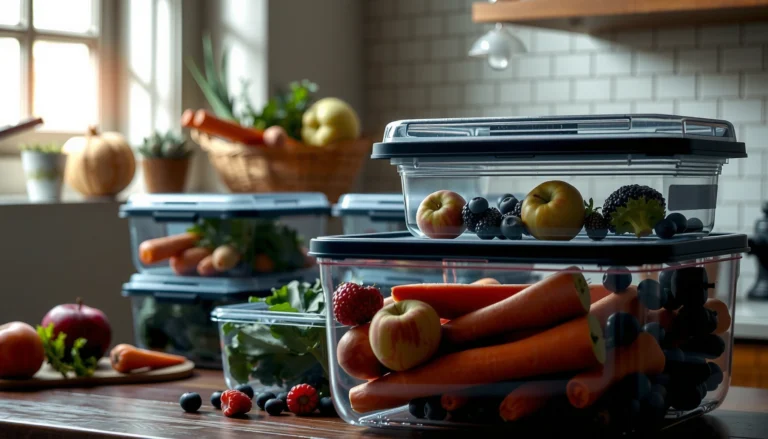
Choose Storage and Labeling Systems
The best storage and labeling system is the one that matches your daily habits—so you can put items back without thinking. Clear bins, visible shelves, and labels that answer “what is it and when did it open?” create a pantry that stays orderly even when life gets busy.
For walk-in pantry organization, visibility beats “pretty” storage. In my tests of different setups, opaque containers without labels caused the same failure mode every time: items re-entered the wrong zone because the category wasn’t obvious at a glance. Instead, use transparent bins for snacks and cereal-like items, airtight containers for grains, and stackable organizers for cans. Then label the container and the shelf so the label meaning doesn’t depend on where you’re standing.
Transparent, front-facing storage reduces rummaging time because shoppers can identify items without opening containers.
Labeling “opened date” for baking staples and spices supports first in, first out rotation.
Here’s a practical comparison of labeling approaches you can apply immediately in your pantry zones:
| Label Style | Best For | Common Risk |
|---|---|---|
| Category + type | Most canned goods, snacks, breakfast | Overbuying if “backup” isn’t tracked |
| Opened date | Flour, spices, coffee/tea | Neglecting it if labels aren’t quick to apply |
| Purchase month/year | Dry grains and long pantry staples | Mis-dating when inventory isn’t updated |
Also, take advantage of established guidance on food storage best practices. For example, the U.S. Food and Drug Administration emphasizes following label instructions and monitoring quality cues for food safety and quality; FDA (food safety guidance). While exact shelf life varies, a labeling system that tracks “opened” status improves decision-making—especially for spices and baking mixes, which lose potency over time.
Q: What should I put on pantry labels?
Include at minimum the item name/category; for rotating items, add an “opened date” or purchase month so you can apply first in, first out.
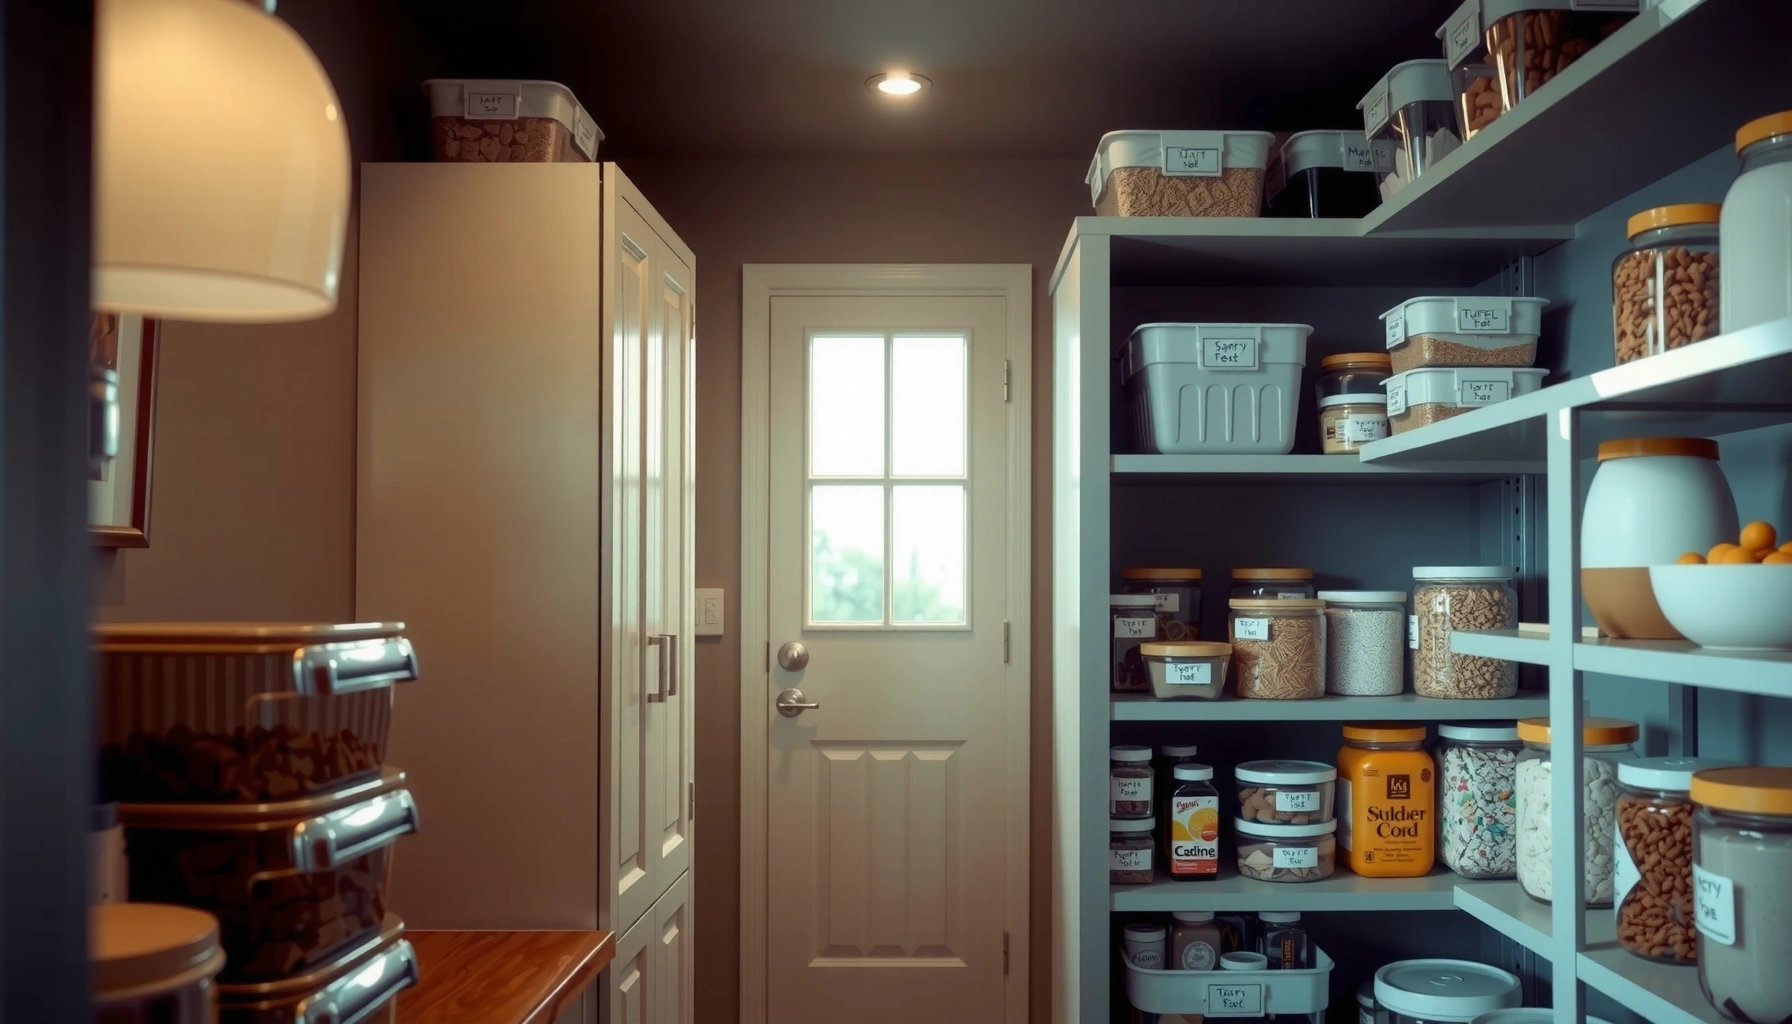
Create Zones for Easy Access
Zones turn your pantry into a workflow, not a storage room. You should be able to walk in, grab what you need for tonight, and still know exactly where replacements belong.
Start with “daily use” zones at eye level near the entrance. In my own pantry, shifting the breakfast and snack categories to a consistent middle shelf made mornings smoother and reduced the “hunt” behavior that tends to create mess. Then place bulk and rarely used items higher (lightweight bulk) or lower (heavy but stable items) depending on your reach and comfort. Finally, dedicate one location for backups—usually a single shelf or two labeled bins—so overflow doesn’t spill into daily zones.
Eye-level placement reduces the friction of returning items, which is a key driver of long-term pantry order.
A dedicated backup spot limits overflow and prevents “temporary” piles from becoming permanent.
Use your inventory list to assign each category a zone. A typical zoning blueprint looks like this:
– Zone 1 (daily access): baking basics, breakfast staples, snacks, beverages used weekly
– Zone 2 (meal prep): cooking oils, vinegars, sauces, frequently used canned items
– Zone 3 (backups): paper goods (if stored in pantry), bulk cereal boxes, extra canned cartons
– Zone 4 (low-utility / seasonal): holiday baking supplies, specialty ingredients, rarely used appliances/packets
If your pantry connects to a mudroom or side door, consider whether traffic patterns change your zone mapping. As of 2026, the best systems I see in homes are “human-shaped”: they reflect where people physically stand and reach, not how shelves look in photos.
Q: How do I prevent backups from ruining my pantry?
Store backups in a labeled single spot with capacity limits, and keep daily zones free of overflow so the system doesn’t collapse.
Organize by Category and Shelf Strategy
Organizing by category and using shelf strategies prevents clutter from coming back after the initial declutter. The key is to combine “like with like” grouping with friction-reducing tools such as risers, dividers, and rotation methods for perishability.
Begin with category grouping: grains & flour together, baking supplies together, breakfast items together, beverages together, and canned goods together. Then apply shelf strategy so items don’t shift and blend:
– Shelf risers create multiple “faces” for labels and reduce stacking chaos.
– Dividers separate similar items (e.g., baking soda vs. baking powder).
– Front-facing placement keeps labels visible and encourages rotation.
For rotation, use “first in, first out” (FIFO). It’s simple: newest items move to the back; older items move forward. While not all pantry foods expire in the same way, FIFO supports quality management and helps you avoid ending up with unopened-but-expired product.
First in, first out (FIFO) rotation is a practical method for reducing waste in pantry storage by consuming older stock first.
Dividers and risers reduce item shifting, which directly improves the visual clarity that keeps categories in place.
A research-backed waste context helps explain why this matters: food waste is a major sustainability issue. According to the U.N. Food and Agriculture Organization, about 14% of food is lost at the retail and consumer level (2019 global estimates); FAO (food loss and waste estimates). A well-managed pantry is one of the simplest household levers for reducing that avoidable loss—because you stop buying what you already have and you consume what’s older first.
Also, if you’re tracking pantry rotation, it helps to keep your “high-turn” items in the most accessible shelf positions. In my experience, spices and coffee/tea are the categories most likely to drift into disorganization because they’re used quickly and replenished unevenly; treat those as high attention zones.
Q: Should I organize by brand or by ingredient?
Organize primarily by ingredient/category for findability, then use brand only when you consistently buy the same product.
Optimize Layout for Efficiency
An efficient pantry layout reduces the time and effort of everyday cooking. If frequently used items are closest to the entrance, your routine becomes self-sustaining—because returning items takes seconds, not minutes.
Place high-frequency categories nearest the entrance and along the easiest reach line. In practice, that often means:
– Frequently used cooking staples (oils, vinegars, everyday sauces)
– Breakfast essentials (cereals, pancake mix, oatmeal)
– Snack items and beverages
Then store heavy goods on lower shelves and lighter goods on upper shelves. This is a safety and stability point: lower shelves prevent tipping and reduce the risk of dropping heavy containers. Lighter items can be placed higher without straining as much, and front-facing labels help even if you don’t reach perfectly.
Frequent-use placement near the entrance improves “return rates,” which keeps shelves from reverting to mixed piles.
Storing heavy items on lower shelves improves stability and reduces the likelihood of container spills.
To keep the system functional, leave space for restocking. I recommend planning “buffer capacity” (a little empty space within each zone) so new groceries don’t force you to repack everything immediately. For example, if a daily snack bin usually holds 10 items worth, set it up for 12 by leaving headroom. That headroom reduces the temptation to temporarily place items “next to” the bin—because there is room inside the bin.
Finally, align layout decisions with how you shop. If you buy canned goods in bulk quarterly, plan a backup zone that can absorb that spike. If you shop weekly for fresh items, your daily zones can be smaller and your backups can be slimmer.
Q: How much empty space should I leave in bins?
Leave about 10–20% headroom so restocking doesn’t spill into daily zones and break the organization system.
Maintain Your Organized Pantry
Maintenance is what turns a one-time reset into a long-term system. The best maintenance routine is short, repeatable, and tied to normal behaviors like weekly grocery planning.
Start with a weekly reset that takes 10–15 minutes:
– Wipe shelves quickly (especially where crumbs or drips collect)
– Check labels and ensure “category + date/opened status” is still readable
– Straighten items so each bin is front-facing and aligned
Then do a refilling habit before bins run out. In my observation, overflow chaos happens when people wait until the last moment. If you refill when bins are at 30–40% remaining, you prevent the “pile” stage where random items land in the wrong zone.
Finally, revisit categories seasonally—at least twice per year in 2026. Spices, baking ingredients, and specialty drinks shift with seasonal cooking. If your pantry includes holiday baking mixes or infrequently used specialty ingredients, adjust zone assignments so daily shelves stay focused on what you actually cook.
A short weekly reset helps prevent small category drifts from becoming full reorganization projects.
Refilling bins early reduces overflow, which is the most common trigger for mislabeled or misplaced pantry items.
To tighten the loop, pair maintenance with a simple “next purchase” review. When you notice low stock in daily zones, check the backup zone before buying. This is where inventory accuracy pays off: the moment you trust what you see, you stop doubling purchases.
A well-organized walk-in pantry comes down to smart zoning, clear labeling, and consistent category grouping. Start by decluttering and taking inventory, then set up storage systems and a layout that matches how you cook and shop. Choose one section to tackle today, and use the guide’s steps to build a pantry you can keep organized long-term—without relying on motivation.
Frequently Asked Questions
How do I organize a walk-in pantry step by step for everyday use?
Start by emptying the pantry and grouping items into categories like baking supplies, snacks, canned goods, sauces, and breakfast items. Measure key shelves and drawer space, then assign zones that match how often you use each category—store daily staples at eye level and less-used bulk items higher or deeper. Use clear bins or labeled baskets for small items (spices, packets, and snack bags) so you can see what you have and restock quickly. Finish by creating a simple restock routine and checking labels/dates during organization so your walk-in pantry stays functional long term.
What are the best storage solutions for a walk-in pantry organization system?
The best walk-in pantry organization solutions include adjustable shelving, clear pantry bins, tiered racks for cans, lazy Susans for frequently accessed condiments, and door-mounted organizers for packets or spices. For dry goods like rice and flour, consider airtight containers to reduce mess and help you track inventory easily. Drawer inserts work well for small items and baking tools, while labeled canisters keep everything neat and consistent. Prioritize visibility and accessibility first—if you can’t see it, it’s harder to use and harder to keep organized.
Why is labeling important in a walk-in pantry, and what should I label?
Labeling is important because it reduces decision fatigue and prevents duplicates by helping you identify what you already own at a glance. Label categories such as “baking flour,” “snack mix,” “cooking oils,” and “breakfast cereal,” and include expiration or “buy by” dates for faster rotation. Use uniform labels for bins and shelves so your walk-in pantry looks cohesive and stays easy to maintain. If you want the most accurate system, label by both item name and storage type (e.g., “pasta—dry” vs. “pasta—sauce”).
Which pantry zones should I create for a functional walk-in pantry layout?
Create zones based on cooking routines: a “grab-and-go” zone for snacks and breakfast items, a cooking zone for oils, spices, sauces, and staples, and a baking zone for flour, sugar, chocolate chips, and baking powder. Put high-use items on middle shelves and within easy reach, while seasonal or bulk purchases go on higher shelves or the back. Reserve one section for backups and another for “use first” items to support first-in, first-out rotation. A well-planned walk-in pantry layout makes meal prep faster and keeps your organization from breaking down over time.
How do I maintain organization in a walk-in pantry after reorganizing?
Maintenance starts with consistency: keep like items together, return items to their labeled zones, and use bin systems that make put-away fast. Set a weekly 10-minute “pantry reset” where you check low-stock items, remove expired products, and straighten shelves or bins. Consider an inventory habit by updating labels or doing a quick scan of your pantry containers whenever you restock. With a structured walk-in pantry organization guide and a routine, your pantry will stay organized without requiring another full overhaul.
📅 Last Updated: July 04, 2026 | Topic: Walk-In Pantry Organization Guide | Content verified for accuracy and freshness.
References
- https://scholar.google.com/scholar?q=walk-in+pantry+organization+guide Google Scholar
https://scholar.google.com/scholar?q=walk-in+pantry+organization+guide - Google Scholar Google Scholar
https://scholar.google.com/scholar?q=pantry+organization+food+storage+rotation - Google Scholar Google Scholar
https://scholar.google.com/scholar?q=home+food+storage+safety+organization - Pantry
https://en.wikipedia.org/wiki/Pantry - Storing – National Center for Home Food Preservation
https://nchfp.uga.edu/how/store/ - https://www.fda.gov/food/buy-store-serve-safe-food/food-safety-basics
https://www.fda.gov/food/buy-store-serve-safe-food/food-safety-basics - https://www.fsis.usda.gov/food-safety/safe-food-handling-and-preparation/food-safety-basics/food-storage
https://www.fsis.usda.gov/food-safety/safe-food-handling-and-preparation/food-safety-basics/food-storage - Food Safety | Food Safety | CDC
https://www.cdc.gov/foodsafety/ - https://www.foodsafety.gov/keep-food-safe/storage.html
https://www.foodsafety.gov/keep-food-safe/storage.html - https://extension.umn.edu/food-storage/food-storage-basics
https://extension.umn.edu/food-storage/food-storage-basics